Start-Up/Operation
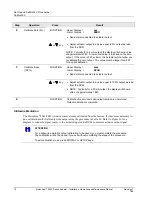
Position Sensor Operation
Revision 7
HercuLine™ 2000 Series Actuator - Installation, Operation and Maintenance Manual
85
7/08
Position Sensor Operation
On HercuLine
®
2000 and HercuLine
®
2001 the potentiometer position sensor is a sealed film pot that is directly
coupled to the output shaft. On HercuLine
®
2002 the non-contact sensor (NCS) is inductively coupled to the
output shaft of the actuator so that the sensor detects shaft position. The sensor is adjusted at the factory and
under normal conditions and requires no adjustment. A simple check can verify that the sensor working
properly and that it is in adjustment. Verification of the output is performed by setting the drive motor to its
zero, midpoint and 100% positions and observing the output voltage of the sensor. The actuator has a feature
that the sensor output voltage can be read from the local display.
Step
Action
1
Drive the motor to 50% position.
2
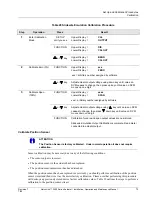
Press SET UP key on the keyboard until the display reads CAL POSOUT.
Press FUNCTION key until the display reads DIS CALPOS.
Press the
or
keys until the display reads BEGN CALPOS.
Press the FUNCTION key.
Upper
Display
=
n.nnn
(Output voltage of the sensor)
Lower Display
=
POSOUT
3
The display should read 2.500 +/– 0.012 Volts for both 90° and 150° operation.
4
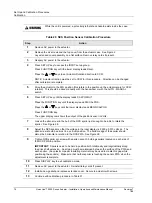
Press DISPLAY key and then drive the motor to zero position. Repeat Step 2.
The display should read 1.600 +/– 0.060 Volts for 90° operation; 1.000 +/- 0.060 volts for 150°
operation.
5
Press DISPLAY key and then drive the motor to 100% position. Repeat Step 2.
The display should read 3.400 +/– 0.060 Volts for 90° operation; 4.000 +/- 0.060 volts for 150°
operation.
6
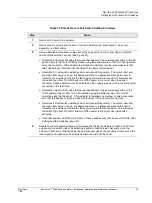
If the sensor needs adjustment, refer to the “Calibrate Non-Contact Sensor” procedure in Table
29 (page 74).
Remote Setpoint Operation
The HercuLine
®
2001/2002 actuator can be set up to receive a digital input from a remote source. The actuator
uses RS485 communications that supports digital Modbus RTU protocol. Press the SET UP key to select the
Input set up group. Change the Input Type to Remote Setpoint (R_SP). Make the necessary connections to
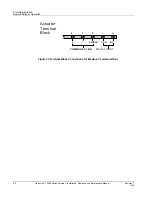
terminals 6, 7, 8 on the actuator terminal block. See Figure 33. Communicaton parameters should be set to the
same values as the host device. The actuator communication parameters are accessed in the Communications
Set Up group.
There are some restrictions to actuator operation when remote setpoint input is active. In order to provide a
bumpless transfer when switching from one input signal type to remote setpoint, the actuator will use the last
known analog input value as its setpoint when switching to remote setpoint input operation. No input filtering
is active on the input signal to the actuator.


