Rev 3.01
21
Document 900.0399
08/08
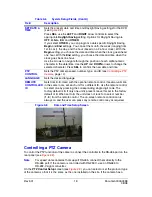
Figure 3-10
Network Setup Screen
Follow
Table 3-8
to set your system network parameters.
Ports
Note
The default port for remote live view and playback on your DVR is 5445. To
remotely configure a DVR with the default port selected, you must also open
port 5455. If you change the default port number, the port you must open for
remote configuration is your new port number plus 10 (for example,
5455=5445+10).
When you connect one or more DVRs to a network through an IP sharing device, each
device must have a unique RTSP port number for remote access to each unit from outside
the LAN (Local Area Network). Also, the IP sharing device must be configured for port
Table 3-8
Network Setup Fields
Field
Description
PORT
Press SEL to enter the port number (see
Ports
below).
REMOTE ACCESS
Enables/disables remote access (through RAS).
BANDWIDTH
SAVING
Enables/disables key frame transmission only. This feature is
useful when your network bandwidth is not enough for live video
streaming.
NETWORK TYPE
Sets the type of network connection. Options are:
LAN, DHCP, ADSL
Note
Other parts of the Network Setup screen change
depending on what network type you select (see
Network
Types
, page
22
).
DDNS
Enables/disables the DDNS server.
DDNS SERVER
NAME
Enters or edits the DDNS server name.
Note
This option only appears if DDNS is enabled.
SEND E-MAIL
Sets up sending e-mail reports. This menu item takes you to the
Send E-mail setup screen. Enter the appropriate e-mail address
and server information to enable sending e-mail reports. See
Setup
for Sending E-Mail Alerts and Reports
, page
23
, for more
information.


