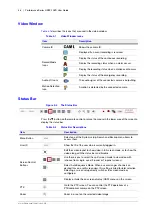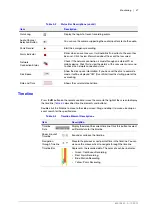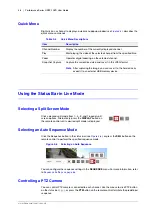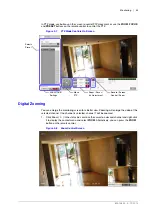
800-15802 - A - 12/2013
Installation | 39
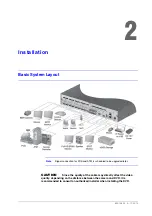
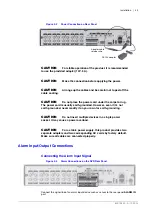
Figure 2-6
Network Connection Overview
1.
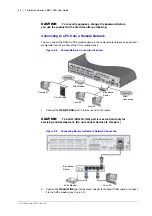
Connect the
WAN(UPLINK)
port in the rear panel to the router or hub (see
).
CAUTION
The LAN (DOWN LINK) port is provided only for
connecting to the dedicated backup network device. (Do not connect
devices to this port.)
2.
Connect the local PC to the router or hub (see
).
Figure 2-7
Connecting Router or Hub to the DVR
3.
Enter the address in the Web browser of your PC in the format of:
http://IP address:Web
service port
(for example:
http://192.168.0.23:8080
). The web service port is set
to 8080 by default. From the Network Setup screen, you can change the port number.
4.
Provide the ID and password before logging in. Then, you can view the monitoring screen.
Access ID (factory default):
ADMIN
Password:
1234
Camera
Local PC
Local PC
Broadband
router or hub
Local PC
Local PC
Broadband
router or hub
Summary of Contents for HREP216
Page 2: ......
Page 3: ...User Guide ...
Page 4: ...Revisions Issue Date Revisions A 09 2013 New document prepared for product launch ...
Page 10: ...10 Performance Series HREP2 DVR User Guide www honeywell com security ...
Page 16: ...16 Performance Series HREP2 DVR User Guide www honeywell com security ...
Page 22: ...22 Performance Series HREP2 DVR User Guide www honeywell com security ...
Page 24: ...24 Performance Series HREP2 DVR User Guide www honeywell com security ...
Page 32: ...32 Performance Series HREP2 DVR User Guide www honeywell com security ...
Page 42: ...42 Performance Series HREP2 DVR User Guide www honeywell com security ...
Page 122: ...122 Performance Series HREP2 DVR User Guide www honeywell com security ...
Page 128: ...128 Performance Series HREP2 DVR User Guide www honeywell com security ...
Page 168: ...168 Performance Series HREP2 DVR User Guide www honeywell com security ...
Page 190: ...190 Performance Series HREP2 DVR User Guide www honeywell com security ...
Page 194: ...194 Performance Series HREP2 DVR User Guide www honeywell com security ...
Page 199: ......

