


800-13897 - A - 01/2013
Alarm Settings | 71
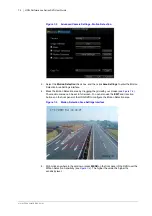
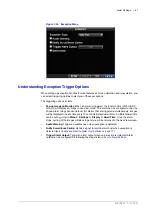
Figure 7-4
Motion Detection Sensitivity Settings
6. Click
OK
to return to the Motion Detection Area Settings interface.
7. Right-click anywhere in the window, and then click
Exit
to return to the Advanced Camera
Settings menu.
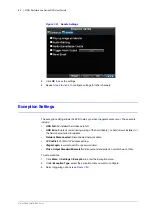
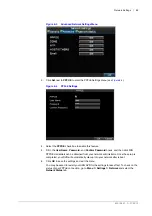
8. Click
Handle
to enter the Exception Handle menu (see
Figure 7-5
Exception Handle Menu
9. Select cameras to trigger for recording when motion is detected by selecting the check
boxes under the desired cameras.
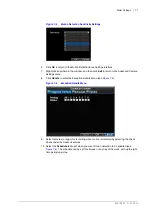
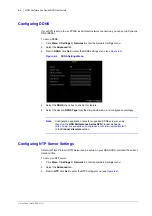
10. Select the
Schedule
tab to set when you want motion detection to be enabled (see
). The schedule can be set for all week or any day of the week, with up to eight
time periods per day.
Summary of Contents for HRG161X
Page 2: ......
Page 3: ...User Guide ...
Page 4: ...Revisions Issue Date Revisions A 01 2013 New document ...
Page 8: ...8 HRG Performance Series DVR User Guide www honeywellvideo com ...
Page 12: ...12 HRG Performance Series DVR User Guide www honeywellvideo com ...
Page 16: ...16 HRG Performance Series DVR User Guide www honeywellvideo com ...
Page 18: ...18 HRG Performance Series DVR User Guide www honeywellvideo com ...
Page 22: ...22 HRG Performance Series DVR User Guide www honeywellvideo com ...
Page 34: ...34 HRG Performance Series DVR User Guide www honeywellvideo com ...
Page 48: ...48 HRG Performance Series DVR User Guide www honeywellvideo com ...
Page 56: ...56 HRG Performance Series DVR User Guide www honeywellvideo com ...
Page 62: ...62 HRG Performance Series DVR User Guide www honeywellvideo com ...
Page 68: ...68 HRG Performance Series DVR User Guide www honeywellvideo com ...
Page 82: ...82 HRG Performance Series DVR User Guide www honeywellvideo com ...
Page 100: ...100 HRG Performance Series DVR User Guide www honeywellvideo com ...
Page 122: ...122 HRG Performance Series DVR User Guide www honeywellvideo com ...
Page 126: ...126 HRG Performance Series DVR User Guide www honeywellvideo com ...
Page 130: ...130 HRG Performance Series DVR User Guide www honeywellvideo com ...
Page 135: ......


