Managing the DVR | 133
800-16694 - A - 04/2014
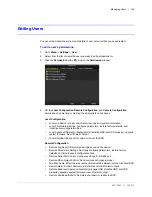
3. Click the
DST Settings
tab.
4. In
DST Settings
, do one of the following:
•
To adjust for daylight saving time automatically, select the
Auto DST Adjustment
check box.
•
To manually configure the settings, select the
Enable DST
check box, and then set
the start and end dates and times for DST and the DST bias (recording overlap).
•
To disable daylight saving time adjustment, leave both check boxes blank.
5. Click the
More Settings
tab.
6. In
More Settings
, configure the following:
7. Click
Apply
to save your settings.
• Device Name
Sets the device name. Enter a name for the device.
• Device Number
Sets the device’s serial number. If you want, enter a number
for the device between
1
and
255
. The default number is
255
.
• Output Brightness
Sets the video output brightness. Drag the slider to select the
desired brightness. 10 levels configurable.
• Operation Timeout
Sets the duration of menu inactivity before the system returns
to live view mode. Select
1
,
2
,
5
,
10
,
20
,
30
minutes or
Never
.
• Main Monitor
Sets the main output mode. Select
Auto
,
HDMI/VGA
, or
Main
BNC
. The
Auto
setting detects the output automatically.
• Main BNC Scaling
Enables/disables scaling for main BNC output. Select the
check box to enable scaling; clear the check box to disable it.
Summary of Contents for HRGX161
Page 2: ...Revisions Issue Date Revisions A 04 2014 New document ...
Page 6: ...www honeywell com security 6 HRGX DVR User Manual ...
Page 54: ...www honeywell com security 54 HRGX DVR User Manual ...
Page 66: ...www honeywell com security 66 HRGX DVR User Manual ...
Page 82: ...www honeywell com security 82 HRGX DVR User Manual ...
Page 100: ...www honeywell com security 100 HRGX DVR User Manual ...
Page 130: ...www honeywell com security 130 HRGX DVR User Manual ...
Page 142: ...www honeywell com security 142 HRGX DVR User Manual ...
Page 149: ......


