30
Advanced Tools (Continued)
NOTE:
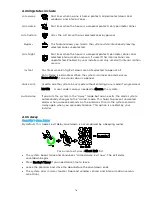
Be sure to Default Controller or Exclude all devices before using the “Learn”
function.
Press Learn after starting the Include function on the primary controller.
All Switches Off
Press to manually turn off all Z-Wave devices. (See the following Note.)
All Switches On
Press to manually turn on all Z-Wave devices. (See the following Note.)
NOTE: All Switches On/Off commands broadcast messages over the Z-Wave network
and are intended for testing device communication. They should not be used for
basic operation as each Z-Wave device reacts differently to these commands and
unintended results may occur. For Example:
•
Some Z-Wave enabled thermostats may enter or exit their Setback (or energy
saver) modes.
•
Z-Wave enabled water valves will open (enabling water flow), however, the All
Switches Off command is not processed.
Failed Devices
(Failed Nodes)
When the system tries to operate a Z-Wave device that has no AC power or other problems,
it is identified as a Failed Device. The system may take up to a minute after the operation to
recognize the failure.
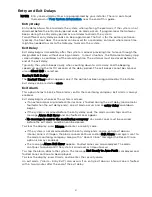
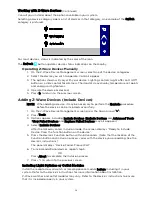
Failed Z-Wave devices are also indicated by a
symbol on the Z-Wave Device
Management screen or the
symbol appears in gray on the Home screen.
To view Failed Devices:
1.
On the Z-Wave Device Management screen, select View Failed Devices
OR press the Down arrow (
), Tools and then View Failed Devices.
2.
The device’s information is displayed. If multiple devices are listed, use the up and
down arrows at right to view the entire list.
NOTE: When troubleshooting a failed device, first make sure that power has been
restored.
3.
If a device is defective or otherwise unavailable, use the Fix All option. Press Fix All
and “This will delete all failed nodes” appears. Press Yes to confirm.
Devices deleted with Fix All must be added to the system again. See
To Replace Failed Devices:
1.
From the Z-Wave Device Management screen, press the Down arrow (
), then Tools.
2.
Press Replace Failed Devices.
3.
When a failed device is highlighted and the “Replace” button is selected, the screen
displays “Entering Inclusion Mode. Please Wait…”. Next, “Ready to include device,
select the function button on the device” appears.
4.
Within one minute press the device’s Function button or activate the switch, as
applicable. If the module has been successfully enrolled, the panel displays “Device
Found! Please Wait”. After successfully including a device, the device is removed from
the failed devices list.
Summary of Contents for Lyric LCP300-L
Page 1: ...Lyric Gateway User Reference Guide Ref LCP300 L LCP300 LC 800 21670 10 16 Rev A ...
Page 10: ...10 ...
Page 62: ...62 ZONES Zone Number Location and Description ...
Page 63: ...63 SMART SCENES Smart Scene Name Description Z WAVE DEVICES Type Name Location ...
Page 64: ...64 Notes ...
Page 65: ...65 Notes ...
Page 66: ...66 Notes ...
Page 67: ...67 Notes ...
Page 69: ...69 ...


