LYRIC INSTALLATION
Automation and Control Solutions
Honeywell International Inc.
1985 Douglas Drive North
Golden Valley, MN 55422
customer.honeywell.com
® U.S. Registered Trademark
© 2015 Honeywell International Inc.
33-00069EFS—01 M.S. 02-15
Printed in United States
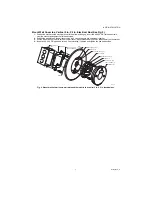
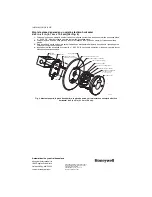
Mount Wall Cover to a Horizontal 2 in. X 4 in. Electrical Box (See Fig 4)
1.
Position the bracket on the electrical box with the arrow pointing up. Insert two #6-32 X 5/8" flat head screws.
Level the bracket and tighten the flat head screws.
2.
Position the wall plate on the wall cover using the 4 mounting posts and snap them together.
3.
Pull the wires through the wire hole on the wall cover / wall plate assembly. Position the assembly on the bracket.
4.
Insert two #6-32 X 3/8" pan head screws. Check leveling, if desired, and tighten the pan head screws.
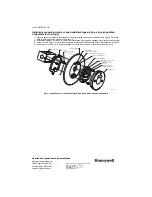
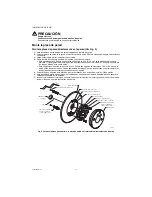
Fig. 4. Mount bracket, wall cover, wall plate and thermostat to a horizontal 2 in. X 4 in. electrical box.
#6-32 X 3/8” PAN
HEAD SCREWS (2)
M35409
G
RC
Ya
Y
R
WIRE HOLE
MOUNTING HOLES (2)
THERMOSTAT
WIRE HOLE
WALL PLATE
MOUNTING HOLES (2)
WIRE
AUX
O/B
L
C
W
W2
U2
U1
1 Wire
2 Wire
Universal
Hum
Dehum
Vent
K
#6-32 X 5/8 FLAT
HEAD SCREWS (2)
BRACKET
ELECTRICAL
BOX
MOUNTING POSTS (4)
WALL
COVER

