e-6
Compact Unit Heater
Fuel Conversion Manual
section 3 raTinG TaG conversion
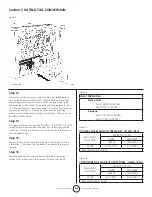
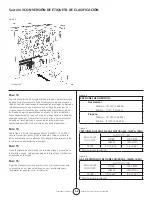
Figure 3
See Figure 3
step 13
See Figure 3. Remove the data tag P/N 60011-10 or 60010-11 for their
respective gases. Remove label and place over the existing portion of
the tag. This label is pre-printed with all the correct information.
step 14
Remove the converted information tag from the kit and fill in the
information. Then place this tag below the updated rating tag on the
converted unit.
Figure 4
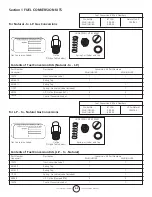
inleT Pressures:
natural Gas
MAx - 14"WC (3.49kPa)
MIN - 5"WC (1.25 kPa)
Propane
MAx - 14" WC (3.49 kPa)
MIN - 11"WC (2.74 kPa)
Figure 5
naTural Gas ManiFolD Pressures - in.WG. (KPa)
MHU-50/80
HSU-50/80
ALTITUDE FT. (M)
0-2000
2000-4500
(0-610)
(610-1370)
50/80
4.0 (0.99)*
3.6 (0.89)
*No adjustment required.
Figure 6
lP/ProPane Gas ManiFolD Pressures - in.WG. (KPa)
MHU-50/80
HSU-50/80
ALTITUDE FT. (M)
0-2000
2000-4500
(0-610)
(610-1370)
50/80
10 (2.49)*
8.0 (1.99)
*No adjustment required.
Honeywell
step 13
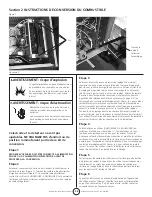
Connect main electrical power, and turn main gas supply back on.
Turn up thermostat to call for heat. When the main burners light
using soapy water check all connections thoroughly for gas leaks.
Remembering to also check the pressure test plug replaced in step
12. Allow the heater to operate for at least 5 minutes, then observe
the main burner flame. A hard blue flame extending into the
tube is normal. Slight yellow tipping is acceptable. There is no air
adjustment to the burner.
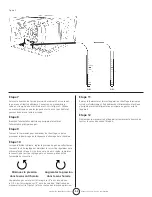
step 14
See figure 3. Remove the data tag P/N 60011-10 or 60011-11 for their
respective gases. Remove label and place over the existing portion
of the tag. This tag is preprinted with all the correct information for
the converted heater.
step 15
Remove the converted information tag from the kit and fill in the
information. Then place this tag below the updated rating tag on
the unit.
step 16
Replace any panels and operate heater following all warnings/
cautions and instructions in the operator’s manual and labels.

