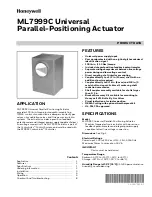
ML7999C UNIVERSAL PARALLEL-POSITIONING ACTUATOR
32-00079EF—01
4
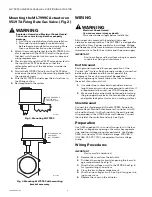
Mounting the ML7999C Actuator on
V5197A Firing Rate Gas Valve. (Fig. 2)
WARNING
Explosion Hazard and Electrical Shock Hazard.
Can cause severe injury, death or property
damage.
1. Turn off gas supply before starting installation.
2. Disconnect power supply for valve actuator
before beginning installation and wiring. More
than one disconnection can be involved.
1.
Attach the mounting bracket for the ML7999C Actu-
ator (supplied with the V5197 Valve) in the position
that best suits the valve location, access space and
wiring requirements.
2.
Place the short end of the V5197 valve drive stem in
the top of the V5197 Valve drive so that the
rectangular portion of the drive stem is inside the
valve drive.
3.
Mount the ML7999C Actuator on the V5197 Valve
and secure the actuator to the mounting bracket with
the supplied screws.
4.
Wire the ML7999C Actuator per the instructions in
the Wiring section.
5.
Restore power to the system.
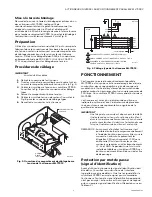
Fig. 3. Mounting ML7999C.
Fig. 4. Mounting ML7999C with mounting
bracket accessory.
WIRING
WARNING
Electrical Shock Hazard.
Can cause severe injury or death.
Disconnect power supply before installation.
All wiring must comply with local electrical codes,
ordinances and regulations. The ML7999C is designed for
used with a Class 2 power supply for low voltage. Voltage
and frequency of the transformer must correspond with the
characteristics of both the actuator and the power supply.
IMPORTANT
Run line voltage and low voltage wiring in separate
conduit to avoid signal interference.
Earth Ground
Earth ground is required for proper operation of the
ControLinks™ system. Earth ground provides a connection
between the subbase and the control panel of the
equipment. The earth ground must be capable of
conducting enough current to blow the fuse or breaker in
the event of an internal short.
1.
Use wide straps or brackets to provide minimum
length, maximum surface area ground conductors. If
a leadwire must be used, use 14 AWG copper wire.
2.
Make sure that mechanically tightened joints along
the ground path are free of nonconductive coatings
and protected against corrosion on mating surfaces.
Shield Ground
Connect the shield ground of the ML7999C Actuator(s),
Remote Reset, Manual Potentiometer, Controller 4-to-20
mA and Auxiliary 4-to-20 mA inputs to the earth ground
strip provided in the Q7999 Universal Subbase. Connect
the shield at the controller end only. See Fig. 6.
Preparation
Use OEM-supplied 1/2 in. conduit connectors in the low-
and line- voltage base openings; the motor has separate
line- and low-voltage wiring compartments. Use Belden
9535, 5-conductor, 100% shield coverage, 300V, 80°C
(UL2464, CSA PCC FT4), or equivalent for low voltage
wiring.
Wiring Procedures
IMPORTANT
Device must be hardwired.
1.
Remove the cover from the actuator.
2.
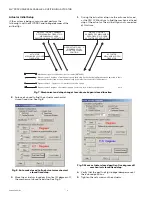
Pull back the snap-locks while opening the low-volt-
age compartment. See Fig. 5.
3.
Wire the low-voltage circuit to the R7999. See Fig. 6
for typical wiring connections.
4.
Close the low-voltage compartment.
5.
Wire the line-voltage circuit. See Fig. 6 for typical wir-
ing connections.
6.
Replace the cover on the actuator.
M16467A
LOCK WASHER OR
CAPTIVE NUT
(NOT PROVIDED)
M16468A
LOCK WASHER OR
CAPTIVE NUT
(NOT PROVIDED)

