background image

JMATEK MÉXICO SAPI DE CV

Santa Cruz Norte No. 21, 
Col Del Valle, C.P. 03100,
México D.F.
Phone: 52 55 52116813
Email: mxinfo@jmatek.com
Web: www.jmatek.com

© 2015 JMATEK Limited. All rights reserved.
The Honeywell Trademark is used under license from 
Honeywell International Inc.
Honeywell International Inc. makes no representations 
or warranties with respect to these products.
These products are manufactured by JMATEK Limited.

© 2015 JMATEK Limited. Todos los derechos reservados.
La marca Honeywell es usada bajo licencia de
Honeywell International Inc.
Honeywell International Inc. no representa
ni garantiza este producto.
Este producto es fabricado por JMATEK Limited.

Aire Acondionado Portátil
Marca: HONEYWELL
Modelo: MM14CCSBB
ESPECIFICACIONES ELECTRICAS
115 V ~ 60 Hz    10,8 A
Consumo de energía en modo de operación: 1,0601 kWh
Consumo de energía en modo de espera: 0,490 Wh
ANTES DE USAR EL PRODUCTO LEA EL INSTRUCTIVO Y 
CONSERVELO PARA FUTURAS REFERENCIAS
SUJETACABLES "Y"  SI EL CORDON DE ALIMENTACION ES DAÑADO, 
DEBE SER REEMPLAZADO POR EL FABRICANTE O SU AGENTE DE 
SERVICIO O POR PERSONAL CALIFICADO PARA EVITAR RIESGO
Este aparato no se destina para utilizarse por personas (incluyendo niños) 
cuyas capacidades físicas, sensoriales o mentales sean diferentes o estén 
reducidas o carezcan  de experiencia o conocimiento a menos que dichas 
personas reciban una supervisión o capacitación para el funcionamiento 
del aparato por una persona responsable de su seguridad.
Los niños deben  de supervisarse para asegurar que ellos no empleen los 
aparatos como juguete.

Antes de limpiar o dar mantenimiento, el aparato debe desconectarse del 
suministro de energía.

Importador: Servicios Home Depot, S de R.L. de C.V.                             
AV. Ricardo Margain No. 605, Santa Engracia,  San Pedro Garza Garcia, 
Nuevo Leon, México, C.P. 66267
Tel: 01 800 004 6633

Summary of Contents for MM14CCSBB

Page 1: ...b www jmatek com Portable Air Conditioner User Manual Read and save these instructions before use Aire Acondicionado Portátil Manual Del Propietario Lea y guarde estas instrucciones antes de usar la unidad Model Modelo MM14CCSBB ...

Page 2: ...the condensate through the air outlet hose There is no need to empty the drainage tank except in very high humidity conditions Read and follow the instructions carefully Follow installation instructions to set up the unit Plug the unit into a properly grounded circuit Important Before installing the unit place it UPRIGHT for 20 minutes before use to allow the refrigerant to stabilize Manually adju...

Page 3: ... contact an authorized service agent Unplug the unit when stored or not in use DO NOT run the power cord under carpeting and rugs Use caution to prevent tripping on cord DO NOT use in areas where gasoline paint or other flammable goods are stored Basic safety precautions should always be followed when using electrical appliances This appliance has been manufactured for use in domestic environments...

Page 4: ...site end of the plastic hose Ensure that all connections are tight and installed properly Note Do not install the window bracket to your window This step is required only to adjust it to the size of your window The bracket should be removed from the window after the size is adjusted INSTALLATION 1 2 3 4 5 Window Bracket Kit Window Bracket Panel Adapter Plastic Pin Hose Connector Plastic Hose Insta...

Page 5: ... the product specifications Do not replace or lengthen it as this could cause the unit to malfunction Make sure the back of the unit is at least 50 cm 20 inches away from the wall Do not place the unit in front of curtains or drapes as this could obstruct the airflow USE OPERATION TOUCH SCREEN CONTROL PANEL POWER CONTROL The Power Control turns the unit on and off MODE CONTROL 3 settings Cool Dehu...

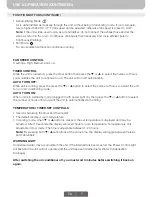
Page 6: ...ou want the unit to run in air conditioning mode AUTO TURN ON When unit is in a standby mode plugged in with power light on then press the or button to select the number of hours until you want the unit to automatically start running TEMPERATURE TIMER SET CONTROLS WARNING LIGHT Condensed water may accumulate in the unit If the internal tank becomes full the Power Control light will flash and the u...

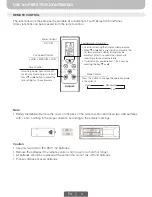
Page 7: ... HIGH MEDIUM LOW In running mode Auto switch off In stand by mode Auto switch on Press or button to adjust the time setting for 1 hour intervals Temperature Timer Set Mode Control Power Control Fan Speed Control Timer Control Battery Installation Remove the cover on the back of the remote control and insert two AAA batteries with and pointing in the proper direction according to the polarity marki...

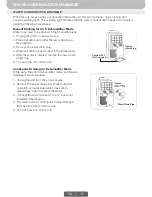
Page 8: ...r 30 minutes before storing Turn off and unplug the air conditioner from the power supply Remove the air filter and clean with water Dry the air filter and then reinstall onto the unit Disconnecting the Window Installation Kit Cover the air conditioner with a cloth plastic bag before storage to protect from dust and scratches collecting on the surface of the unit It is recommended to coil the powe...

Page 9: ... power source Place a shallow pan under the lower drain plug See diagram Remove the lower drain plug Water will drain out and collect in the shallow pan After the water is drained replace the lower drain plug firmly You can now turn on the unit 1 2 3 4 5 Unplug the unit from the power source Remove the upper drain plug While doing this operation some residual water may spill so please have a pan t...

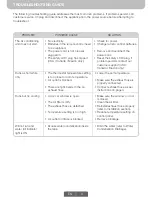
Page 10: ...ge remote control batteries Remove and reconnect the power cord Reset the safety LCDI plug if problem persists contact our customer support USA Canada Mexico only Lower the set temperature Make sure the exhaust hose is properly connected Connect exhaust hose as per instructions on page 4 Runs but no cooling A door or window is open The air filter is dirty The exhaust hose is detached Temperature s...

Page 11: ... cuidadosamente estas instrucciones Siga las instrucciones de instalación para configurar su unidad Conecte la unidad a un circuito conectado adecuadamente a tierra Importante Después de transportarlo coloque la unidad en posición vertical para permitir que el refrigerante se estabilice y espere 20 minutos antes de usarlo Ajuste manualmente la ventila de aire localizada en la parte superior de la ...

Page 12: ...ntectar la unidad cuando no esté en uso o en reparación No haga funcionar el cable de alimentación debajo de alfombras y tapetes Tenga cuidado para evitar tropezar con el cable No lo use en áreas donde haya gasolina pintura u otros inflamables almacenados Las precauciones básicas de seguridad siempre se deben seguir cuando se utilizan aparatos eléctricos Este producto ha sido fabricado para uso ha...

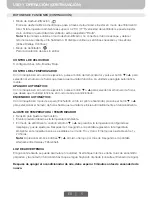
Page 13: ... el extremo opuesto de la manguera de plástico Asegúrese de que las conexiones estén apretadas y correctamente instaladas Nota No instale por el momento el anaquel de ventana a su ventana este paso es solo requerido para ajustar el anaquel según el tamaño de su Ventana El anaquel tiene que ser quitado de la ventana después de que el tamaño es ajustado INSTALACIÓN 1 2 3 4 5 Equipo Deslizante para V...

Page 14: ...ECOMENDADO NO RECOMENDADO La longitud de la manguera de salida está especialmente diseñada de acuerdo con las especifica ciones del producto No la reemplace o la alargue con ninguna otra manguera pues esto podría dañar su aparato Asegúrese que la parte trasera de la unidad esté a al menos 50 cm 20 de distancia de la pared USO Y OPERACIÓN PANEL DE CONTROL TÁCTIL CONTROL DE ENERGÍA El control de enc...

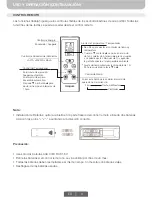
Page 15: ...l número de horas que desea que la unidad funcione en modo de aire acondicionado ENCENDIDO AUTOMÁTICO Con la máquina en modo de espera Enchufado con la luz piloto encendida presione el botón o para seleccionar el número de horas hasta que la unidad se inicie automáticamente en funcionamiento AJUSTE DE TEMPERATURA TEMPORIZADOR LUZ DE ADVERTENCIA El agua condensada se puede acumular en la unidad Si ...

Page 16: ...do Apagado ALTA MEDIA BAJA En el modo de ejecución Apagado automático En el modo de espera Encendido automático Presione o el botón para ajustar el tiempo en intervalos de 1 hora Ajuste de Temperatura Temporizador Control de Modo Control de Energía Control de Velocidad del Ventilador Control del Temporizador Instalación de Baterías quite la cubierta en la parte trasera del control remoto e inserte...

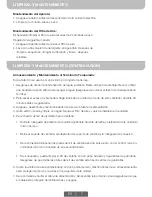
Page 17: ...entilador durante 30 minutos antes de guardarla Apague y desenchufe el acondicionador de aire de la fuente de alimentación Quite el filtro de aire y limpie con agua Seque el filtro de aire y vuelva a instalarlo en la unidad Desconexión del kit de instalacion para Ventana Cubra la unidad de aire acondicionado con una bolsa de tela plástico antes de su almacenamiento para proteger del polvo y rayone...

Page 18: ...ura debajo del tapón de drenaje Vea el diagrama Retire el tapón de drenaje El agua drenada se acumula en la bandeja Después de que el agua es drenada cierre la tapa firmemente Ahora puede encender la unidad 1 2 3 4 5 Desenchufe la unidad de la fuente de alimentación Retire el tapón de drenaje superior Mientras se hace esta operación se genera algún derramamiento de agua así que por favor tenga un ...

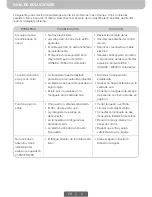
Page 19: ... temperatura es demasiado parecida a la temperatura ambiental La salida de aire esta bloqueada por algún objeto Existe polvo o pelusas en la manguera de la salida de aire Disminuir la temperatura establecida Revisar no haya obstáculos en la salida de aire Conecte la manguera de escape de acuerdo con instrucciones en página 4 Funciona pero no enfría Una puerta o ventana está abierta El filtro de ai...

Page 20: ...ción 1 0601 kWh Consumo de energía en modo de espera 0 490 Wh ANTES DE USAR EL PRODUCTO LEA EL INSTRUCTIVO Y CONSERVELO PARA FUTURAS REFERENCIAS SUJETACABLES Y SI EL CORDON DE ALIMENTACION ES DAÑADO DEBE SER REEMPLAZADO POR EL FABRICANTE O SU AGENTE DE SERVICIO O POR PERSONAL CALIFICADO PARA EVITAR RIESGO Este aparato no se destina para utilizarse por personas incluyendo niños cuyas capacidades fí...

Reviews: