54
NFW-50X Manual —
P/N LS10129-001NF-E:C 7/25/2018
Programming
Master Programming Level
With the preceding program settings, when the detector with address 005 is activated, zone Z048 will cause its associated control module
to activate immediately, sounding the connected signaling device to indicate the Pre-signal condition. Following the Pre-signal delay
time, zone Z001 will cause its associated control module to activate and the control panel will initiate an alarm condition.
Note that a detector can be enabled for either PAS or Pre-signal, but not both.
Zone Assignment
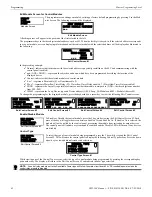
A maximum of five zones can be programmed to each addressable detector. Pressing
1
while viewing Edit
Detector Screen #4 displays the following screen:
Note that Z*** represents the Zone Number(s) corresponding to this device. The factory default for an unprogrammed device is Z000 for
general alarm zone. A flashing cursor will appear on the first
0
to the right. Enter the three digit number corresponding to the zone that is
to be assigned to this device. The cursor moves to the next Z*** designation. Continue entering zone assignments or the remaining zones
can be left blank or programmed as general alarm zone Z000. When all desired changes have been made, press the Enter key to store the
zone assignments. The display will return to the Edit Detector Screen #4. Note that the left and right arrow keys can be used to navigate
through the zones and the
CLEAR
key can be used to quickly clear a zone.
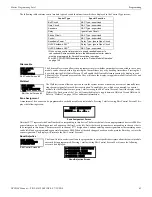
If the selected detector is a multi-criteria detector, the following screen will display respectively before the Zone Assignment Screen
allowing the user to program the zones independently.
Wireless
The Wireless selection will update automatically if the system recognizes a wireless device. A wireless
device operates as part of the SWIFT® wireless network. If the detector is wireless, the display reads
Wire-
less Yes
. If the device is wired, the display will read
Wireless No
. Fore more information on the SWIFT
wireless network,
refer to the SWIFT manual
, #LS10036-000NF-E.
Sounder Base
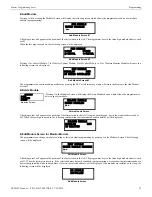
The Sounder Base selection allows the programmer to enter different values if the selected detector is mounted in an addressable sounder
base. Pressing
2
while viewing Edit Detector Screen #5 will display the following:
If the selected detector has been installed in a sounder base, press
1
while viewing Sounder Base Screen #1 until the display reads
Installed Yes
. Each press of the
1
key will cause the display to toggle between
Installed Yes
and
Installed No
.
The Silenceable selection allows the programmer to select whether the selected sounder base can be silenced, either by pressing the
Alarm Silence key or by enabling Autosilence. Pressing the
2
key while viewing Sounder Base Screen #1 will enable the Silenceable
feature causing the display to read
Silenceable Yes
. Repeated presses of the
2
key will cause the display to toggle between
Silenceable
Yes
and
Silenceable No
.
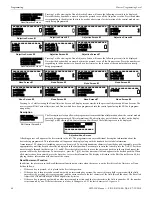
The Fire Coding feature allows the programmer to select the type of output that the sounder base will generate when activated. Pressing
3
while viewing Sounder Base Screen #1 will cause the following displays to appear:
The programmer can select the sounder base output by pressing the number corresponding to the desired output. The coding selections
are:
•
Steady - a continuous output with no coding
•
Temporal 3 - ½ Second On, ½ Second Off, ½ Second On, ½ Second Off, ½ Second On, 1½ Seconds Off
•
Temporal 4 - ½ Second On, ½ Second Off, ½ Second On, ½ Second Off, ½ Second On, ½ Second Off, ½ Second On, 1½ Seconds
Off
EDIT DETECTOR
1=ZONE ASSIGNMENT
000
Edit Detector Screen #4
Zone Assignment Screen
ZONE ASSIGNMENT
Z000 Z
Z
Z
EDIT DETECTOR
1=PHOTO ZONES
2=HEAT ZONES
3=CO ZONES
Multi-Criteria Detector Zones Screen
EDIT DETECTOR
WIRELESS NO
2=SOUNDER BASE
Edit Detector Screen #5
Edit Detector Screen #5
SOUNDER BASE
1=INSTALLED NO
2=SILENCEABLE NO
3=CODING STEADY
Sounder Base Screen #1
SOUNDER BASE
1=ZONE ASSIGNMENT
000 000 000 000 000
2=VOLUME LOW
Sounder Base Screen #2
CODING
1=STEADY
2=TEMP-3
3=TEMP-4
Coding Screen #1


