S9240F2051 MODULATING INTEGRATED FURNACE CONTROL
3
69-2807—01
WARNING
Fire or Explosion Hazard.
Can cause severe injury, death or property
damage.
1. The integrated furnace control can malfunction if it
gets wet, leading to accumulation of explosive gas.
— Never install where water can flood, drip or
condense on the IFC.
— Never try to use an integrated furnace control
that has been wet—replace it.
2. Liquefied petroleum (LP) gas is heavier than air
and will not naturally vent upward.
— Do not operate electric switches, lights, or
appliances until you are sure the appliance area
is free of gas.
WARNING
Electrical Shock Hazard.
Can cause severe injury, death or property
damage.
Disconnect power supply before beginning wiring or
making wiring connections to prevent electrical shock
or equipment damage.
CAUTION
Equipment Damage Hazard.
Water can cause equipment damage or
malfunction.
If the integrated furnace control must be mounted near
water or moisture, provide suitable waterproof
enclosure.
Location
The integrated furnace control is mounted on a panel within
the circulator compartment of the furnace. The location must
provide:
— Access to the field wiring terminals.
— Operating ambient temperatures between -40°F and 175°F
(-40°C and 79°C).
— Relative humidity below 95% non condensing.
— Protection from water, steam or corrosive chemicals that
are used to clean the appliance.
— Protection from dripping water, such as from an overfilled
humidifier or from condensation.
— Protection from dust or grease accumulation.
Mounting
The integrated furnace control is designed to snap into the
appliance mounting panel.
1.
While holding the controller board with the thermostat
terminals (E7) at the bottom, insert the two left-side
hooks on the board into the holes in the mounting panel.
2.
Press the board into the mounting panel’s right-side
holes until it snaps into place.
Wiring
if available, check the wiring diagrams furnished by the
appliance manufacturer for circuits differing from the general
hookup shown. Carefully follow any special instructions
affecting the general procedures outlined below.
All wiring must comply with local codes and ordinances.
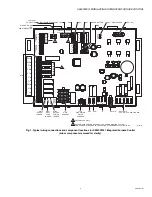
See Table 1, Table 2, Table 3, and Fig. 1 beginning on page 3
for typical connections, but refer to furnace manufacturer
instructions, if available.
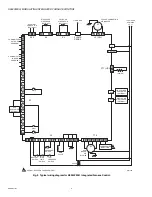
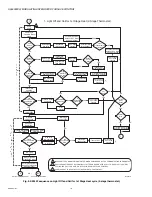
See Fig. 2 on page 6 for a typical wiring diagram.
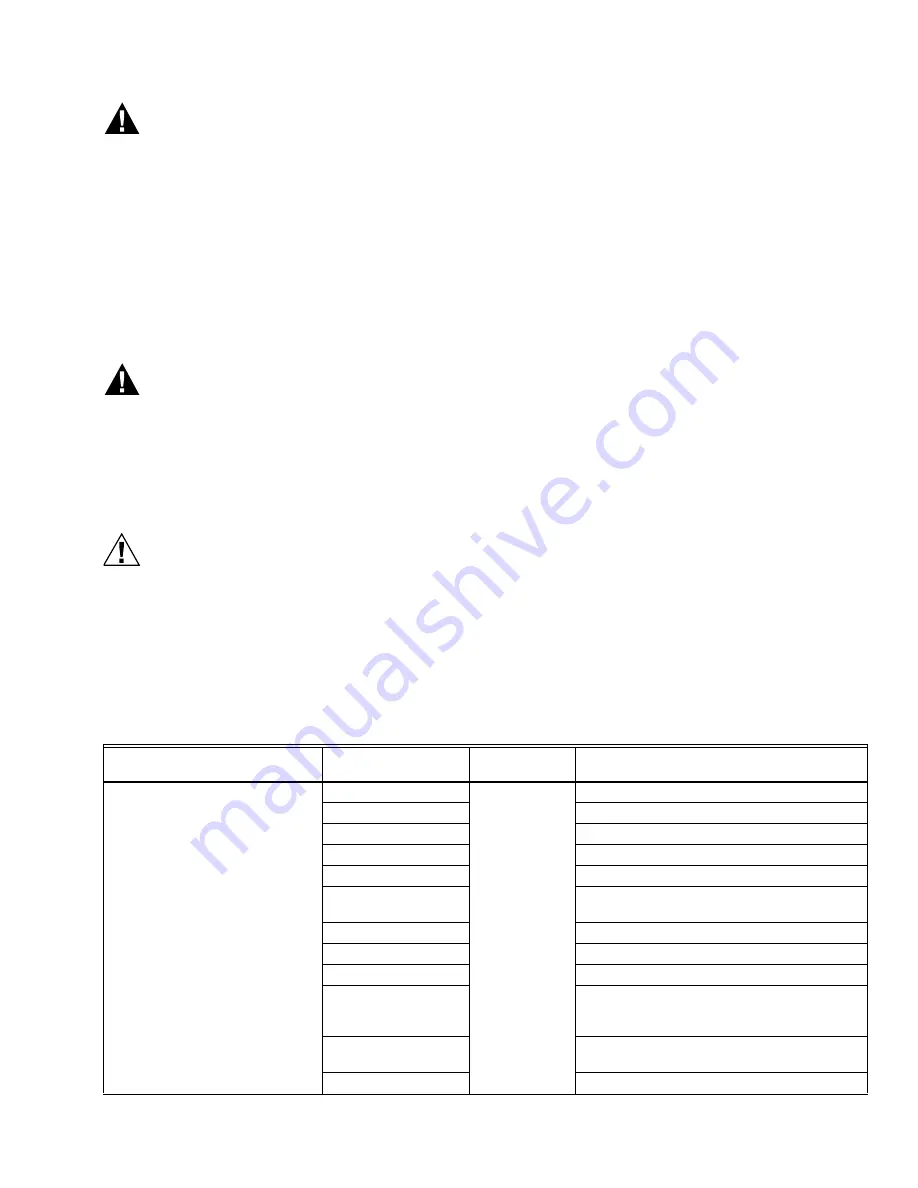
Table 1. Wiring Connections - Class 2 - Low Voltage.
Terminal Type
Connection/Label
Board label
(see Fig. 1)
Connects S9240F to:
12-position screw terminal block
(#5 screw)
W1
E7
Thermostat 1st stage heat input
W2
Thermostat 2nd stage heat input
G
Thermostat continuous fan input
Y2
Thermostat 2nd stage cool input
Y1
Thermostat 1st stage cool input
C
24 Volt ground (connected to transformer and
chassis ground)
R
24 Volt hot
DH
Not used
H (optional)
If used: 24V humidifier output
L (optional)
If used: Lennox System Operating Monitor
(LSOM) output; LSOM provides diagnostics for
outdoor heat pump or A/C unit.
O (optional)
If used: Thermostat signal to heat pump
reversing valve input
DS (optional)
If used: Thermostat Dehumidification

