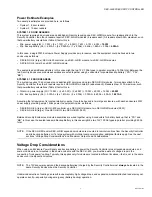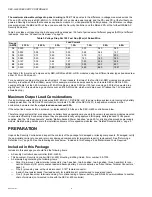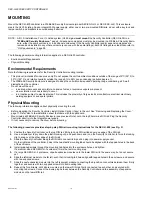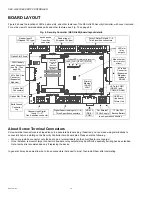
SEC-H-600 SECURITY CONTROLLER
5
95-7759—07
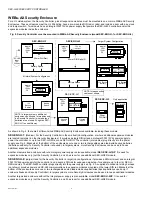
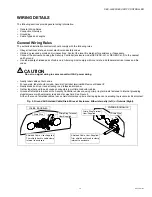
SEC-ENC-H-3:
(Small) Has a single DIN rail, and is used only for one SEC-H-R2R module—it has no integral power supply or
backup battery area. See Fig. 2 When wiring back to the Security Controller, you must use a 3-conductor cable for power/battery
backup (PS-, PS+, BB), in addition to RS-485 wiring.
Related Documentation
For more information on mounting and wiring a WEBs-AX Security system, refer to the following documents:
• Remote 2 Reader Module (SEC-H-R2R) Installation Instructions, Form number 95-7749
• Remote I/O Module (SEC-H-RIO) Installation Instructions, Form number 74-4060
• Medium (SEC-ENC-H-1/SEC-ENC-H-1NP) and Large (SEC-ENC-H-2/SEC-ENC-H-2NP) Security Enclosure Install Guide,
Form number 95-7747
• Small (SEC-ENC-H-3) Security Enclosure Install Sheet, part number 95-7748
• Security Controller (SEC-H-201) Installation Instructions, part number 95-7759
For details on software configuration for a fully functioning security system, refer to the following documents:
• WEBs-AX Enterprise Security Guide, Form number 74-4086
SYSTEM PLANNING
The following sections provide information necessary to plan a WEBs-AX Security System using a SEC-H-600 Security
Controller. Because of the flexibility of the system architecture, a number of factors may be in play.
• “Basic Design Rules (SEC-H-600)” on page 5
• “Estimating Power and Battery Requirements” on page 6
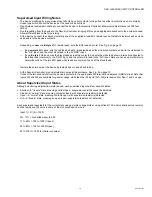
• “Voltage Drop Considerations” on page 7 and “Maximum Output Load Considerations” on page 8
Basic Design Rules (SEC-H-600)
1.
Only one Security Controller, unless part of an Enterprise Security system. The controller provides access control for 2
doors (one reader per door), plus additional I/O points. See “Onboard Security I/O” on page 2.
2.
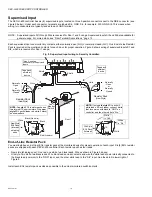
Per SEC-H-600 controller, a maximum of 15 additional SEC-H-R2R (2 reader) modules and SEC-H-RIO (remote I/O) mod-
ules total, in any combination. If needed, all 15 can be SEC-H-R2R modules. See “Expansion Modules” on page 2.
3.
For a UL 294 listed system, all equipment above must be installed in one or more WEBs-AX Security Enclosures, with a
model SEC-ENC-H-1 or SEC-ENC-H-2 used to house the SEC-H-600 controller. See “WEBs-AX Security Enclosure” on
4.
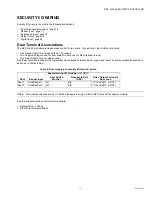
All expansion modules must be connected to the Security Controller on an RS-485 communications trunk, using a daisy
chain topology. Also, each reader must be located within 500 feet of the reader input used. For related details, see “Con-
5.
Because readers are powered by the Security Controller and any SEC-H-R2R modules, system power requirements vary
depending on the exact reader models used. Identify the power used/amps drawn by readers.
6.
The Security Controller requires 15Vdc primary power—typically, this is supplied by the integral power supply of the
required SEC-ENC-H-1 or SEC-ENC-H-2 model enclosure. Note that 15Vdc is required so that the Security Controller can
keep its attached 12V backup battery(ies) trickle charged.
7.
Expansion modules can be powered from 12–15Vdc—modules directly attached (in
same enclosure
) with the Security
Controller use the enclosure’s 15Vdc source and backup battery. On larger jobs, when installing additional SEC-ENC-H-1
or SEC-ENC-H-2 enclosures to house (remote) expansion modules, expansion modules are powered by the local (enclo-
sure) power supply, where you can wire the backup battery supply from the enclosure with the Security Controller (at a
maximum of 2.5A load
). This method uses a single pair (2 twisted conductor) cable to connect terminals “PS-, “BB”.
If installing a non-powered enclosure (SEC-ENC-H-1NP, SEC-ENC-H-2NP, SEC-ENC-H-3) to house one or more expan-
sion modules, you can either:
• Wire a “triad” (3 twisted conductor) cable back to the Security Controller enclosure, for both 15Vdc power and battery
backup (terminals “PS+, “PS-, “BB”).
• Use a UL 294 approved, third-party, battery-backed, 12Vdc power supply to locally power the remote expansion
modules. See the expansion module installation documents for more details.
8.
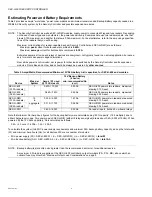
When the system is operating on backup battery (AC power lost scenario), system operation for a minimum of 4 hours is
the intended goal. To achieve this, size the Backup Battery(ies) accordingly, using the section Estimating Power and Bat-
tery Requirements below.

