background image

SPYDER MODEL 5 ENGINEERING TOOL 

 USER GUIDE


47 

31-00282ES-01 

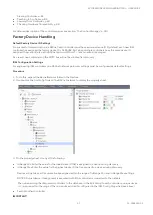
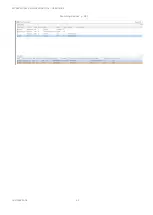
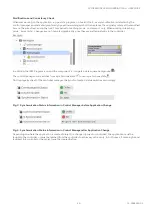
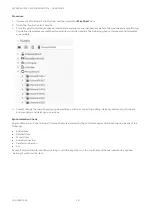
You can also see the devices can also be seen in the nav tree as shown below. 


Summary of Contents for Spyder 5

Page 1: ...Trademark Copyright 2019 Honeywell Inc All Rights Reserved 31 00282 01 IMPORTANT NOTE Email your Host Id to Honeywell WEBs Customer Care WEBsLicense honeywell com so we can move the license to your organization For additional queries contact to the distributor ...

Page 2: ...GER 35 FACTORY DEVICE HANDLING 37 DETAILED OFFLINE PROCEDURE 39 DETAILED ONLINE PROCEDURE 43 WORKING WITH APPLICATIONS THE IRM PROGRAM 45 PREPARING NIAGARA WORK ENVIRONMENT 45 IRM PROGRAM COMPONENTS 48 The Control Manager Procedure 50 Periodic Program 53 Event Program 54 Onboard IO 55 Alarms 58 APPLICATION ENGINEERING GUIDELINES 59 Commissioning and Station Copier Usage 59 Final Step after Applica...

Page 3: ...ion 94 Applying Master Sync 95 Excluding Function Block Items from Master Sync 97 SPLITTING OFF APPLICATION 99 CONTROLLER MAC ADDRESS ASSIGNMENT 102 Setting MAC Address of Controller 104 SYNCHRONIZING DEVICE TIME 106 FIRMWARE DOWLOAD 107 ALARMING 108 MISCELLANEOUS 108 VALUE UPDATES AFTER DEVICE POWER FAILURE 108 HIDING SLOTS 108 SYLK WALL MODULE USAGE 110 ...

Page 4: ...e can be downloaded from The Honeywell Buildings Forum Restrictions and Recommendations For successful and seamless engineering it is recommended to note the following internal system restrictions Number of BACnet Devices max 64 devices per channel Depending on performance needs of the application and bus traffic it is recommended to keep the number of devices below 64 Controller Memory Usage max ...

Page 5: ...n N4 x installation files configuration files including station backup certificates and licenses in the disaster recovery plan 3 Make sure that the PC running WEBStation N4 x where possible is secured against unauthorized physical access 4 Make sure that the local ethernet network that the PC is connected to is secured e g by the use of firewalls and intrusion detection systems 5 The PC is running...

Page 6: ...er at the plant Online Engineering In this mode you discover the devices on the BACnet network in the first step and use the devices instantly for application engineering This is recommended when doing the engineering directly at the plant with the devices already installed on the BACnet bus Synchronization Status of Application The current content of the applications engineered in the project and...

Page 7: ... program change and commissioning dates Periodic program Includes the control strategy running in a cyclic manner on a fixed time base Event program Includes event driven control strategy triggered by particular IO changes On board I O Shows the hardware I Os of the controller Alarms Provides the notification classes for establishing alarming Hardware Compatibility Check The hardware configuration...

Page 8: ... a popup window and all actions are summarized in a list in the Jobs window IRM Palette The following palette is available for creating the application honIrmControl provides control function blocks and templates for IRM BACnet devices IRM programs and folders honIrmAppl provides standard FCU application with all commonly used functionalities ...

Page 9: ...P based system containing a CIPer Model 50 controller as a router and 3 IRM Spyder Model 5 controllers for room control The system is engineered using the Spyder Model 5 Engineering Tool based on the WEBStation N4 4 or higher Fig 1 System Architecture based on Spyder Model 5 Engineering Tool Spyder Model 5 and CIPer Model 50 Controllers ...

Page 10: ...EFS Make sure that the following steps were done prior of working with the Spyder Model 5 Engineering Tool If not already available in the current WEBs N4 installation copy the following files to the Modules folder honIrmAppl rt jar honIrmAppl rt jar sig honIrmConfig rt jar honIrmConfig rt jar sig honIrmConfig wb jar honIrmConfig wb jar sig honIrmControl rt jar honIrmControl rt jar sig Adding IRM ...

Page 11: ...PYDER MODEL 5 ENGINEERING TOOL USER GUIDE 11 31 00282ES 01 3 On the platform and connect to the station 4 On the Palette pane click Open Palette icon 5 In the Open Palette dialog box enter honIrmAppl jar ...

Page 12: ...If not already selected in the list select honIrmAppl jar and then click OK 7 In the Palette pane expand the honIrmAppl folder 8 Right click IRM Program and click Copy in the context menu 9 In the Nav tree expand the IRM device and delete the existing IRM Program ...

Page 13: ...SPYDER MODEL 5 ENGINEERING TOOL USER GUIDE 13 31 00282ES 01 10 Right click the IRM device and click Paste in the context menu ...

Page 14: ...ch as creating platforms stations and networks Hence only the specialties for the CIPer Model 5 steps 2 and 5 are described in the following NOTE For detailed information on standard Niagara techniques and functions please refer to the Niagara online documentation and or the CIPer Model 50 Controller User Guide 31 00198 01 Setting up the CIPer Model 50 controller as router and host for an IRM stat...

Page 15: ...SPYDER MODEL 5 ENGINEERING TOOL USER GUIDE 15 31 00282ES 01 Fig 2 Basic Engineering for Typical CIPer Model 50 and Spyder Model 5 Application Scenario ...

Page 16: ... functions please refer to the Niagara online documentation and or the CIPer Model 50 Controller User Guide 31 00198 01 Procedure 1 Open the platform on the PC 2 Start creating the station using the New Station Wizard 3 In the New Station Wizard dialog select the EaglehawkNX ntpl template 4 Continue with creating the station standard Niagara procedure ...

Page 17: ... use the CIPer Model 50 controller which can host and run a station for Spyder Model 5 engineering in parallel NOTE For detailed information on standard Niagara techniques and functions please refer to the Niagara online documentation and or the CIPer Model 50 Controller User Guide 31 00198 01 Prerequisite Steps 1 Open the platform PC 2 Create CIPer Model 50 station 3 Start and connect to CIPer Mo...

Page 18: ...SPYDER MODEL 5 ENGINEERING TOOL USER GUIDE 31 00282ES 01 18 3 Open the BACnet palette and expand NetworkPorts 4 Expand BACnet Comm and Network on the Property Sheet ...

Page 19: ...SPYDER MODEL 5 ENGINEERING TOOL USER GUIDE 19 31 00282ES 01 5 From the BACnet palette add the MstpPort to Network 6 Expand MstpPort and Link ...

Page 20: ... 5 ENGINEERING TOOL USER GUIDE 31 00282ES 01 20 7 Set enter the following Network Number any e g 56 must be less or equal than 65535 Port Name RS485_1 Baud Rate Baud_38400 see also Baud rate note below Enabled true ...

Page 21: ... User Guide 31 00198 01 Baud rate Note The following baud rates for the MSTP interface in the Spyder Model 5 controller are supported 9600 19200 38400 default 57600 76800 The baud rate of each Spyder Model 5 controller on the BACnet MSTP bus is automatically set by the defined baud rate of the BACnet IP MSTP Router CIPer Model 5 controller after the Spyder Model 5 controller is powered up and conn...

Page 22: ...k in the first step and use the devices instantly for application engineering This is recommended when doing the engineering directly at the site with the devices already installed on the BACnet bus Offline Engineering Offline engineering includes the following steps Create IrmBacnetDevice Create application for the IrmBacnetDevice optional Later at the site do the following o Connect to the BACne...

Page 23: ...SPYDER MODEL 5 ENGINEERING TOOL USER GUIDE 23 31 00282ES 01 Matching Devices p 28 Teaching to Controller p 82 Learning from Controller p 83 Clearing Project p 85 ...

Page 24: ... ENGINEERING TOOL USER GUIDE 31 00282ES 01 24 Clearing Controller p 85 Checking Hardware Compatibility p 86 For further information on offline engineering please refer also to the Factory Device Handling section p 37 ...

Page 25: ...e 1 Double click the BACnet network folder in the Nav tree and then select Irm Bacnet Device Manager view 2 On the bottom click New 3 In the New dialog box select Irm Bacnet Device and then click OK RESULT The Irm Bacnet Device is created and added to the Database pane and the BacnetNetwork tree ...

Page 26: ... by adding control strategy hardware layout and alarm settings optional To do so please refer to the section Working with Applications The IRM Program p 45 5 After finishing the application engineering match the offline disconnected device to the desired physical device discovered on the BACnet network see ...

Page 27: ...n the control logic NOTE Add the physical IO points Make sure to select the right physical point template that matches the online device model NOTE It is allowed matching smaller offline device models with bigger online device models It is strongly recommended not match devices vice versa since hardware compatibility issues may arise In this case please execute the hardware compatibility check and...

Page 28: ...stablish synchronicity Procedure 1 Press the service pin at the device you want to match to the offline created IRM BACnet device Do this for all devices you want to match 2 On the Discovered pane click Discover RESULT All devices available in the BACnet network are discovered RESULT In the Service Pin Rank column the service pin action is indicated by consecutive numbers depending on the time whe...

Page 29: ...Cnet device indicate in the Database pane The device gets the data of Device ID Status e g Alarm unacknowledged alarm Model Firmware Revision Serial No Irm Family Irm Program Name Irm Application Type Irm Sync Status synchronized or not synchronized Irm Last Change Irm Master Sync The Irm Sync Status shows whether the device is part of a master sync group source target none The application status ...

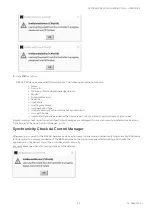
Page 30: ...message will be displayed and the relevant synchronization status is indicated in the control manager see section Synchronicity Check via Control Manager p 35 9 To solve any inconsistencies synchronize the applications by doing any of the following Clear project Clear controller Teach to controller Learn from controller Checking Hardware Compatibility For detailed descriptions please refer to the ...

Page 31: ...31 31 00282ES 01 Clearing Controller p 85 Teaching to Controller p 82 Learning from Controller p 83 Checking Hardware Compatibility p 86 For further information on offline engineering please refer also to the Factory Device Handling section p 37 ...

Page 32: ... change application and hardware layout if necessary Depending on the synchronization status apply any of the following actions o Learn from controller o Teach to controller o Clear project o Clear controller For detailed descriptions please refer to the corresponding sections Working with Applications The IRM Program p 45 Teaching to Controller p 82 Learning from Controller p 83 Clearing Project ...

Page 33: ...Compatibility p 86 For further information on online engineering please refer also to the Factory Device Handling section p 37 Procedure 1 For new factory devices press the service pin at the devices 2 On the Discovered pane click Discover RESULT All devices available in the BACnet network are discovered ...

Page 34: ...lays You can change properties of the devices before adding them to the database To do so select the device and change the desired property from o Name o Device ID o Network o Use Cov o Max Cov Subscriptions 5 Click OK in Add dialog box RESULT All devices are added to the database The devices are learned from the project to the controller as indicated by the following messages ...

Page 35: ...ether the device is part of a master sync group source target none A synchronicity check is performed and particular messages are displayed if non synchronicity is detected see section Synchronicity Check via Control Manager p 35 Synchronicity Check via Control Manager Whenever you connect to the BACnet network via device discovery online mode or when matching an empty IRM device offline mode to a...

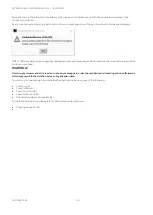
Page 36: ...g appropriate messages which describe the current status problem and how to proceed WARNING It is strongly recommended to read and note any messages in order to avoid derived misleading actions afterwards which may result in the deletion or loss of application data To solve any inconsistencies synchronize the applications by doing any of the following Clear project Clear controller Teach to contro...

Page 37: ...lers on a BACnet network particular settings must be configured as default settings Procedure 1 To do this expand the BacnetNetwork folder in the Nav tree 2 Double click the IrmConfig folder in the BACnet network to display the property sheet 3 On the property sheet do any of the following Id Range Min Enter the value for the lowest drive ID that is assigned to a device during discovery Id Range M...

Page 38: ...moved copied the application to an external location e g to the palette changed it there and then include it again NOTE Copying and pasting parts of an application from an external location such another controller does not generate inconsistencies in the application Assignment of Unique Device IDs Depending on the requirements scenarios online at the site offline in the office new IRM controllers ...

Page 39: ...er command The controllers will be discovered but they still show the default factory Id Then when adding the discovered controllers to the database to each controller a unique device Id is issued within the range of the min and max Id limits configured in the IRM Config Properties see above NOTE In the Add dialog you can change the pre defined device ID before the database addition In both cases ...

Page 40: ...work 9 Now software searches for controllers that have the same serial numbers issued offline 10 Add the controllers to the database RESULT Once those controllers are added to the network they will start communicating with the physical online controllers While adding the discovered controllers to the database a unique device Id is issued to each controller within the range of the min and max Id li...

Page 41: ... 00282ES 01 NOTE In the Add dialog you can change the pre defined device ID before the database addition 11 If any Sync messages are displayed confirm by clicking OK 12 Finish by matching the offline device with the online device in the database see ...

Page 42: ...SPYDER MODEL 5 ENGINEERING TOOL USER GUIDE 31 00282ES 01 42 Matching Devices p 28 ...

Page 43: ...he Nav tree 2 At the controller press the service pin for 15 sec Then click Discover RESULT The controller will be discovered but it still shows the default factory Id 4194302 3 Repeat step 2 for each controller 4 Select the controllers 5 Add them to the database via drag drop or by clicking Add RESULT The Add dialog box displays ...

Page 44: ...n the range of the min and max Id limits configured in the IRM Config Properties NOTE In the Add dialog box you can change the pre defined device ID before the database addition 6 Click OK RESULT The controllers are added to the database For further information please refer also to the Engineering modes section p 22 ...

Page 45: ...ring prepare the work environment by enabling the following functions in the Spyder Model 5 Engineering Tool BACnet Device Manager View Double click the BACnet network folder in the Nav tree and then select the IRM BACnet Device Manager view IRM Palette The following palette is available for creating the application honIrmControl provides control function blocks and templates for IRM BACnet device...

Page 46: ...tions Monitor shows all actions in a popup window and all actions are summarized in a list in the Jobs window In the Windows menu click Side Bars and then click Jobs When actions are executed they will be shown in the temporary Spyder_5 Operations Monitor popup window and listed permanently in the Jobs window ...

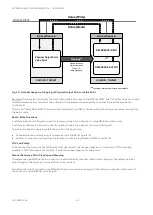
Page 47: ...SPYDER MODEL 5 ENGINEERING TOOL USER GUIDE 47 31 00282ES 01 You can also see the devices can also be seen in the nav tree as shown below ...

Page 48: ...ng it in the tree and selecting the Wire Sheet view For the Control Manager the Property Sheet displays after double clicking on the item For detailed functional descriptions please refer to the following sections The Control Manager p 50 Periodic Program p 53 Event Program p 54 Onboard IO p 55 Alarms p 58 Control Logic Source Palette For creating the application the honIrmControl palette is used ...

Page 49: ...r Example In addition the IRM Program icon and the component s icon gets a dark square background The control manager icon switches from synchronous state to non synchronous state On the property sheet of the controller manager the synchronization status switches accordingly Fig 3 Synchronization Status Information in Control Manager before Application Change Fig 4 Synchronization Status Informati...

Page 50: ...immediate Measurement Type allows selecting the type of engineering units from SI metric or Imperial Drop of BACnet Output defines which type of reference point reference input or output is created when dropping a BACnet output from another device Drop of BACnet Value defines which type of reference point reference input or output is created when dropping a BACnet value point from another device C...

Page 51: ...ol provides a memory consumption check of the current application in the tool This is an approximate calculation of the application in the tool but not a real time consumption within the controller The calculated memory usage is shown in the IRM Manager as percentage and graphically via traffic light symbol Memory Usage and Its Display The max number of memory in the controller is 344 KB Each fold...

Page 52: ...vel and to avoid to exceed the limit of 80 To keep the memory usage as low as possible it is recommended to optimize application engineering by keeping the number of folders as low as possible and the number of added function blocks per folder as high as possible in relation to the required result of the logic The max number of function blocks per folder is 150 If you want to use more than 150 fun...

Page 53: ...desired steps such as connecting adding deleting moving icons and or adding and deleting connections Synchronization Check Any modifications on the Periodic Program wire sheet are detected by the control manager Modifications can be any of the following Added item Deleted item Moved item Deleted connection Added connection etc As result all modified items will be not in sync with the application i...

Page 54: ...inary input that is used in the event program changes and when this binary input point is used as an input slot to a function block You can configure BI and UI as binary inputs Procedure 1 Double click Event Program in the tree and then select the Wire Sheet view 2 Open the honIrmControl palette 3 From the palette add control items to the wire sheet via drag drop 4 Create change the control logic ...

Page 55: ... demand or immediate After synchronization the warning symbols are removed and the items are indicated in its synchronized state When working in teaching mode immediate this happens immediately See also the description of the The Control Manager p 50 Onboard IO Shows the hardware configuration to which the application is designed for The hardware displayed here can differ from the real hardware la...

Page 56: ...owing physical terminals and templates are available 4 Create change the layout by applying desired steps such as connecting adding deleting and moving terminals and or adding and deleting connections Synchronization Check Any modifications on the On Board I O wire sheet are detected by the control manager Modifications can be any of the following Added item Deleted item Moved item Added connectio...

Page 57: ...The application can be synchronized according to the active teaching mode on demand or immediate After synchronization the warning symbols are removed and the items are indicated in its synchronized state See also the description of the The Control Manager p 50 ...

Page 58: ...SPYDER MODEL 5 ENGINEERING TOOL USER GUIDE 31 00282ES 01 58 Alarms Alarming Provides the notification classes for establishing alarming ...

Page 59: ...led description please refer to the CIPer Model 50 Controller User Guide 31 00198 01 Final Step after Application Engineering IMPORTANT It is strongly recommended to swap out the application in any case after finishing the engineering in online or offline mode Swapping out the application avoids additional communication between Spyder Model 5 Engineering Tool and controller and reduces bus traffic...

Page 60: ...onitoring system contains more than one BACnet device controller the devices communicate with one another via the BACnet MSTP protocol This enables one controller to read values from other controllers and set values on other controllers This data communication is realized via so called reference input and reference output points which are assigned to physical or value BACnet points Assignments can...

Page 61: ... Value Write SOURCE REFERENCE OUTPUT TARGET Physical Point Value Point BACnet Device A BACnet Device B Device Instance Object Instance Object ID Manually Mapping Fig 8 Data Exchange via Manual Mapping of Reference Output Point to Physical Value Point BACnet MSTP Value Read TARGET REFERENCE INPUT always Device Instance Object Instance Object ID Automatically SOURCE Physical Input Point BACnet Devic...

Page 62: ...A reference input point target is used for reading a value from a physical or value BACnet point source A reference output point source is used for writing a value to a physical or value point target There are two ways for applying reference points in the application Manual creation and mapping of reference points to BACnet points A Automatic creation and mapping of reference points via Drag drop ...

Page 63: ...r Slave Configurations A typical application scenario for the usage of reference points is a master slave configuration consisting of one master controller connected to multiple slave controllers and or 3rd Party BACnet devices The master incorporates the main control logic writes values to the slave controllers and or 3rd Party BACnet devices and receives values from the slave controllers and or ...

Page 64: ...SPYDER MODEL 5 ENGINEERING TOOL USER GUIDE 31 00282ES 01 64 Fig 11 Master Slave Configuration using Reference Points ...

Page 65: ...um high from the master controller via RefIn Reference Inputs Based on the example above the reference input functions of the WEB RL6N master controller are described in the following The WEB RL6N master controller reads the window contact status EffWindow from the slave controller via RefIn reads the room temperature ExtWmRmTemp from the BACnet Wall Module via RefIn NOTE The read function of the ...

Page 66: ...ODEL 5 ENGINEERING TOOL USER GUIDE 31 00282ES 01 66 3 Double click the Points folder and discover the points by clicking Discover on the bottom 4 Sort the discovered points by clicking on the Object Name column ...

Page 67: ...e EffWindow BACnet point 6 Note the Object ID in this case multiStateValue 8 7 In the Nav tree browse to the WEB RL6N master controller 8 Expand the IRM Program folder 9 Double click the control program folder Periodic Program or Event Program to which you want to add the reference input point ...

Page 68: ...0282ES 01 68 10 In the honIrmControl palette expand BacnetObjects and then drag drop the RefIn BACnet object to the wire sheet 11 In the Name dialog box change the name to EffWindow and then click OK 12 The reference input is added to the wire sheet ...

Page 69: ... sheet for the reference input 14 On the Property Sheet expand Device Instance Object Type and Object Instance 15 Enter the values of the wall module and the EffWindow multistate value point as shown in step 1 and 6 Device Instance device ID 5001 Object Type object ID multistateValue Object Instance object ID 8 ...

Page 70: ...ontroller which provides the window contact status 18 Apply the procedure in the same way for Reading the room temperature by mapping a reference input from the master controller to the analog value ExtWmRmTemp of the external BACnet Wall Module Reading the fan stage by mapping a reference input from the WEB RS5N slave controller to the multistate output FanStage of the WEB RL6N master controller ...

Page 71: ...et devices Reference Outputs Example Two IRM controllers and a wall module are on the MSTP bus in master slave configuration WEB RL6N Master WEB RS5N Slave In the following procedure the reference output function of the WEB RL6N master controller is described The WEB RL6N master controller writes the occupancy status EffOccMd to an external BACnet wall module via RefOut Procedure 1 Note the device...

Page 72: ...SPYDER MODEL 5 ENGINEERING TOOL USER GUIDE 31 00282ES 01 72 9 In the honIrmControl palette expand BacnetObjects and then drag drop the RefOut BACnet object to the wire sheet ...

Page 73: ...SPYDER MODEL 5 ENGINEERING TOOL USER GUIDE 73 31 00282ES 01 10 In the Name dialog box change the name to EffOccMd and then click OK ...

Page 74: ...e property sheet for the reference output 13 On the Property Sheet expand Device Instance Object Type and Object Instance 14 Enter the values of the external BACnet wall module and the EffOccMd multistate value point as shown in step 1 and 4 Device Instance device ID 5008 Object Type object ID multistateValue Object Instance object ID 13 15 Click Save ...

Page 75: ...OL USER GUIDE 75 31 00282ES 01 16 The reference input in the WEB RL6N master controller is mapped to the multistate value point EffOccMd in the wall module 17 If desired you can change the setting for master sync or other settings ...

Page 76: ...bject type and object instance of the target controller and point manually since they come with the BACnet point automatically This automatic creation is always executed whenever a BACnet point is dragged dropped onto the wiresheet of another controller or external BACnet device The drop result that is which type of reference point input or output is to be created can be defined in the control man...

Page 77: ...ule via RefIn writes the occupancy status EffOccMd to an external BACnet Wall Module via RefOut The RS5N slave controller reads the fan output status FanStage of the staged fan slow medium high from the master controller via RefIn Based on the example above the reference input function of the RS5N slave controller is described The RS5N slave controller reads the fan output status FanStage of the s...

Page 78: ...SPYDER MODEL 5 ENGINEERING TOOL USER GUIDE 31 00282ES 01 78 5 Add the FanStage BACnet point to the database by clicking Add at the bottom ...

Page 79: ... the IRM Program folder 9 In the control manager of the WEB RS5N slave controller set the drop option for BACnet output dropping mandatory for outputs and value points but not necessary for input points see previous subsection Based on the example select Create RefInput in Drop of Bacnet Output 10 Double click the control program folder Periodic Program or Event Program to which you want to add th...

Page 80: ...troller drag drop the FanStage BACnet point to the wiresheet of the WEB RS5N slave controller 12 In the Name dialog box click OK A reference input point with the name of the dropped BACnet point in this case FanStage is created 13 Double click the symbol of the reference input point to display the property sheet ...

Page 81: ...ect instance 15 If desired you can change the setting for master sync or other settings Master Slave Synchronization If Master Sync Enabled is true this property will be synchronized between master and slaves in case a master sync operation is performed The source device setting will be synced to a target device during master sync operation If the source device has set the flag to false then this ...

Page 82: ...n application from the controller to the project If you want to keep the application in the project learning the application from the controller should be avoided for controllers with history In this case the controller should be cleared before in order to avoid the destruction of the application in the project If you want to keep the application in the controller teaching the application to the c...

Page 83: ...odel 5 controller In this case damage of the controlled equipment may occur IMPORTANT To avoid damaging the controlled equipment or environment due to partial application download failure it is strongly recommended to clear the controller and perform the application download again Learning from Controller Learn from Controller uploads the current application from the controller in the project The ...

Page 84: ...e 1 Right click on IRM Program in the tree then click Actions and then click Learn From Controller in the context menu RESULT The application is to uploaded into the project The applications are synchronized The successful action is displayed via IRM Operations Monitor ...

Page 85: ...in the controller Procedure 1 Right click on IRM Program in the tree then click Actions and then click Clear Controller in the context menu RESULT The application is deleted in the controller The successful action is displayed via IRM Operations Monitor Clearing Project Clear Project deletes the application in the project ...

Page 86: ...in the project The successful action is displayed via IRM Operations Monitor Checking Hardware Compatibility The hardware configurations of the used physical controller and the hardware defined for the controller in the application can be checked Any differences are indicated graphically via yellow warning symbol on the terminals in the wire sheet In addition a message displays that lists the affe...

Page 87: ...lick on IRM Program in the tree then click Actions and then click Check Hw Compatibility in the context menu RESULT In case of incompatibilities as message box displays that lists the affected terminals On the wire sheet the terminals are marked as dirty by a yellow warning symbol ...

Page 88: ...r RESULT The successful action is displayed via Irm Operations Monitor Taking Snapshot The current status of an application can be backed up and restored later This allows restoring a changed application if these changes should be discarded Procedure 1 Right click on IRM Program in the tree then click Actions and then click Take Snapshot in the context menu ...

Page 89: ... The application is backed up and the successful action is displayed via IRM Operations Monitor Restoring Snapshot The current status of an application can be backed up and restored later This allows restoring a changed application if these changes should be discarded ...

Page 90: ...e disk The swapped device is indicated by a proxy which inherits and shows the minimum information of the device necessary for swapping in the device For swapped out devices synchronization is no more possible In order to synchronize swapped out devices the devices must be swapped in again You can swap single devices one after another or multiple devices in one step IMPORTANT It is strongly recomm...

Page 91: ... USER GUIDE 91 31 00282ES 01 RESULT The device is swapped out On the Property Sheet the proxy is displayed In the tree the IRM program is shown without any subfolders The successful swap out is displayed in the Irm Operations Monitor ...

Page 92: ... in In the tree the IRM program is restored showing all subfolders The successful swap in is displayed in Irm Operations Monitor Procedure Multiple Devices 1 To swap out the devices expand the BACnet network 2 Right click on the IRM Config folder in the tree then click Actions and then click Swap Out in the context menu RESULT The devices are swapped out The successful swap out is displayed in the...

Page 93: ...iple devices Among all devices one device is defined as the source and the other devices are defined as targets Then the master sync command allows rolling out the current application changes of the source device to all target devices per one step The master sync function works in online and offline mode on project level but not in the devices Hence the applications in the project do not have to b...

Page 94: ...nc section p 95 Example The following schematic shows a master sync group consisting of 4 devices with the same application A which has the program name A and application type A The application is cloned using device 1 as template and the devices 2 through n are selected for receiving this application They are forming a master group defined by application Type A Fig 13 Cloning Application Procedur...

Page 95: ...fferences in all target device applications are synchronized with the application of the source device NOTES The source target definition of the devices can be done before or after cloning of the device application and vice versa At least one device must include an application in order establish a master sync group via cloning If not already done clone the application as described in the section C...

Page 96: ...IDE 31 00282ES 01 96 2 Select the device you want to define as the source and then click Set as Source 3 Select the devices you want to define as the targets and then click Set as Target 4 Select the source device and then click Master Sync ...

Page 97: ...performing the master sync command the excluded values of the function block will be kept and not affected by the updated application This applies to the periodic and event programs Excluding function block values from master sync updates can be applied in the master device and in the target device s When excluding a function block value in the master device this particular value will be kept in a...

Page 98: ...e click the item in the Periodic program or Event program to display the Property Sheet 2 Expand the values area by clicking The Master Sync Enabled option is set to true by default 3 To exclude a function block value from master sync updates set the option to false 4 Click Save ...

Page 99: ...r a different IRM program name A new IRM application type is issued automatically by the software The new application can then be cloned to form the new master sync group This function can be applied in order to extend an existing application with new features for the usage in a similar environment e g the application of a small sized office will be used as basis for creating an application for a ...

Page 100: ...SPYDER MODEL 5 ENGINEERING TOOL USER GUIDE 31 00282ES 01 100 Fig 15 Splitting Off and Cloning Application ...

Page 101: ...ng OK RESULT The following dialog box displays 3 Enter a new name for the IRM program 4 Confirm by clicking OK RESULT In the Database pane in the IRM Program Name column the defined program name is displayed and in the IRM Application Type column the new application type is displayed With the device based on this split off application type you can now form a new master sync group by cloning the ap...

Page 102: ... Once the controller has found a valid MAC address it is saved in the controller permanently From now on and on every power up or system reset this MAC address is used for MSTP communication The permanent MAC address changes automatically if any of the following conditions happen the Auto MAC process is re triggered by Niagara via You are command using the MAC address 255 0xFF there is a conflict ...

Page 103: ... only the MSTP performance Swapping MAC Addresses If you want to assign to a controller A a MAC address which is already assigned to another controller B the following steps must be applied 1 Re assign a free MAC address in the range of 1 32 to the controller B which blocks the needed MAC address 2 Now assign the freed MAC address of controller B step 1 to the controller A 3 Assign the next needed...

Page 104: ...ess of an IRM controller and the Max Master setting can be changed in Niagara Procedure 1 Open the Property Sheet of the IRM controller 2 In Address change the MAC Address as desired 3 Confirm by clicking Save 4 If the changed address is the highest address on the MSTP network change the Max Master setting as follows 5 Expand the Config Device Object area ...

Page 105: ...INEERING TOOL USER GUIDE 105 31 00282ES 01 6 In maxMaster enter the highest MAC address of all controllers of the network 7 Confirm by clicking Save 8 Enter the same number of maxMaster in all controllers of the network ...

Page 106: ...me either from the work bench PC that is used for device engineering or from the supervisor This depends from where the function is performed Procedure 1 In the Database pane select TSync RESULT The Synchronize Time dialog box displays 2 Confirm the message by clicking OK RESULT The time of the devices are set to time of the supervisor ...

Page 107: ...ER GUIDE 107 31 00282ES 01 FIRMWARE DOWLOAD Allows updating the firmware in the controller via download Procedure 1 In the Database pane select the controller 2 Click Download Firmware button RESULT The File Chooser dialog box displays ...

Page 108: ...se NC objects in BACnet points and generate alarms and get it in Niagara To use the alarming function please refer to the N4 x BACNET UTILITIES DRIVER User Guide form no EN2Z 1020GE51 MISCELLANEOUS Value Updates after Device Power Failure If a device had a power failure and the device is restarting it will take 3 5 minutes until the values will be updated in the wire sheet To accelerate the value ...

Page 109: ...SPYDER MODEL 5 ENGINEERING TOOL USER GUIDE 109 31 00282ES 01 RESULT The Pin Slots dialog box is displayed 3 Click the slot you want to be hidden RESULT The pin icon at the selected slot will be removed ...

Page 110: ...ect and learning the application back from the controller the hidden slots will be visible again Sylk Wall Module Usage When using a Sylk or external wall module only one wall module per controller can be added and its address is fixed to 1 Procedure 1 Double click Event Program or Periodic Program in the tree 2 Open the honIrmControl palette 3 Scroll down to the Wallmodule group and then expand i...

Page 111: ...SPYDER MODEL 5 ENGINEERING TOOL USER GUIDE 111 31 00282ES 01 5 In the Name dialog box change the name if desired and then click OK 6 Double click the WmConfigHvacA icon to display the Property Sheet ...

Page 112: ...SPYDER MODEL 5 ENGINEERING TOOL USER GUIDE 31 00282ES 01 112 7 Once TR42H is saved the window will pop up to configure the SylkwallModule address ...

Page 113: ...ng Technologies Honeywell International Inc 1985 Douglas Drive North Golden Valley MN 55422 customer honeywell com 2019 Honeywell International Inc 31 00282ES Rev 01 08 19 8 On the property sheet select the sylk wall module type in Wm Model RESULT Under SylkWallmodule the fixed Wm Address can be viewed For detailed information on configuration of wall modules please refer the IRM NX Application Us...

Reviews: