background image

(


!"$ %&

'!"$ & "$

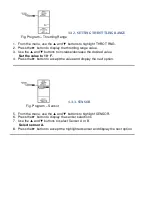
            Fig. Program – Throttling Range                           


1.  From the menu, use the   and   buttons to highlight THROT RNG. 

2.  Press the   button to display the throttling range value. 

3.  Use the   and   buttons to increase/decrease the desired value. 

Set the value to 10° F. 

4.  Press the   button to accept the value and display the next option.


( (   "  &

                  Fig. Program – Sensor 


5.  From the menu, use the   and   buttons to highlight SENSOR. 

6.  Press the   button to display the sensor selections. 

7.  Use the   and   buttons to select Sensor A or B. 

Select sensor A. 

8.  Press the   button to accept the highlighted sensor and display the next option.


Summary of Contents for T775M

Page 1: ...ttons to highlight MOD 1 2 Press the button to select MOD 1 to view the parameters Fig 2 shows RELAY 1 In MOD 1 THROT RNG replaces DIFFERNTL Fig Program Setpoint 1 From the menu use the and buttons to highlight SETPOINT 2 Press the button to display the setpoint value 3 Use the and buttons to increase decrease the desired setpoint temperature Set the temperature to 55 F 4 Press the button to accep...

Page 2: ...nu use the and buttons to highlight SENSOR 2 Press the button to display the sensor selections 3 Use the and buttons to select Sensor A or B Select sensor B 4 Press the button to accept the highlighted sensor and display the next option Fig Program Heat Cool 1 From the menu use the and buttons to highlight HEAT COOL Default HEAT 2 Press the button to display the heat and cool selections 3 Use the ...

Page 3: ...2 2 Press the button to select MOD 2 to view the parameters Fig Program Setpoint 1 From the menu use the and buttons to highlight SETPOINT 2 Press the button to display the setpoint value 3 Use the and buttons to increase decrease the desired setpoint temperature Set the temperature to 55 F 4 Press the button to accept the setpoint temperature and display the next option ...

Page 4: ...ecrease the desired value Set the value to 10 F 4 Press the button to accept the value and display the next option Fig Program Sensor 5 From the menu use the and buttons to highlight SENSOR 6 Press the button to display the sensor selections 7 Use the and buttons to select Sensor A or B Select sensor A 8 Press the button to accept the highlighted sensor and display the next option ...

Page 5: ...lect HEAT 8 Press the button to accept the highlighted selection and display the next option _____________________________________________________________________ Press the button to accept the highlighted selection EXIT This will display the main Program Menu screen Fig 1 Fig 1 1 From the menu use the and buttons to highlight RELAY 1 Fig 2 2 Press the button to select RELAY 1 to view the paramete...

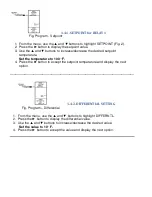
Page 6: ...F 4 Press the button to accept the setpoint temperature and display the next option _____________________________________________________________________ Fig Program Differential 1 From the menu use the and buttons to highlight DIFFERNTL 2 Press the button to display the differential value 3 Use the and buttons to increase decrease the desired value Set the value to 10 F 4 Press the button to acce...

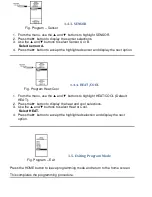
Page 7: ...splay the next option Fig Program Heat Cool 1 From the menu use the and buttons to highlight HEAT COOL Default HEAT 2 Press the button to display the heat and cool selections 3 Use the and buttons to select Heat or Cool Select HEAT 4 Press the button to accept the highlighted selection and display the next option Fig Program Exit Press the HOME button to leave programming mode and return to the ho...

Reviews: