background image


800-16571V1  7/14


Rev. A


T

T

u

u

x

x

e

e

d

d

o

o


T

T

o

o

u

u

c

c

h

h


W

W

i

i

-

-

F

F

i

i

®

®


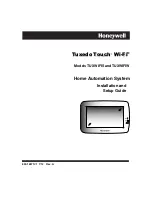
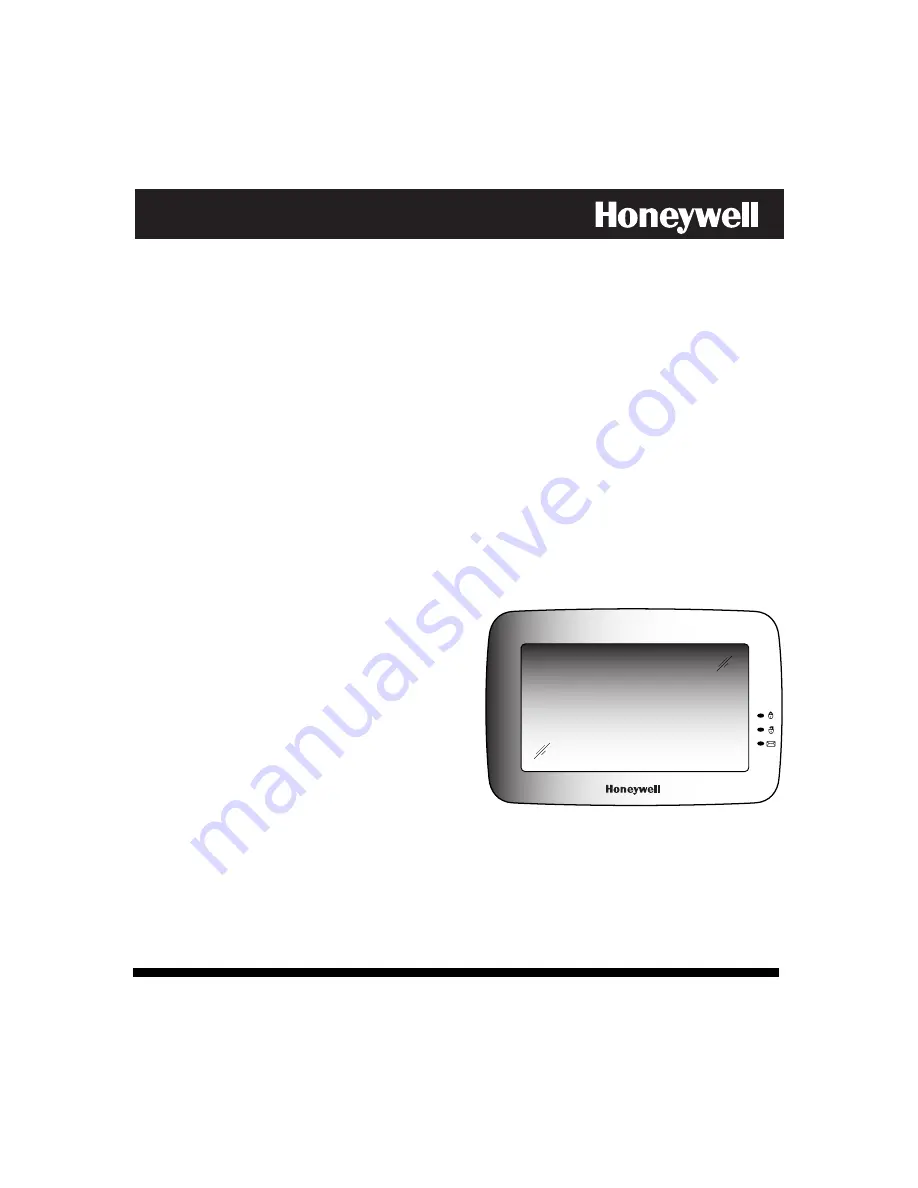
Models TUXWIFIS and TUXWIFIW


Home Automation System 


Installation and 

Setup Guide 


Summary of Contents for TUXWIFIS

Page 1: ...800 16571V1 7 14 Rev A T Tu ux xe ed do o T To ou uc ch h W Wi i F Fi i Models TUXWIFIS and TUXWIFIW Home Automation System Installation and Setup Guide ...

Page 2: ...Motion Limited and are registered and or used as trademarks in the U S Canada and countries around the world QuickTime is a registered trademark of Apple Inc registered in the U S and other countries iPad and iPhone are registered trademarks of Apple Inc iTunes and iTunes Store are registered trademarks of Apple Inc registered in the U S and other countries All other trademarks and service marks a...

Page 3: ...up a LAN Connection 15 Setup a WLAN Wi Fi Connection 16 Mounting and Wiring 17 Mounting 17 Wiring 18 Setup Menus 19 Brightness and Volume Control 19 Display Audio Setup 19 Language Selection if applicable 19 Weather Forecast 19 Temperature Unit 19 Adjust the Screen Timeouts 20 Clean Screen 20 Panel Configuration 20 Multi Media 21 Picture Setup 21 Camera Setup 22 Viewing Cameras 24 Video Setup 25 V...

Page 4: ...n Setup Account Setup 42 Remote Services 43 Using Total Connect with Tuxedo Remote Services 43 Controlling Automation Z Wave Devices Remotely 43 Creating Scenes in Total Connect 43 Viewing and Controlling Total Connect Scenes from Tuxedo 44 Enabling Devices for Total Connect 44 Total Connect Server Screen for Troubleshooting 44 Software Updates 45 System Information 45 Keypad Diagnostics and Calib...

Page 5: ...ports up to 30 scenes Cameras View up to four cameras at the same time Supports up to 32 cameras Video View videos from the Home screen A video converter is required See Video Setup section for details Security System Control the security system via Tuxedo menus Offers burglary protection and may provide fire carbon monoxide and emergency protection Weather Forecast The Weather forecast if enabled...

Page 6: ...m by returning to the Home screen and turning off the Armed and Ready status LEDs When the EN50131 Display is turned ON Tuxedo returns to the Home screen after 30 seconds Armed and Ready LEDs turn OFF The To Homepage After time setting changes to 30 seconds and the time is non selectable The Auto Slideshow After is preset to 1 minute and cannot be changed The Security Message and Lighting screen d...

Page 7: ...out the decimal point To obtain the software revision level on residential panels From the Home Screen press Setup System setup Central Station Setup enter installer code press the panel configuration icon the software revision level is displayed The keypad sound suppression feature available in some commercial panels is not compatible with the Tuxedo keypad The Voice Chime feature is a residentia...

Page 8: ...nt Addresses 1 2 and 3 30 may be used for older controls under Rev 10 supporting 3 AUI s see Important Note below Addresses 1 30 may be used for commercial Turbo controls Rev 10 and higher supporting 6 AUI s These addresses in the control panel are normally not defaulted for AUI type devices To enable the addresses you are using for keypads use an alpha keypad and follow the procedures for Device ...

Page 9: ...EDs FUNCTION COLOR STATUS Automation Occupancy Mode RED ON Residential mode system is set to AWAY or NIGHT Commercial mode system is set to CLOSE or NIGHT GREEN ON Residential mode system is set to HOME Commercial mode system is set to OPEN Data Entry Keyboard Throughout this document the user is required to enter information on the Tuxedo Keypad i e password device names etc Use the Data Entry Ke...

Page 10: ...About the System cont d 10 ...

Page 11: ... the Tuxedo Refer to the Control Panel Installation Instructions for additional information NOTE The Tuxedo ECP address 1 30 is defaulted to 1 the RIS Automation address 1 30 is defaulted to 25 The ECP RIS addresses can also be set later using the ECP Address menu from the CS Setup menu NOTES 1 If ECP Error is displayed the ECP address in the keypad is not valid for the panel that it is connected ...

Page 12: ... enabled uncheck the Primary RIS Device feature in the Tuxedo NOTE If using remote services one of the touch screen device AUI addresses is used by the control panel Refer to control panel Instructions for specific configuration Operating Modes Normal Mode Normal Mode is used when a control panel is connected and provides security functions Demo Mode Demo Mode allows the automation and multimedia ...

Page 13: ...The Safe Mode may be automatically entered by the program on a communication failure or may be entered manually on command To Exit the Safe Mode 1 Press the SAFE MODE bar SAFE MODE 2 Select Yes to return to the Normal Mode of operation Tuxedo resets and normal operation returns as long as the original conditions that caused the entry into Safe Mode do not still exist To Enter Safe Mode 1 Select Sa...

Page 14: ...ns in the Safe Mode however you do not have Voice system status messages Voice Chime announcements or Message capability if set to default Master Z Wave Scenes do not function in Safe Mode When an alarm occurs in the Safe Mode it is displayed on the Console mode screen only and is not shown on the Home screen The Slide Show feature does not start automatically in Safe Mode Time Date Setup If not a...

Page 15: ... When Override Display Settings is selected Display settings are overwritten and Tuxedo operates in low power mode Brightness Volume controls decrease to minimum levels Return To Homepage After time resets to 30 seconds Auto SlideShow After time reverts to Never When AC power is restored the original Display settings resume Remote Access Setup Tuxedo s remote access option offers built in web host...

Page 16: ... details Setup a WLAN Wi Fi Connection Press the WIFI ON button A pop up window displays This will switch off LAN Network do you want to continue Yes or No Use the scroll bar to locate a network from the list of Wi Fi Networks to connect to and highlight that field Or scroll to the bottom of the list and select Add Network Highlight each field to enter the required information for SSID Security Mo...

Page 17: ...mark the location of the mounting screws and the cut out for the keypad assembly on the mounting location Check for level 4 Install 4 screws supplied in the mounting surface leaving screw heads 1 8 above the mounting surface 5 Locate the case back over the mounting surface such that the opening is aligned with the wire cable access opening on the mounting surface while passing the wires cable thro...

Page 18: ...TARY 12 VDC POWER SUPPLY P N AD12612 BLACK GND RED 12VDC GREEN DATA TO CONTROL YELLOW DATA FROM CONTROL CONTROL TERMINAL STRIP AUX DATA IN DATA OUT AUX DATA IN DATA OUT AUX AUX Y G IP CONNECTION IMPORTANT When Tuxedo is powered from an auxiliary power supply always apply power to the control panel first and then to Tuxedo Failure to observe this sequence results in improper operation of the keypad...

Page 19: ...e effect Language Selection if applicable Tuxedo has the functionality to display four languages including multi lingual web page display Set the language feature as follows Press the Setup and Disp Audio Setup icons and then enter your Authorized Code if required Press the Language field and select from English French Canadian Latin American Spanish or Latin American Portuguese English is the def...

Page 20: ...ss Continue or Cancel to exit or press the Save icon NOTE When the Continue icon is pressed the message Touch Screen Disabled for 30 Seconds is displayed During these 30 seconds the touch screen should be wiped clean of fingerprints using a mild soap solution and a soft cloth When the counter reaches zero the window automatically closes and the touch screen is active IMPORTANT Do not use an abrasi...

Page 21: ...wing transition desired Standard Horizontal Vertical or Fade Out After images have been added press the Play Image icon to begin the slide show To remove an image from the slide show select the image and press the Deselect Image icon To move to the Next Image press to go back to a Previous Image press To set a picture as wallpaper 1 Use the slide bar to highlight the file you want to be displayed ...

Page 22: ...his step until all cameras are discovered If the camera information is not discovered automatically press the Add icon to enter information on the Add New Camera screen 4 To edit information highlight the camera name and press the Edit icon Highlight each field and enter the required information see Add Edit Options below and then press Save To retrieve camera settings and connect to the camera pr...

Page 23: ...entication Open System or Shared Key Passphrase then press GENERATE Key must consist of 10 hexadecimal characters c Press Apply to All to set cameras for wireless operation Press Save when done A pop up window displays Info XXX XXX X X WIFI Configuration Saved d Press the Settings icon to enter Video Network Wireless and Other settings if required refer to Advanced Camera Settings below NOTE Camer...

Page 24: ... WiFi enabled devices and Total Connect refer to the Remote Access section later in this document Camera Icons CAMERA SETUP PLAY PAUSE AUTO PAN QUAD VIEW FULL VIEW PAN TILT CONNECT RESET BACK To view cameras locally do the following 1 Press the Multi Media and Camera icons a Highlight the View Cameras button images from installed cameras appear Use the Quad View button to view up to four cameras o...

Page 25: ...ht hand side of the keypad to reset Videos cannot be played when the EN50131 Display is turned ON To exit Full View mode at any time while a video is playing press anywhere on the screen When in Full View mode there is an 8 10 second delay for video display Video Recording Event Viewing Recording Setup The camera Recording feature allows you to create a scene for recording two minutes of video eve...

Page 26: ...playback for the duration of less than the full two minutes If this occurs it is recommended that you lower the frame rate and resolution to 320 x 240 5 FPS Recorded video events are always in 24 hour format regardless of keypad time format Removing the SD card during video recording and playback may cause SD card corruption and loss of data To ensure recording is not in progress before removing t...

Page 27: ...p icon and select the Filter by Camera button to view a specific cameras event select the Show All button to view all camera events or select Filter By Critical to view if enabled a minimum of two events that have been stored when the SD card is not available Press Save when done Highlight the event from the list to view and press Play Use the Delete icon to remove the event video ...

Page 28: ...Multi Media cont d 28 ...

Page 29: ...User Levels in commercial panels See the following chart for corresponding User Levels in Residential Panels Residential Panels and Screen Security Authority Level in Panel Matching Authority Level in Keypad Access Level Chosen in Keypad Screen Security Installer Master Manager Operator A Operator B Operator C System Master Master No Yes Yes Yes Yes Yes Partition Master Master No Yes Yes Yes Yes Y...

Page 30: ...Authority Levels Authority levels define the system functions a particular user can perform Depending on the authority assigned to you there are certain system functions you may be prohibited from performing The following information describes the authority levels available in Tuxedo and provides the equivalent authority level name found in your alarm system manuals The authority levels available ...

Page 31: ... be programmed first before it can be assigned to a user How to Add an Existing User to a Second Tuxedo After adding a user to the first Tuxedo the same user can be added to a second Tuxedo From the second Tuxedo go to User Setup and enter the same user name and same user code refer to How to Add a User above The second Tuxedo will automatically update the user information Press Save Delete a User...

Page 32: ...e output functions by enabling disabling as follows Press the Setup System setup and Advanced Setup icons If required enter your Authorized Code Press the Output Setup icon and select the outputs to display or not display on the Output screen then press Apply A confirmation window is displayed stating Information Settings saved Press OK to save the setting If the Back icon is pressed a confirmatio...

Page 33: ...vice is displayed WARNING Automation is intended for lifestyle convenience Do not use automation for life safety and property protection Add a Door Lock 1 Assemble the Z Wave door lock according to the manufacturer s directions Be sure the door lock orientation handedness is correct 2 Refer to the Door Lock Instructions and connect necessary cables then install batteries 3 Enroll the door lock wit...

Page 34: ...ywell thermostat enrollment procedure may vary Refer to the Thermostat instructions Some thermostats do not update temperature status automatically i e Wayne Dalton IMPORTANT Honeywell is not responsible for property damages due to improper setting of the thermostat modes Abort a Z Wave Action If you inadvertently make a wrong selection add delete or remove failed device press the Abort Operation ...

Page 35: ...s the defined device activates The programming of these triggers and actions is called Scenes Up to 10 scenes can be defined Scenes must have at least one trigger and one action to work NOTE Scenes cannot be triggered when using panic zones 995 996 and 999 on commercial panels and panic zones 95 96 and 99 on residential panels A scene consists of a trigger an optional condition and up to three act...

Page 36: ...select from DISARM AWAY STAY NIGHT AWAY SECURED or ALARM Enter User Code if required NOTES AWAY triggers upon arming away AWAY SECURED triggers when exit delay has expired Set the Thermostat In the Trigger Condition Action box press Add Press the THERMOSTAT button and select a Thermostat Device from the drop down menu Use the ABOVE and BELOW buttons to increase decrease the temperature or press th...

Page 37: ...e box next to the device s that you want to be controlled in this Room and press the Save icon Select the Edit icon to make changes to existing Rooms use the Delete icon to delete a Room If settings were changed a pop up confirmation window displays Settings changed Do you want to save Select Yes or No Group Setup A group is a defined collection of the same type of Z Wave devices such as only ligh...

Page 38: ...ew or Removed devices When devices are added or removed from the Z Wave network the device information needs to be updated in the Tuxedo To perform this update do the following 1 Press the Add Device icon on Primary Tuxedo controller press the Add Device icon on Secondary Tuxedo controller The controller scans for device changes and the message is displayed Devices added Successfully Tuxedo Synchr...

Page 39: ...l to delete the list of devices Removing a Secondary Tuxedo To remove the Secondary Tuxedo Controller do the following 1 Press Remove Device on the Primary Tuxedo press Remove Device on the Secondary Tuxedo Both Tuxedos display Device Removed and the Secondary reverts back to the Primary Tuxedo ...

Page 40: ...Z Wave Setup cont d 40 ...

Page 41: ...a mobile device to Tuxedo view the Local System Control Tablet Smartphone training video and then do the following 1 Verify the Tuxedo is connected to the Internet via Wi Fi or its Ethernet connector 2 At your Smart Phone or Tablet navigate to the Settings feature turn ON the Wi Fi setting and select the router to connect to Enter a name and password if required Open the browser and enter the IP A...

Page 42: ...he premises network To set up a remote access log in do the following 1 Press the Account Setup button 2 Enter the desired user name and password Passwords must be 8 alphanumeric characters and must include at least one uppercase letter and one number 3 Check the box for Secured Remote Access HTTPS optional and press Save A Confirmation window displays the message Settings saved The new user is di...

Page 43: ...security certificate Controlling Automation Z Wave Devices Remotely Use Total Connect to control Z Wave devices lamp modules binary switch dimmer modules multilevel switch thermostats etc from a smart phone iPad AndroidTM Tablet Blackberry or PC 1 Access the Total Connect account and navigate to the Automation section of the dashboard 2 Select a displayed device and click the desired action Refer ...

Page 44: ...upgrade 4 Press Save when done 5 After devices have been enabled for Total Connect follow the Total Connect prompts to synchronize the data with Tuxedo Syncing is required before the enabled devices will display in Total Connect NOTES 1 Device IDs for Z Wave devices could be different on Tuxedo and Total Connect web pages 2 On Total Connect the maximum number of supported devices is 40 switches 3 ...

Page 45: ...eeds to be connected to the internet via LAN or WIFI An SD card with 200 MB of available space is required Press the Remote Upgrade Setup button to set the time period that you want to upgrade the system in the Arm condition Select the Duration Type in hours or days and then press on the duration value to enter the number of Hours between 720 1440 hours or Days between 30 60 days Press Save when d...

Page 46: ...46 Software Updates cont d ...

Page 47: ...icon for LCD Display Test a series of screens appear After each type of display you are asked if the display was proper If the response to all questions is yes the LCD Display Test message area of the Diagnostics screen displays Passed Audio Test Press the icon for Audio Test Testing is displayed while beeps sound from the speaker At the conclusion of the test a pop up Confirmation Window is displ...

Page 48: ...ontroller shift to Secondary and Secondary Controller shift to Primary Z Wave Basic Command Set On or Off With the status of the controller in the P Primary state press the icon for Z Wave Primary Controller Shift to Secondary To shift the primary controller role to a handheld controller follow the handheld controller manufacturer s instructions A pop up window is displayed with the following Role...

Page 49: ...de number to route to Press the Assign Router test icon If route was successful the message Transmit complete is displayed If the route could not complete successfully the message Transmit no ACK is displayed NOTE Nodes must be in the keypad Z Wave list prior to selection Keypad Reset Press the Setup System setup and Advanced Setup icons and enter your authorized code Press the Keypad Reset icon t...

Page 50: ...Keypad Diagnostics and Calibration Tests cont d 50 ...

Page 51: ...bles of other Partitions are enabled the zones that created the conditions cannot be viewed You must go to that zone s home partition to view If field 1 11 Zone Bypass After Disarm is enabled you must use the keypad s Console Emulation Mode and the commands Code 64 unbypass all or Code 6 Zone Number unbypass zone to remove zone bypasses The First to Alarm Display Lock feature field 1 10 is not sup...

Page 52: ...ck tile or concrete walls block more of the RF signal than walls made of wooden studs and drywall Wall mounted Z Wave devices installed in metal junction boxes will suffer a significant loss of range approximately 20 since the metal box blocks a large part of the RF signal WARNING NOT FOR USE WITH MEDICAL OR LIFE SUPPORT EQUIPMENT Z Wave enabled devices should never be used to supply power to or c...

Page 53: ...amera iPCAM WO Camera iPCAM WL Camera ACU Wireless Analog Converter Unit Yes Yes Yes Yes Cisco WVC210 TrendNet TVIP 422 TV IP422 TV IP522WN TV IP512WN TV IP322WN TV IP252P No Axis Communication M10011 W Honeywell Commercial ONVIF Camera NOTES A maximum of 4 cameras can be enabled for remote viewing with the same account activation If more than 4 cameras are needed for remote viewing user can use m...

Page 54: ...eadbolt Lock Schalge Link Deadbolt Lock Schlage Link Lever Lock Kwikset Smartcode Lever lock Kwikset Smartcode Deadbolt Lock Thermostats Honeywell ECC Wayne Dalton Zwave Thermostat Trane Zwave Thermostat Appliance HomeManageable Appliance Module Wayne Dalton Small Appliance Module GE Wireless Lighting Control Plug in Appliance Module Lights Leviton ViziaRF Switches Leviton ViziaRF Dimmers Leviton ...

Page 55: ...igned pager Telco 1 Cut The system is not able to communicate with the central monitoring station over the primary phone line Telco 2 Cut The system is not able to communicate with the central monitoring station over the secondary phone line Wireless Failure The system is not able to communicate with its wireless devices NOTE If multiple faults exist press the More Choices icon and then the Show Z...

Page 56: ...s to the last screen viewed Panic Displays Emergency functions as programmed by the installer See programming the Control Panel note Note This icon is displayed and active on all screens except while in the Clean Screen mode during an LCD Display test in Diagnostics and from the Video and Camera screen Control Panel Message This icon alerts the user to a Control Panel Message Setup Accesses the Se...

Page 57: ...Notes and Compatible Devices cont d 57 ...

Page 58: ...Notes and Compatible Devices cont d 58 ...

Page 59: ...Notes and Compatible Devices cont d 59 ...

Page 60: ...Notes and Compatible Devices cont d 60 ...

Page 61: ...Notes and Compatible Devices cont d 61 ...

Page 62: ......

Page 63: ...he receiver control Move the antenna leads away from any wire runs to the receiver control Plug the receiver control into a different outlet so that it and the radio or television receiver are on different branch circuits Consult the dealer or an experienced radio TV technician for help INDUSTRY CANADA CLASS B STATEMENT This Class B digital apparatus complies with Canadian ICES 003 Cet appareil nu...

Page 64: ...uite 100 P O Box 9040 Melville NY 11747 Copyright 2014 Honeywell International Inc www honeywell com security Ê800 16571V1HŠ 800 16571V1 7 14 Rev A For Online Support visit http www security honeywell com hsc resources MyWebTech ...

Reviews: