Honeywell
2
Unpack Everything
One
Camera
8-pin terminal block for alarm input/output
One CD containing the software
Prepare for Installation
Select the lens to use with your camera. The VENTI
series Network Camera supports the use of a manual iris
or DC iris lens. When using a DC iris lens, it should be
connected to the camera via the 4-pin square socket
located at the side of the camera.
Mount the Camera
1. Attach the camera to a pending mount.
Insert the screws on the camera stand into either of
the screw holes on the base. Then tighten them up.
2. Mount the camera onto the ceiling/wall and fasten it
securely.
Connect the Wiring
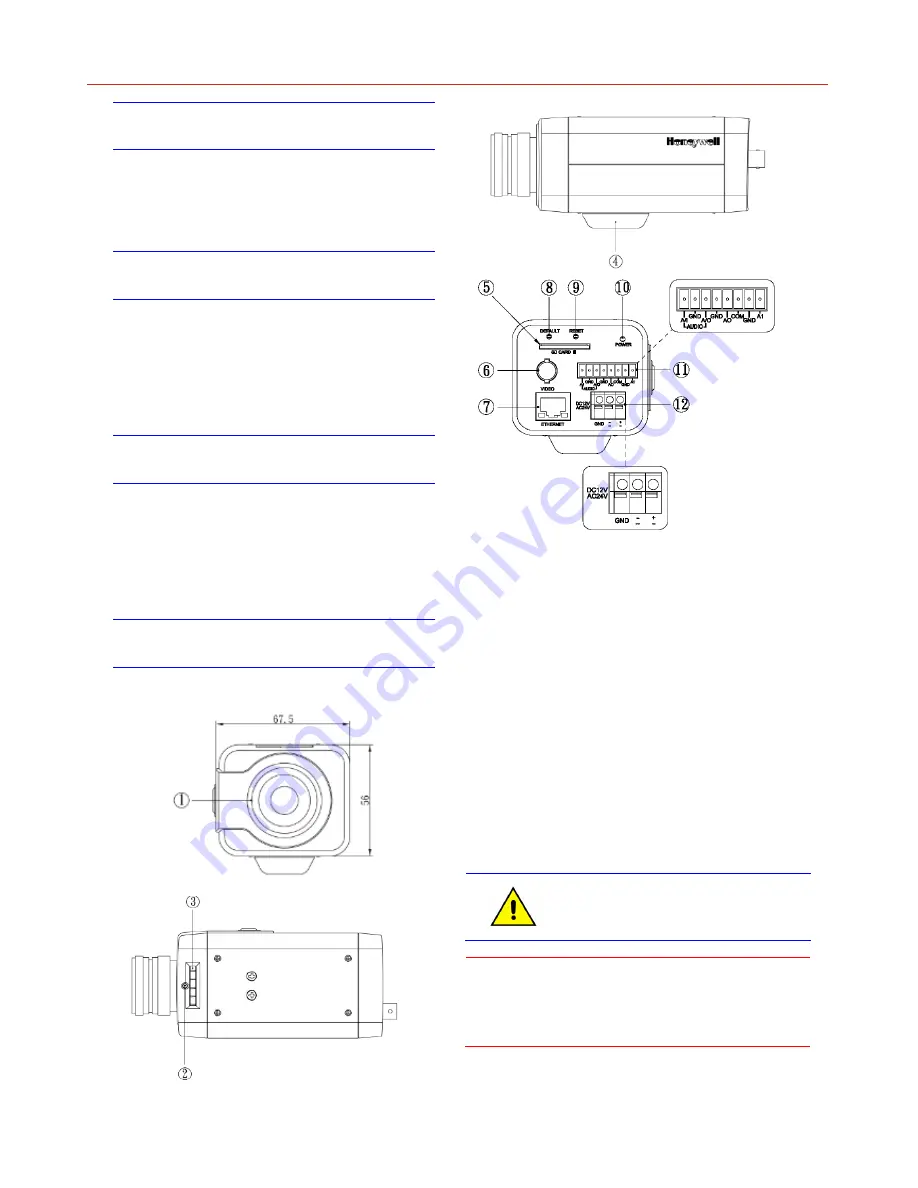
1. CS mount: connect the lens with the camera
2. Screw
3. Back
focus
Adjustment
4. Base: connect the camera with the tripod
5. SD card slot: insert a SD card into this slot for
recording and storage
6. Video: video output port
7. RJ45 Ethernet Connector/ PoE: insert the RJ45 cable
for network connection. It also supports PoE (Power
over Ethernet).
8. Default: reset all of the camera parameters to factory
default.
9. Reset Button: restart the system.
10. Power Indicator: Red light indicates power connection.
11. I/O Connector: Input/ Output Connector
12. Power Terminal: DC12V/AC24V, red port: power
+/white port: power –/black port: GND. Make sure to
connect the power connector to correct ports (+ and –)
when the power supply is DC12V.
For secure installations, protect surface
mounted cables with plastic or metal
cable covers.
Caution
To avoid damage to the camera, never connect
more than one type of power supply (PoE
IEEE802.3 Ethernet or 12V DC or 24V AC
power plug) at the same time


