52
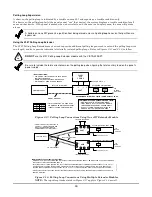
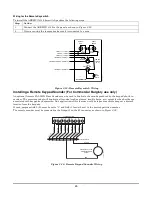
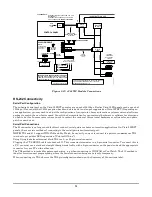
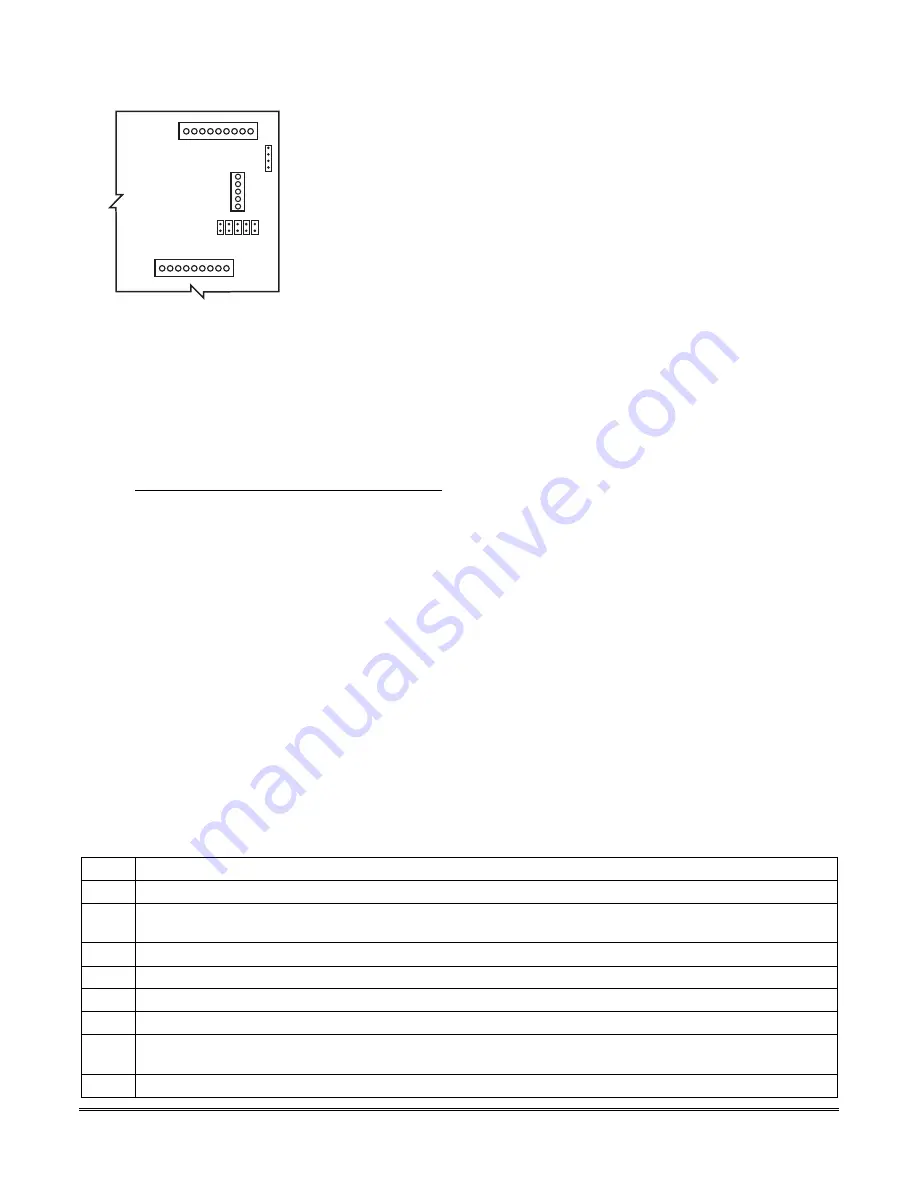
J2
Control Panel
PC Board
PC
PRN
J13
TXD
RXD
RTS/DTR
CTS/DSR
GND
J3
V128FBPT-001-V0
Panel
9-Pin
25-Pin
TXD
2 (All Configurations)
3 (All Configurations)
RXD
3 (WIN-PAK or Pro-Watch)
2 (WIN-PAK or Pro-
Watch)
RTS/DTR
8 (WIN-PAK or Pro-Watch)
5 (WIN-PAK or Pro-
Watch)
CTS/DSR
4 (Printer Only)
20 (Printer Only)
GND
5 (All Configurations)
7 (All Configurations)
When connecting via J13, use the VT-SERCBL cable assembly. To connect this to a PC, you must use a standard
straight through serial cable with a 9-pin connector on the panel end and the appropriate connector for your PC on the
other end.
IMPORTANT:
When connecting the VT-SERCBL cable into header J13, the red strip (pin 1) on the ribbon cable should
be to the left.
NOTES:
1.
TB4 and J13 cannot be used simultaneously
. If you are using one of these connection points to
communicate with the panel, you MUST temporarily disconnect the other wiring.
2.
You cannot use WIN-PAK or Pro-Watch and the Printer at the same time.
Serial Programming Options for Automation Applications
NOTE:
You cannot simultaneously use a serial printer and Home/Facility Automation.
The following group of fields must be set to use the serial port for automation applications:
∗
05 Enter 1 to send System Event Messages via RS232 port
∗
14 Enter 1 to enable Home/Facility Automation Control Input
1
∗
78 Extended Home Control Events (Enter 1 for extended)
1
∗
79 Home Control Event Types (Enter 1 for each event type to be enabled; 0 to disable)
1
∗
80
Enter 1 to improve automation performance by disabling fault/restore messages over the automation
port. If you require live mapping while the system is disarmed, you must enter 0 here.
Connecting the Transformer
NOTE:
Upon a total power failure, the control unit will ignore and not transmit alarm supervisory information for a
stabilization period of 120 seconds following restoration of power. Within 60 seconds at the end of the stabilization
period, the control unit shall initiate the transmission of a power restoration signal code. If this report code is enabled
(see report code programming in the Programming Guide), this is the report that will be sent.
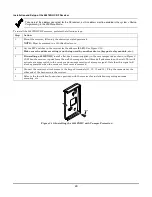
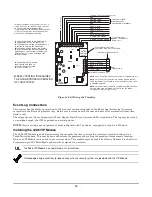
To connect the 1451 transformer to the control, perform the following steps:
Step
Action
1
Remove the front cover of the enclosure.
2
Mount the enclosure to the wall near the VISTA-32FBPT control panel. The enclosure has four mounting
holes on its back surface for this purpose.
3
Run 120VAC wiring to the enclosure in conduit.
A dedicated circuit must be used.
4
Use wire nuts to splice the 120VAC wires to the transformer’s white and black primary leads.
5
Connect the earth ground post on the back of the enclosure to a good earth ground.
6
Run 16AWG wire in conduit from the enclosure to the control panel.
7
Use wire nuts to splice the transformer blue 18VAC secondary leads to the 16AWG wire. Connect the 16AWG
wire at the control panel to terminals 1 and 2.
8
Replace the front cover of the enclosure and fasten it with the screws supplied.
Summary of Contents for VISTA-32FBPT
Page 2: ......
Page 62: ...62 ...
Page 64: ...64 ...
Page 84: ...84 ...
Page 88: ...88 ...
Page 94: ...94 ...
Page 100: ...100 NOTES ...
Page 101: ...101 NOTES ...

