WEBVISION™
95-7769—01
32
LONSpec Changes
Complete the following steps for migrating the existing LCBS
sites to WebVision:
1.
Ensure that LonSpec database which is used to
commission the site is ready. Open the LonSpec project.
Click
Network
>
Edit
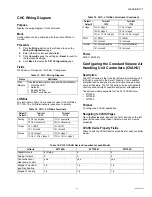
on the menu bar. The
Edit
Network
dialog box appears.
Fig. 46. Edit Network dialog box.
2.
Click
Advanced Features
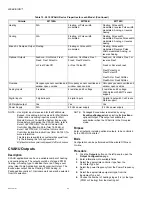
. The
Advanced Features
dialog box appears.
Fig. 47. Advanced Features dialog box.
3.
Set the
Domain index for non-zero length domain
to
0 (LNS based systems)
. Click
OK
to save the
changes.
4.
Modify the original LonSpec project so that it does not
contain unsupported devices. The following are
frequently used:
a. XL15A
b. XL15B
c. Command Display 1 and 2
d. T7300
e. RapidLink/SLTA/PCLTA used by LonSpec, LonSta-
tion and XL15A.
f. RF Gateway
g. CX-VFD
It is highly recommended not to have these devices
physically connected to the Lon Network as it could
result in partial upload of binding information into WebVi-
sion, or worse interfere with WebVision functionality.
5.
Disconnect WebVision from the network and re-
commission all the devices using LonSpec.
NOTE: When re-commissioning, please use full commission
command, not quick commission.
6.
After re-commissioning, disconnect LonSpec from the
network.
WebVision Configuration Steps
Start the migration process on a fresh WebVision without any
existing config file. There should not be any devices present in
WebVision
1.
Configure WebVision as given in the Quick Start Guide
and connect it to Ethernet and LON network.
2.
Logon to WebVision through internet browser.
3.
Click
System
>
Network Setup
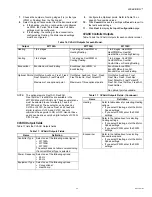
. In
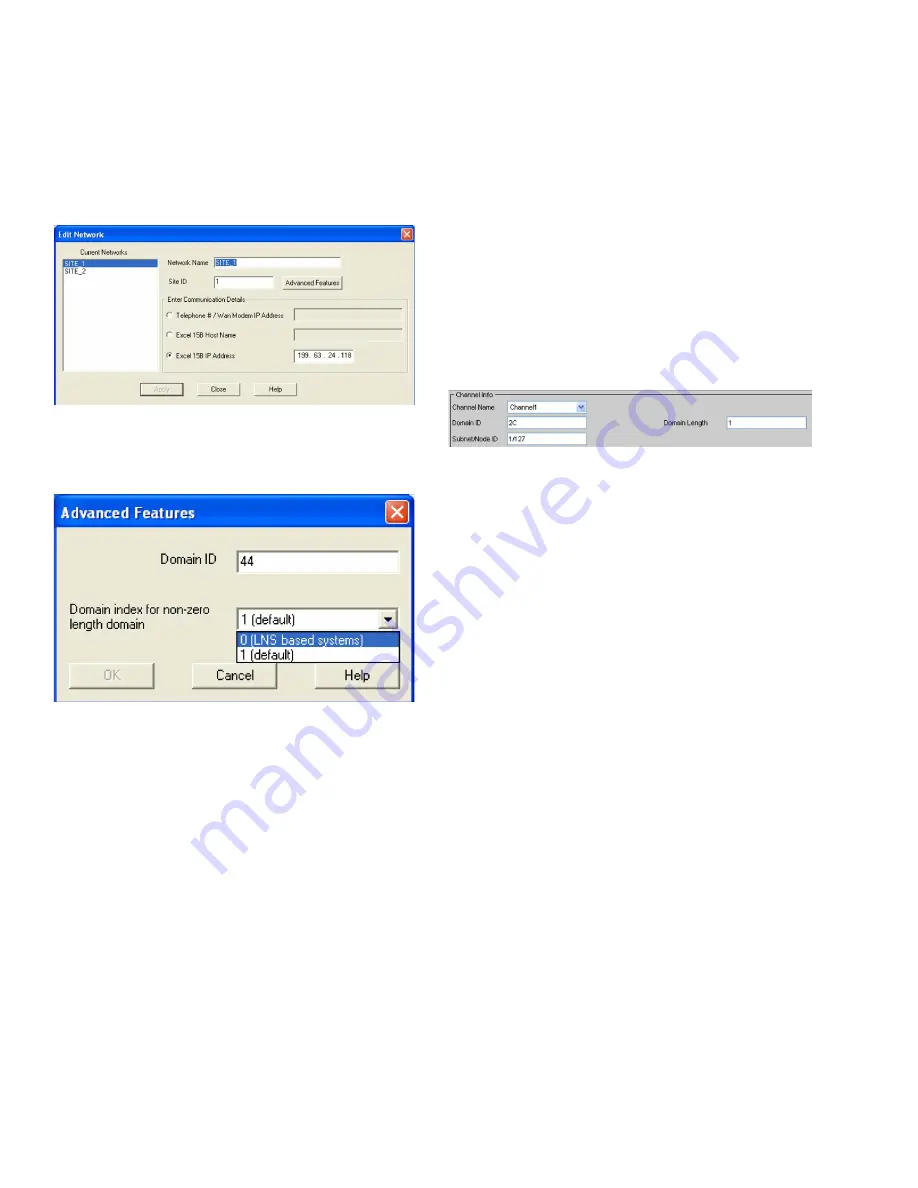
Channel Info
, set
the
Domain ID
to the same domain ID configured in
LonSpec typically 2C (44 decimal). The ID must be
specified in Hex format.Click
Save
to save the changes.
Fig. 48. Channel Info - Domain ID and Domain Length
fields.
4.
Click the
Devices
tab and go to
Device List
screen.
5.
Click
Discover
. A dialog box appears. Select
Channel
as Channel 1 and click
Discover
. A progress bar
appears indicating the discovery progress.
6.
After the discovery is complete, all the discovered
devices are listed on the left side of the table. Review
the subnet/node ids of discovered devices to ensure
that there are no conflicts. WebVision will detect the
clash and on confirmation from the user, it would
change the subnet/node id of the device.
NOTE: Changing subnet/node id will break any bindings
going in and out of that device. It is suggested that
the user find the clash manually and rectify them
through LonSpec.
7.
Select all the devices by clicking on each device (or
click the SelectAll box) and then click
Add
to add them
to WebVision database.
NOTE: The user should click on the device to select the
device in the discovered list to do further operation
on them. Although mouse scrolling across the
discovered devices records appear as selection,
they are actually not selected
8.
Enter a name for each device that should appear in then
UI and click
Done
to complete the discovery process.
9.
Select all the devices and click
Upload
to upload the
device configuration onto WebVision. A progress bar
appears indicating the progress of the Upload
operation. Once the upload is complete, the
Synced On
option is enabled for each device.
10.
Ensure that all the devices are in
Auto
mode in the
Mode
Column. If any device is in Manual or any other
mode, select that device and click
Set Mode to Auto
.
11.
Click the
Device Bindings
sub-tab next to
Device List
subtab.


