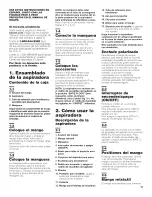
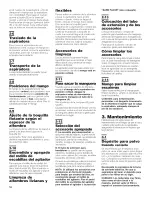
background image

Summary of Contents for Nano-Lite U2440-900

Page 1: ...4 Attach handle 4 How to use 5 7 Cleaner description 5 Transporting 6 Cleaning rugs 7 Using tools 7 Cleaning stairs 7 Maintenance 8 10 Emptying dirt cup 8 Filters 9 Lubrication 11 Clearing blockages 12 13 Agitator brush roll 11 Agitator brush roll belt 9 10 Service 12 If you have a problem 12 Warranty 13 Parts accessories mail reorder form 27 Yow for choosing HOOVER t 0_ 2006 _ i_he Hoover Comlpan...

Page 2: ...an Rd 310 921 6533 fax Suite 150 Meridian ID 83642 1834 Fulton Ave 208 855 4775 Sacrarnento CA 95825 208 855 4776 fax 916 481 4860 916 481 1528 fax ILLINOIS 1372 Winston Plaza 3628 Geary Blvd Melrose Park IL 60160 San Franciso CA 94118 708 344 3800 415 668 5101 708 344 3853 fax 415 668 5976 fax 4328 East New York Street 699 Lewelling BIvd Aurora IL 60504 Suite 182 630 499 5728 San Leandre CA 94579...

Page 3: ...lean filter frequently when picking up very fine materials such as powder Use extra care when cleaning on stairs Do not put any object into openings Do not use with any opening blocked keep free of dust lint hair or any thing that may reduce air flow Always disconnect cord from electrical outlet before servicing the cleaner Unplug cleaner when not in use Turn off all controls before unplugging Do ...

Page 4: ...h item shown Make sure all parts are located before disposing of packing materials Press button A on back of handle base and push handle down until metal button on handle snaps out Press button A to raise and lower the handle 1 The hose is packed in a plastic bag for shipping Remove hose from bag before assembly Position hose over rack and into hose tube B NOTE Hose must be connected at the hose t...

Page 5: ...d helps prevent cleaner from marking furniture 11 Hood 12 Stair cleaning handle 13 Crevice wand 14 Carrying handle 15 Cord clip 16 Handle release button 17 Cord hooks top hook rotates for quick cord release Operate cleaner only at voltage specified on data plate on back of cleaner This cleaner is intended for household use Polarized plug To reduce the risk of electric shock this appliance has a po...

Page 6: ...dle up until it locks into desired position TYansporting cleaner To move your cleaner from room to room put handle in upright position tilt cleaner back on rear wheels and push forward Handle positions The handle of your cleaner has three positions upright for storage and when using cleaning tools operating position for general operation on carpet and floors low for reaching under low furniture St...

Page 7: ...able tops books lamps lighting fixtures venetian blinds baseboards shutters and registers D Crevice wand may be used in tight spaces corners and along edges in such places as dresser drawers upholstered furniture stairs and baseboards Attach the dusting brush to the end of the crevice wand for extra reach NOTE For extended above floor tool use it is recommended to turn the agitator brush roll OFF ...

Page 8: ...nd clean the filters often How to empty Press dirt cup release button B and pivot cup out Hold dirt cup over trash receptacle Press dirt cup door release button C to open dirt cup door D Larger debris collected in the dirt cup will fall out C eaning fi lers Allergen pleated filter Disconnect cleaner from electrical outlet Do not use cleaner without dirt cup or filters in place With dirt cup door o...

Page 9: ...ck of housing What to buy When purchasing a new final filter ask for HOOVER filter package No 40110 013 filter part No 1BEB124710000 Belt replacement The belt is located under the cleaner hood and should be checked from time to time to be sure it is in good condition When to replace Disconnect cleaner from electrical outlet WARNING Agitator brush roll can start suddenly Unplug cleaner before repla...

Page 10: ...move belt from motor shaft E Discard used belt Position new belt on agitator brush roll With lettering on outside of belt insert agitator brush roll through belt and position belt in groove F on agitator brush roll installing agitator brush roll Grasp agitator brush roll firmly and fit it into position by first sliding end opposite the belt into the rectangular slot G on side of cleaner Pull other...

Page 11: ...ondition of brushes move edge of a card across bottom plate while turning agitator brush roll To maintain cleaning effective ness replace agitator brush roll if brushes do not touch card To remove agitator follow Items 3 11 through 3 16 Install new agitator brush roll follow ing Items 3 19 through 3 23 Lubrication The motor is equipped with bear ings that contain sufficient lubrica tion for the li...

Page 12: ... or breaker Blown fuse or tripped breaker Replace fuse or reset breaker Possible Cause Possible Solution Broken or worn belt Replace belt Agitator brush roll worn Replace agitator brush roll Dirt cup full Empty dirt cup Blockage in air flow passages Clear blockage Agitator brush roll is OFF Step on pedal Fig 2 9 to turn agitator brush roll ON Filters dirty Clean filters Figs 3 4 through 3 10 Possi...

Page 13: ...es not apply if the appliance is used in a commercial or rental application This warranty only applies when the product is in use in the country or territory in which it is purchased Warranty service can only be obtained by presenting the appli ance to one of the following autho rized warranty service outlets Proof of purchase will be required before service is rendered 1 Hoover Sales and Service ...

Page 14: ...mbustibles como gasolina o restos de madera lijada ni en reas donde pudieran encontrarse presentes Apague siempre este aparato antes de conectar o desconectar la manguera No use la aspiradora sin tener el dep6sito para polvo o los filtros en su lugar Vacie el dep6sito y limpie con frecuencia cuando aspire materiales muy finos como talco Tenga especial cuidado al limpiar escaleras No coloque ningQn...

Page 15: ...enviada con el rodillo de escobillas del agitador en la position BARE FLOOR piso expuesto Antes de limpiar alfombras pise el pedal fig 2 1 No 8 para colocar el rodillo de escobillas del agitador en CARPET aifombra 2 COmo usar ia aspitadora Descripci6n de la aspitadora 2 1 1 Asidero del mango 2 Mango retractil 3 Manguera 4 Interruptor de encender y apagar ON OFF 5 BorOn para soltar el deposito para...

Page 16: ...B para sacarla Cuando haya terminado de limpiar con los accesorios vuelva a colocar el extremo de la manguera dentro del tubo y girelo para trabarlo en su lugar 2 12 Selecci6n de accesorio apropiado C La escobilla para desempoIvar se usa para muebles tallados superficies de las mesas libros la mparas accesorios de iluminaciOn persianas venecianas z6calos postigos de ventanas y rejillas de ventilac...

Page 17: ...gura 3 2 Saque el filtro de espuma negra A de debajo de las lengOetas Enjuague el filtro de espuma bajo un chorro de agua fria Permita que el filtro se seque al aire durante 24 horas antes de volver a colocarlo en la aspiradora Vuelva a colocar el filtro inserta ndolo debajo de las lengOetas en la parte posterior del cuerpo de la aspiradora Qu_ comprar Cuando compre un nuevo filtro final pida el p...

Page 18: ...onos bajo Vacuum Cleaners Household Aspiradoras Articulos del hogar O consultando la lista de Centros de ventas y servicio de Hoover provista con esta aspiradora O consultando la secci0n Service Servicio de Hoover en Internet hoover corn 0 Ilamando al 1 800 944 9200 para obtener una referencia automatizada de las ubicaciones de los centros de servicio autorizados solamente en EE UU No envie su asp...

Page 19: ... obra y las piezas necesarias para dejar este aparato en buen estado de funcionamiento durante el periodo de garantia Esta garantia es va lida si el aparato fue comprado en los Estados Unidos en sus territories y poses ones en Canada o en una tienda situada en una base militar de los EE UU Los aparatos comprados en otros lugares esta n cubiertos por una garantia limitada de un ano que cubre solame...

Reviews: