150
mm
max.
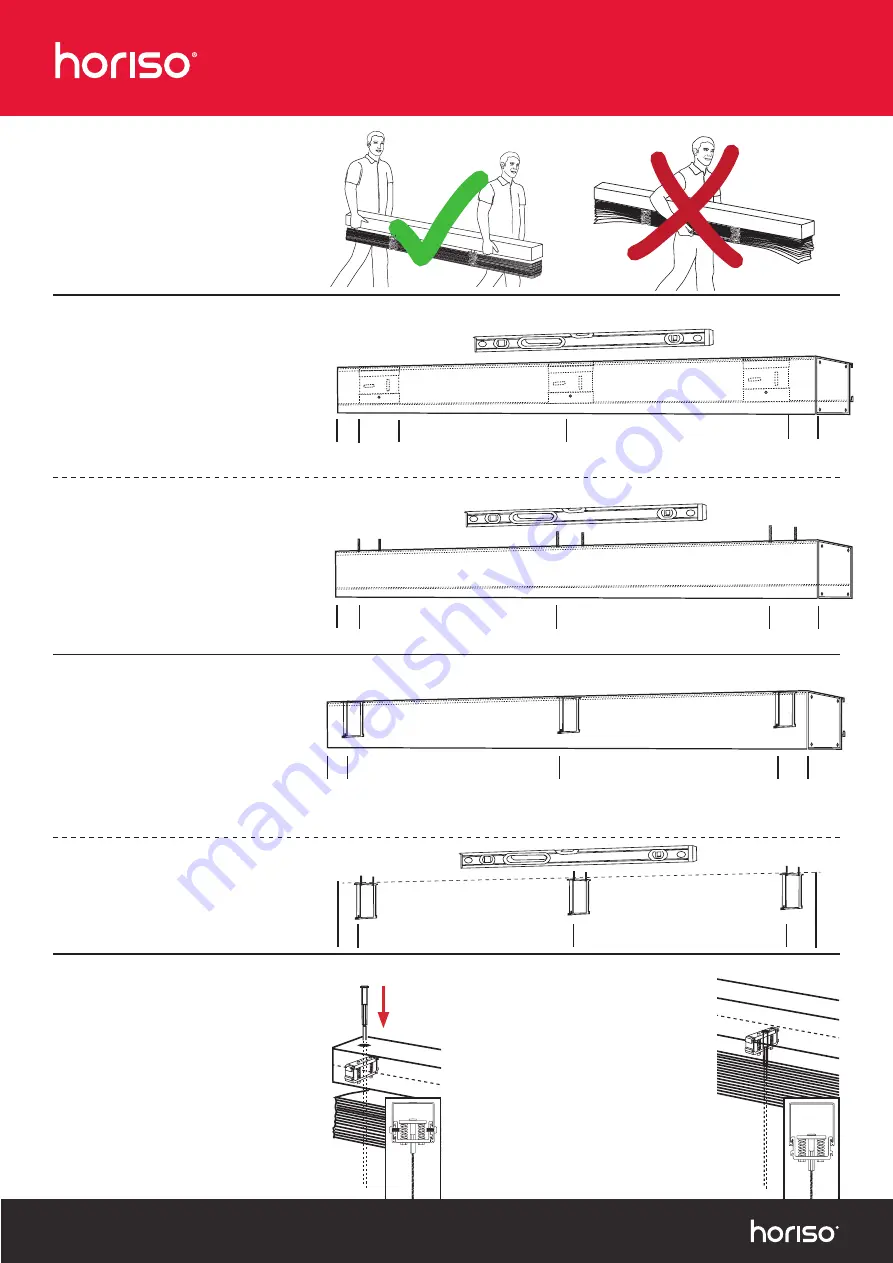
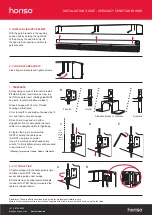
2 - PELMET SET OUT
Face fix pelmet
Pelmet wall brackets should be installed
maximum 250 mm in from each end and
spaced maximum 800 mm apart. Use a
spirit level to ensure pelmet is level.
NOTE:
For AK-G, remove pelmet end plate
and slide in gate bracket, before installing
pelmet.
Top fix pelmet
Fix pelmet according to width ensuring
pelmet does not bow or distort. 2 centre
lines are visible inside pelmet for drill
positioning. (Depending upon particular
situations, staggered fixing may be
required).
NOTE:
For AK-G, remove pelmet
end plate and slide in gate bracket, before
installing pelmet. Ensure level.
3 - GATE BRACKETS SET OUT
With pelmet
Gate brackets in Horiso pelmet or surface
fixing. Insert gate bracket at either end
of the blind maximum 150 mm in from each
end and with a maximum width of
600 mm apart.
NOTE:
For AK-G, remove
pelmet end plate and slide in gate bracket,
before installing pelmet.
250
mm
max.
250
mm
max.
800 mm center maximum
space between brackets
800 mm center maximum space
between brackets
To determine the front/out-facing side of the
blind locate the Horiso sticker on the right
hand side, third slat from the bottom.
4A - INSERT SIDE CABLES
Insert supplied cable guide through access
hole in top of head rail at both ends and thread
cable through slat pack. Ensure mushroom
head is inserted correctly on top of spring
tension bracket.
(Do not remove cable ties
on tension bracket at this point.)
Ensure cables are running
parallel with each other and check diagonal.
250
mm
max.
800 mm maximum space between
800 mm maximum space between
250 mm
max.
600 mm maximum space between
600 mm maximum space between
150
mm
max.
1 - CARRYING / HANDLING
Unpacking SVB
Carry blind by head rail ONLY.
Two installers
should carry blind at ALL times.
Warning:
Be careful using scissors or knife to
unwrap blind, as you may seriously damage
blind coating or components.
Surface fixing without pelmet
Fix gate bracket at either end of
the opening maximum 150 mm in from each
end and with a maximum width
of 600 mm apart. Ensure level.
150
mm
max.
600 mm maximum space between
600 mm maximum space between
150
mm
max.
4B - INSERT INTERMEDIATE CABLES
Insert supplied cable guide through spring
tension bracket and thread through slat pack.
Insert spring tension bracket into head rail by
twisting, then turning until top lip of double
spring bracket fits into
bottom lip of the
head rail.
NOTE:
For AK-G, spring tension
bracket is supplied installed. Install cable
only.
(Do not remove cable ties on tension
bracket at this point.)
Ensure all cables are
running parallel.
INSTALLATION GUIDE - SPECIALTY VENETIAN BLINDS
+61 2 8755 4500
info@horiso.com.au
horiso.com.au


