background image


1. Overview 

  19. Power output & conditioning 

2. What is included 

  20. Software description 

3. What you will need 


21. Setup and defines 

4. Setup instructions 

  22. Arduino Pinouts 

5. Connect H2 regulator and purge valve 

  23. Available Functions 

7. Electrical connections to Arduino shield 

  24. Storage 

8. Prepare Arduino and fuel cell control shield 

  25. Reconditioning 

9. Connect HYDROSTIK PRO and load 

  26. Hydrogen supply 

10. Operation 

  27. Safety 

11. Status LEDs 

  28. FAQ 

12. Purge 

  29. License 

13. Waste water 

  30. Appendix 

14. Output power 

  31. Included in the power extender module 

15. Overload protection 


32. Setup instructions using power extender 
module (2 stacks) 3 

16. Fuel cell maintenance and use 

  3. Connect H2 regulator & purge valve 

17. Software downloads 

  34. Solder wires to fuel cell stack 


18. Monitoring fuel cell status 


Control system for Horizon fuel cell stack 


Refillable metal hydride hydrogen storage 

with  


pressure regulators 


Complete component kit to build and create  


your own hydrogen fuel cell power plant 


Development board "shield" for popular  


Arduino platform with stack control 

software 


Monitoring and data-logging via USB 

(voltage &  


current) 


Open source hardware and software 


Regulated 5V output 


Summary of Contents for FCDK-1.5

Page 1: ...water 5 30 Appendix 9 14 Output power 5 31 Included in the power extender module 9 15 Overload protection 5 32 Setup instructions using power extender module 2 stacks 3 9 16 Fuel cell maintenance and...

Page 2: ...the purge valve normally closed The Arduino and fuel cell control shield open the purge valve momentarily every 60 seconds to allow any impurities on the anode side of the fuel cell to escape improvi...

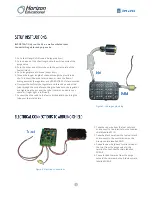
Page 3: ...e end of the tube through the nut before pushing the tube onto the regulator and tightening the nut over the tube there is no need to use a spanner finger tight is sufficient 7 Connect the other end t...

Page 4: ...Serial Monitor window to indicate that the software is running You should also see activity on the LEDs whilst the capacitors are charging the status LED will flash ever half second once the capacito...

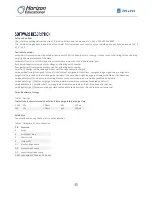
Page 5: ...W With a 3W system output power will be 2 75W Overload protection If the stack voltage drops too low due to being overloaded or externally short circuited the stack control shield will disconnect the...

Page 6: ...int shortTime unsigned long purgeInterval unsigned in purgeTime This can be used to change the timings of the stack shorting and purging All values should be in milliseconds void enableShort Enables s...

Page 7: ...Then open the short circuit stop touching the wires together and close the hydrogen supply clip on the inlet tube 9 Your stack is now reconditioned and ready for use Hydrogen supply Where delivery me...

Page 8: ...urate to about 50mV The current reading may be out by up to 100mA Additionally the software is doing some filtering on the current measurement which is why it can take some time for the current shown...

Page 9: ...es of silicone tubing connect one to each of the other ends of the first tee splitter 5 Connect each free end from the tee piece to the outlet nozzle of each fuel cell stack 6 Cut another two 8cm piec...

Page 10: ...Strip approx 5mm of insulation from each end of the loose wires 3 Orientate the stacks so that the nozzle is at the top as you look at the side with the solder tags 4 Solder 15cm red wire to the left...

Reviews: