34
SET UP XID ACCOUNT FOR VIEWFIT CONNECTIVITY
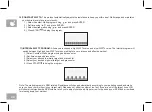
Creating an xID account will allow you to save and share workout data online at
viewfit.com
Up to four users can be saved
on a machine. This process is the first step in connecting your equipment. It must be done from a computer, tablet, or
mobile device.
1) Visit the web site:
viewfit.com
2) Once at the web site, select the CONNECT YOUR EQUIPMENT option on the top menu bar.
3) The first step in connecting your equipment will to be creating your xID account. This will be your login to ViewFit.
4) Enter your phone number or another easy-to-remember 10-14 digit number. This will be your account number.
5) Fill in your profile information to finish the xID account set up process. You will be asked to provide an email address
not associated with any other xID account. Check your email after the set-up process for a link to validate your
account.
CONNECT WI-FI
Once you have created your xID account, you will be able to move on to activating the Wi-Fi on your equipment. Reminder,
this requires you to use your computer, tablet, or mobile device that is connected to the internet.
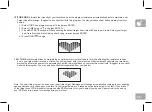
1) Press and hold
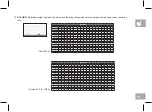
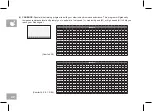
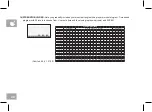
for 3-5 seconds you can use up/down button to set your time zone, please refer to time zone code
in the last page, then press enter button you will see the message ACTIVATED on your screen.
2) On your computer or other device, go to your Wi-Fi settings. You should select the “ViewFit” network. Doing this enables
you to connect your equipment to your wireless network.
3) A new window will pop up with the list of wireless networks your equipment can see. Select your home Wi-Fi network
and connect.
4) The remaining step is to reconnect your computer or other device back to your Wi-Fi network. Go to your settings again
and connect as you normally would.
Congratulations! You are now connected and ready to get started.
Summary of Contents for 2981000
Page 2: ...3 ENGLISH 61 DEUTSCH 119 NEDERLANDS 177 FRAN AIS...
Page 25: ...25 BIKE OPERATION This section explains how to use your bike s console and programming...
Page 26: ...26 Comfort 2 0 A H B H I F D G C Eingaben E...
Page 50: ...50 COMFORT 2 0 EXPLODED VIEW...
Page 53: ...53 COMFORT 4 0 8 1 EXPLODED VIEW...
Page 56: ...56 COMFORT R8 0 EXPLODED VIEW...
Page 84: ...84 Comfort 2 0 A H B H I F D G C Eingaben E...
Page 108: ...108 COMFORT 2 0 EXPLOSIONSANSICHT...
Page 111: ...111 COMFORT 4 0 8 1 EXPLOSIONSANSICHT...
Page 114: ...114 COMFORT R8 0 EXPLOSIONSANSICHT...
Page 142: ...142 Comfort 2 0 A H B H I F D G C Eingaben E...
Page 166: ...166 COMFORT 2 0 ONDERDELENDIAGRAM...
Page 169: ...169 COMFORT 4 0 8 1 ONDERDELENDIAGRAM...
Page 172: ...172 COMFORT R8 0 ONDERDELENDIAGRAM...
Page 200: ...200 Comfort 2 0 A H B H I F D G C Eingaben E...
Page 224: ...224 VUE CLAT E COMFORT 2 0...
Page 227: ...227 VUE CLAT E COMFORT 4 0 8 1...
Page 230: ...230 VUE CLAT E COMFORT R8 0...
Page 235: ......
Page 236: ...Horizon Comfort 2 0 4 0 8 1 R8 0 Rev 1 0 A 2020 Johnson Health Tech...


