117
Loading S
titch Wire /
Ma
intena
nce
6
s
6 Maintenance
This chapter describes how to clean the machine, replace the consumables and
lubricate the parts.
6-1
Loading Stitch Wire
1
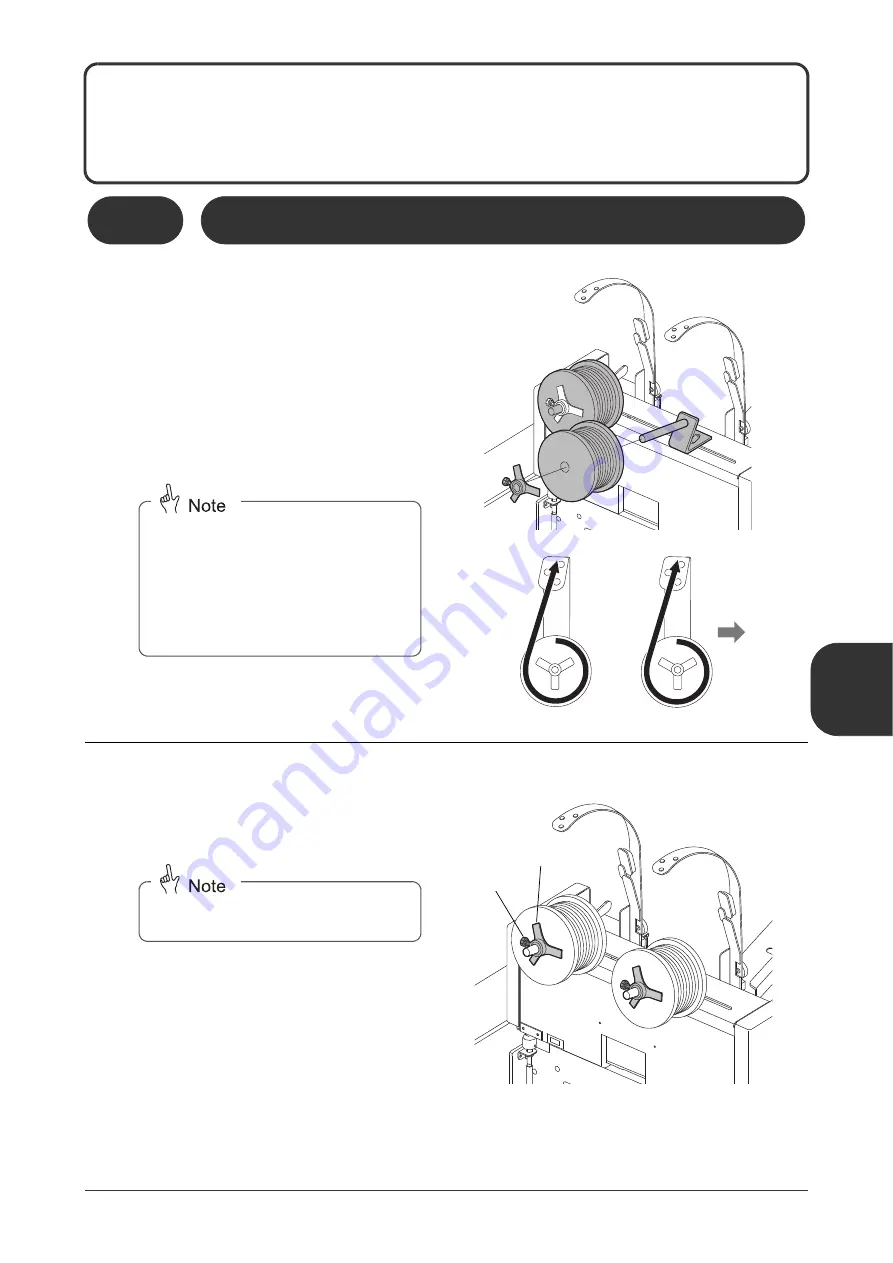
Place the wire coils on the rods.
- Be aware of the wire direction when attach-
ing the coils.
- The standard accessory wire is No.26 (0.5
mm in diameter).
- Wire sizes No.26 (0.5 mm in diameter) to
No.28 (0.4 mm in diameter) are standard
sizes for the stitcher heads.
2
Hold the coils in place with the
wire brakes.
- Press each wire brake lightly against the
wire coil to hold the wire coil in place.
- When using thick wire (No.24 and 25), you
must use the optional stitcher heads for
thick wire. It is recommended to install the
wire coil in the direction that the wire
moves clockwise.
- If the wire is not strained even though the
wire and the wire guide are adjusted,
reverse the direction of the wire coil.
11119
60101A1
11119
60101B1
Wire Direction
Operation
Side
The wire brake produces a bit of drag to
keep the wire from tangling.
11119
60101C1
Locking Knob
Wire Brake
Summary of Contents for Bookletmaker FC-200A
Page 84: ...This page is intentionally left blank...
Page 94: ...This page is intentionally left blank...
Page 146: ...This page is intentionally left blank...
Page 202: ...This page is intentionally left blank...
Page 217: ...This page is intentionally left blank...
Page 218: ...Manufacturer Phone 81 75 934 6700 Fax 81 75 934 6708 www horizon co jp...


