127
Replacing the Fore-edge T
rim Knife /
Ma
intena
nce
6
6-6
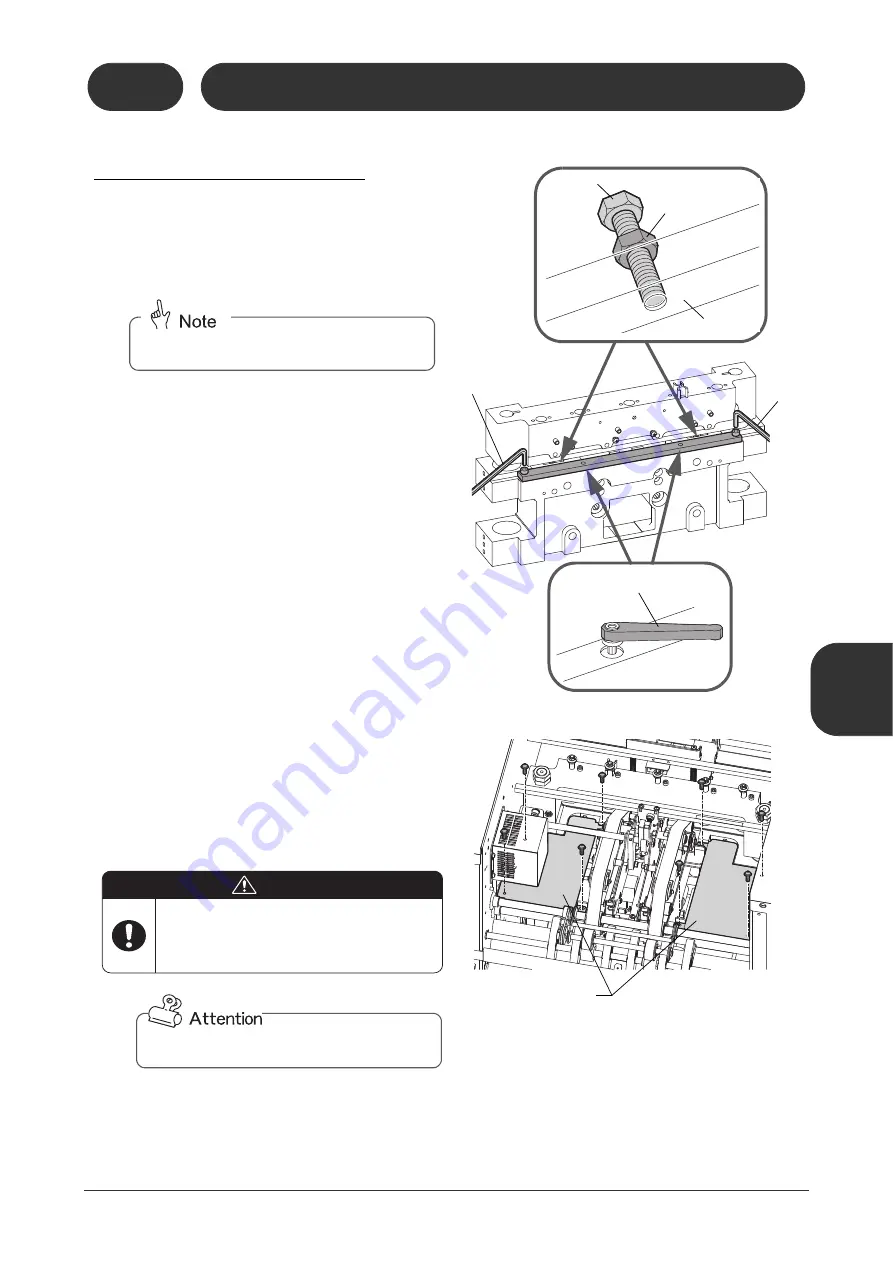
Replacing the Fore-edge Trim Knife
6-6-2 Lower Knife Replacement
1
Remove the upper knife. (Refer to
the previous page.)
2
Remove the lower knife.
3
Remove the lower guides at the
front and rear.
4
Loosen the adjuster bolts.
- Loosen the locking nut and then turn the
adjuster bolt.
- Loosen the adjuster bolt, but not so far that it
comes out of the trim base.
5
Attach the lower knife.
- Temporarily tighten only the outside mount-
ing screws while pressing them against the
trim base. (Leave the inside mounting
screws loose.)
6
Attach the upper knife.
7
Turn on the power switch for the
main part of the machine.
21102
60602A1
21102
60602B1
21102
60602C1
21102
60602D1
Ratchet Wrench
Lower Guides
Allen Wrench
Allen
Wrench
Adjuster Bolt
Locking Nut
Trim Base
Loosen the two inside mounting screws with
the accessory ratchet wrench.
Keep your hands and fingers away from
the knives when lowering the upper knife
in the next step.
WARNING
Be sure not to place anything near the trim
knives.
Summary of Contents for Bookletmaker FC-200A
Page 84: ...This page is intentionally left blank...
Page 94: ...This page is intentionally left blank...
Page 146: ...This page is intentionally left blank...
Page 202: ...This page is intentionally left blank...
Page 217: ...This page is intentionally left blank...
Page 218: ...Manufacturer Phone 81 75 934 6700 Fax 81 75 934 6708 www horizon co jp...


