

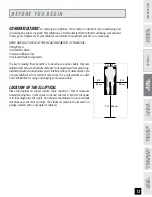


BEFORE
YOU
BEGIN
16
INTRODUCTION
IMPORT
ANT
PRECAUTIONS
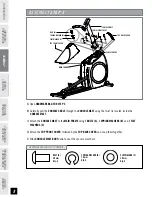
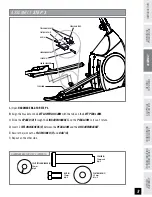
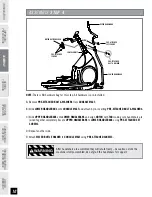
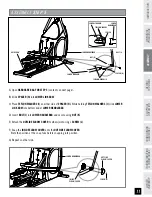
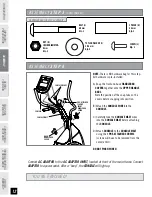
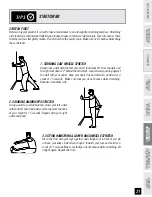
ASSEMBL
Y
BEFORE
YOU
BEGIN
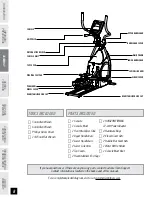
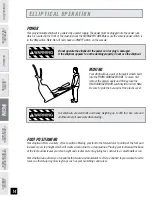
ELLIPTICAL
OPERA
TION
LIMITED
W
ARRANTY
TROUBLESHOOTING
&
MAINTENANCE
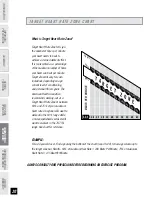
CONDITIONING
GUIDELINES
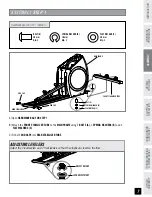
ASSEMBL
Y
ELLIPTICAL
OPERA
TION
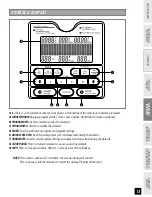
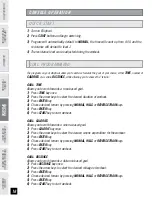
CONSOLE OPERATION
1)
Turn on Elliptical.
2)
Press
START
button and begin exercising.
3)
Program will automatically default to
MANUAL
, the time will count up from 0:00, and the
resistance will default to level 1.
4)
The resistance level can be adjusted during the workout.
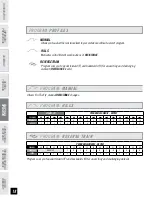
QUICK START
The programs on your elliptical allow you to exercise towards the goal of your choice, either
TIME
, number of
CALORIES
or a certain
DISTANCE
, while allowing you to choose the “terrain.”
GOAL: TIME
Allows you to work towards a time-based goal.
1)
Press
TIME
key once.
2)
Press the arrow keys to select the desired duration of workout.
3)
Press
ENTER
key.
4)
Choose desired terrain by pressing
MANUAL
,
HILLS
or
REVERSE TRAIN
keys.
5)
Press
ENTER
key.
6)
Press
START
key to start workout.
GOAL: CALORIES
Allows you to work towards a calorie-based goal.
1)
Press
CALORIE
key once.
2)
Press the arrow keys to select the desired caloric expenditure for the workout.
3)
Press
ENTER
key.
4)
Choose desired terrain by pressing
MANUAL
,
HILLS
or
REVERSE TRAIN
keys.
5)
Press
ENTER
key.
6)
Press
START
key to start workout.
GOAL: DISTANCE
Allows you to work towards a distance-based goal.
1)
Press
DISTANCE
key once.
2)
Press the arrow keys to select the desired mileage of workout.
3)
Press
ENTER
key.
4)
Choose desired terrain by pressing
MANUAL
,
HILLS
or
REVERSE TRAIN
keys.
5)
Press
ENTER
key.
6)
Press
START
key to start workout.
GOAL PROGRAMMING


