background image

28

29

6)  LIfETIME ToTAL:

  This option allows you to view the the total accumulated data. The following information 

will be shown in each display window:

•  INCLINE - Average incline level.

•  TIME - Total accumulated time. NOTE: If time is greater than 59:59, the time will no longer display minutes 

and will display hours only.

•  CALORIES - Average calories burned.

•  PACE - Average pace.

•  DISTANCE - Total accumulated distance.

•  SPEED - Average speed.

WEEKLY GoAL SETUP

1)  Select USER 1 or USER 2. 
2)  Press PROFILE™ button and scroll to WEEKLY gOAL.
3)  To enter setup mode: Press ENTER. Use      on the PROgRAMMINg BUTTON to set a TIME gOAL. 

Leave time at 00:00 if you want to set a distance goal.

4)  Press ENTER again and use      on the PROgRAMMINg BUTTON to set a DISTANCE gOAL. If the 

distance is changed from 0.00, distance will be the goal. NOTE: You may only set a time or distance goal, 

not both.

3)  Press ENTER again to exit the setup mode.

CoNNECTING AN IPoD

®

IPHoNE

® 

oR IPAD

®

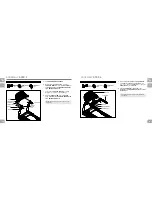
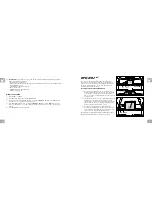
This console includes a built-in iPod cable as an entertainment 

solution for your workouts. Various iPod, iPhone and iPad models 

with a dock connector will work with the included iPod cable. iPhone 

must be set to Airplane Mode to use the iPod cable. iPod, iPhone 

and iPad models are sold separately.

To CoNNECT YoUR CoMPATIBLE DEVICE:

1)  Plug in your device by matching the dock connector pin on 

the iPod cable with the dock connector on your device NOTE: 

Once you have connected the device to the cable, please 

allow 10 seconds for it to authenticate the device before it will 

be fully functional.

2)  You can use your device’s controls to adjust volume and song 

settings. Or you can adjust your volume and song settings 

using the iPod control keys on the console. NOTE: If you don’t 

want to use the speakers, you can plug your headphones into 

the audio out jack at the bottom of the console.

3)  Once the device is plugged in you can feed the cable 

through the iPod cable channel if you want to rest the device 

horizontally. It is recommended that you rest your device in the 

center of the console against the rubber grip areas. 

NOTE: Audio will not play through speakers if audio adaptor cable is 

plugged in while the iPod cable is connected to your device. 

iPod

®

Select

Menu

Controls

IPOD

®

 CONTROLS

AUDIO OUT JACK

AUDIO IN JACK FOR
OTHER MEDIA PLAYERS

IPOD
CABLE

IPOD CABLE
CHANNEL

IPOD /
IPHONE

iPod

®

Select

Menu

Controls

IPOD
CABLE

IPOD CABLE
CHANNEL

RUBBER GRIP AREAS

IPAD

Summary of Contents for ELITE T5000

Page 1: ...TREADMILL OWNER S MANUAL Read the treadmill guide before using this owner s manual Elite T5000...

Page 2: ...parts that are not tightened and will seem loose and may cause irritating noises To prevent damage to the treadmill the assembly instructions must be reviewed and corrective actions should be taken B...

Page 3: ...o not lift or transport this unit unless it is fully assembled Unpack and assemble the unit where it will be used Never grab hold of any portion of the incline frame and attempt to lift or move the tr...

Page 4: ...ead wire through the mast the top of the console cable should be located at the top of the mast Detach and discard lead wire N C Attach console mast to main frame bracket using 3 bolts a 3 spring wash...

Page 5: ...down attach the console mast caps to the console using 6 bolts J 6 spring washers B and 6 flat washers I BOLT J M8 x 20mm Qty 6 ARC WASHER I 8 2 x 16 Qty 6 SPRING WASHER B 8 2 mm Qty 6 HARDWARE for s...

Page 6: ...oid damage D Attach the right side of the console using 3 bolts J 3 spring washers B and 3 arc washers C Elite T5000 BOLTS J SPRING WASHERS B ARC WASHERS C CONSOLE MAST ASSEMBLE THIS SIDE FIRST CONSOL...

Page 7: ...Carefully slide the drop down handlebar cover and fix to the base frame using 4 screw 1 Elite T5000 BOLTS K SCREW 1 ASSEMBLY STEP 7 HARDWARE BAG 7 Elite T5000 BOLT K M6 x 12mm Qty 6 SCREW 1 1 M 4 x 12...

Page 8: ...n und befolgen Sie die Bedienungsanleitung vor der Erstbenutzung Halten Sie Kinder von dem Ger t fern WARNUNG Nur f r den Heimgebrauch Attach safety key clip to clothing before starting and remove saf...

Page 9: ...your media player R iPod docking station used to dock and charge your iPod not included S iPod controls press to adjust your attached iPod audio settings See page 29 for more info T iPod CABLE channe...

Page 10: ...ally during your workout 2 SPEED intervals Walk or run a series of alternating speed levels Time based goal with 10 difficulty levels to choose from Warm up and cool down last 4 00 minutes each and ar...

Page 11: ...5 0 5 0 5 1 0 1 5 0 5 0 0 Speed 1 0 1 5 2 0 2 5 3 0 3 5 4 0 3 5 3 0 2 5 2 3 1 5 Level 2 Incline 0 0 0 5 1 5 1 5 1 0 0 5 1 0 0 5 1 0 1 5 0 5 0 0 Speed 1 3 1 9 2 5 3 0 3 5 4 0 4 5 4 0 3 5 3 0 2 6 1 8 Le...

Page 12: ...t THR Zone program using and press enter on the programming button 2 Select TIME using and press enter on the programming button 3 The HEART RATE window will flash showing the default target heart rat...

Page 13: ...d reuse a perfect workout for you with specific speed incline and time combination The ultimate in personal programming Time based goal 1 Select CUSTOM 1 or 2 using and press enter on the programming...

Page 14: ...no user is selected and clock and date are not set no data will be tracked RESET Reset all recorded information for USER 1 or USER 2 by selecting the user and then holding down the PROFILE button for...

Page 15: ...e included iPod cable iPhone must be set to Airplane Mode to use the iPod cable iPod iPhone and iPad models are sold separately To connect your compatible device 1 Plug in your device by matching the...

Page 16: ...ication is complete your iPod specific console controls will be active see next page 3 See Console Operation on page 23 and start your workout 4 If your iPod or iPhone is Nike Plus compatible your wor...

Page 17: ...TREADMILL OWNER S MANUAL T5000 Owner s Manual 0729 11 Rev 1 6 2011 Horizon Fitness...

Reviews: