1
INTRODUCTION
IMPORT
ANT
PRECAUTIONS
ABOUT
YOUR
TREADMILL
BEFORE
YOU
BEGIN
TREADMILL
OPERA
TION
LIMITED
W
ARRANTY
TROUBLESHOOTING
&
MAINTENANCE
CONDITIONING
GUIDELINES
1
INTRODUCTION
IMPORT
ANT
PRECAUTIONS
ABOUT
YOUR
TREADMILL
BEFORE YOU
BEGIN
TREADMILL OPERA
TION
CONDITIONING GUIDELINES
TROUBLESHOOTING &
MAINTENANCE
LIMITED WARRANTY
WIRELESS PEDOMETER INSTRUCTIONS
CUSTOMIZING THE SETTINGS
•
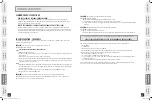
TO ENTER SETTINGS MODE:
While the display shows Step Count, press and hold
and
for 3 seconds.
•
TO SCROLL THROUGH MODES:
Press
to advance a mode and
to go back a mode.
•
TO ENTER MODE:
Press and hold
for 3 seconds to enter a chosen mode.
•
TO SCROLL THROUGH OPTIONS:
Press
to advance a setting and
to go back a setting.
•
TO SAVE OPTION:
Press and hold
for 3 seconds to save setting and exit mode.
•
TO ExIT OPTION (WITHOUT SAVING):
Press and hold
for 3 seconds to exit the mode without saving changes.
•
TO ExIT SETTINGS MODE:
Press and hold
for 3 seconds.
P-: SLEEP MODE
- The display back light will
automatically turn off if there is no activity for 30
seconds. The pedometer’s default setting should
not be adjusted as it is preset for optimal battery
longevity.
P-: SENSITIVITY SETTING
- There are three
sensitivity settings to choose from. Use the following
guide to customize your sensitivity needs:
• L1 = Low for heavy running/walking
• L2 = Medium for light jogging or medium walking
(default)
• L3 = High for light walking
P-0: SOFTWARE VERSION
- Cannot be changed.
P-1: DISPLAY BRIGHTNESS
- There are eight brightness
settings to choose from.
P-2: STEP COUNT UPDATE (STEPS)
- Adjusts how often
(in steps) the pedometer will transmit to the treadmill.
The pedometer’s default setting should not be adjusted
as it is preset for optimal battery longevity.
P-: STEP COUNT UPDATE (SECONDS)
- Adjusts how
often (in seconds) the pedometer will transmit to the
treadmill. The pedometer’s default setting should no be
adjusted as it is preset for optimal battery longevity.
BATTERY REPLACEMENT
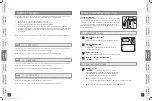
To access the battery compartment, open the pedometer case. As you look at
the display, the battery compartment is on the far right (Fig.1).
To open, slide the cover away from the display screen, to the right.
Insert the battery printed side up. A series of five 0s will then appear in the
display window. Slide battery compartment cover back on.
The battery in your pedometer can be expected to last six months for someone
who walks 10,000 steps per day. Results may vary depending on usage. Your
pedometer uses one (1) Lithium CR1225 battery. Should your display become
faint or the transmitter signal only picks up at a very short distance, it may be
time to replace the battery.
Battery replacement is the responsibility of the customer and is not covered
under Horizon Fitness’ Limited Home Use Warranty.
PEDOMETER IS NOT TURNING ON.
Ensure the pedometer has a working battery installed. See above to access the battery compartment.
•
•
•
•
•
•
Tested to comply with FCC standards.
WARNING:
Changes or modifications to this unit not expressly approved by the party responsible for compliance could void the user authority to operate the equipment.
This device complies with Part 15 of the FCC Rules. Operation is subject to the following two conditions: (1) this device may not cause harmful interference, and (2) this device must accept any interference
received, including interference that may cause undesired operation.
TROUBLESHOOTING
PEDOMETER CASE IS DIFFICULT TO OR WILL NOT OPEN.
The pedometer case is designed to open as if worn on the hip.
Hold the pedometer with the Horizon Fitness logo facing outward or sideways.
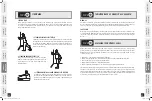
Then, press the latch up and away from the body (Fig.2) rather than pulling the
latch up and toward the body.
THERE IS NO DISPLAY.
The LCD display is designed to be used in temperatures between 32 to 104 degrees Fahrenheit (0-40 degrees Centigrade). If the
pedometer is being used outside of this range, return to room temperature to restore operation.
Avoid placing the LCD in direct sunlight for long periods of time. Return to room temperature to restore operation.
The pedometer may be in Sleep Mode. Press
to turn on pedometer.
The battery needs to be replaced. Your pedometer uses one (1) Lithium CR1225 battery.
MY STEP COUNT IS INACCURATE ON THE PEDOMETER.
The pedometer will only count steps if you continue to wear it on the hip. Once
the pedometer is removed, it will stop counting steps.
The pedometer provides the most accurate step count when you maintain a
speed of 2.0 mph or higher.
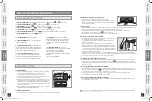
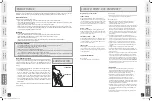
For proper placement, attach the pedometer to your belt, skirt, waistline, etc,
with the clip located on the back of the pedometer. Do NOT place the pedometer
in line with the center of your body. Instead position the pedometer to the left or
right of the center of your body to ensure proper step count during your workout
(Fig.3). Be sure to attach the pedometer horizontally and securely enough that
it will not become dislodged during workout.
If you believe your step count is inaccurate, do the following: Walk and count 100 steps. Compare your count to the pedometer’s.
If the pedometer’s count is less than yours, increase the sensitivity setting. If the pedometer’s count is more than yours, decrease
the sensitivity setting. (See Settings, P-5 to change the sensitivity setting.)
THE TREADMILL IS NOT CALCULATING MY DAILY STEP COUNT.
You need to transmit the step count from the pedometer to the treadmill at the start of each workout. The pedometer will only
transfer the step count information to the treadmill when you send it. The
button will need to be held for 2-5 seconds.
Consult the instructions located to the right of the display on your treadmill to ensure the most precise results. Transmission can
take up to 15 seconds.
THE STEPS PROGRAMS ARE NOT FUNCTIONING ON THE TREADMILL.
The pedometer must be both turned on and worn on the hip during the workout for the steps programs to function correctly.
Stand on the treadmill, press and hold
on your pedometer for approximately 5 seconds. The treadmill will then receive your
steps count from your pedometer. This transmission may take up to 15 seconds.
Then place the pedometer on your hip according to the positioning suggestions on the pedometer instruction sheet.
On the treadmill console, select a steps program and press START.
THERE IS A DELAY BETWEEN THE PEDOMETER AND THE TREADMILL.
The pedometer does not transmit the step count to the treadmill continuously during the workout. Rather, it transmits the step
count approximately every 20 seconds.
•
•
•
•
•
•
•
•
•
•
•
•
•
•
•
•
•
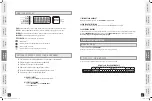
BODY
Fig.2
POWER ON
or
DISPLAY STEP COUNT
TO DISPLAY TIME
(shown as hrs-min.)
- Returns to Step Count after 5 seconds
PRESS
TRANSMIT
STEP COUNT
RESET TIME
& STEP COUNT
PRESS
FOR
2
SECONDS
HOLD
FOR
2
SECONDS
HOLD
AGAIN
BATTERY
Fig.1
OR
Fig.
Evolve_SS_Treadmill_Rev.1.5.indd18-19 18-19
6/23/08 2:43:25 PM


