6
7
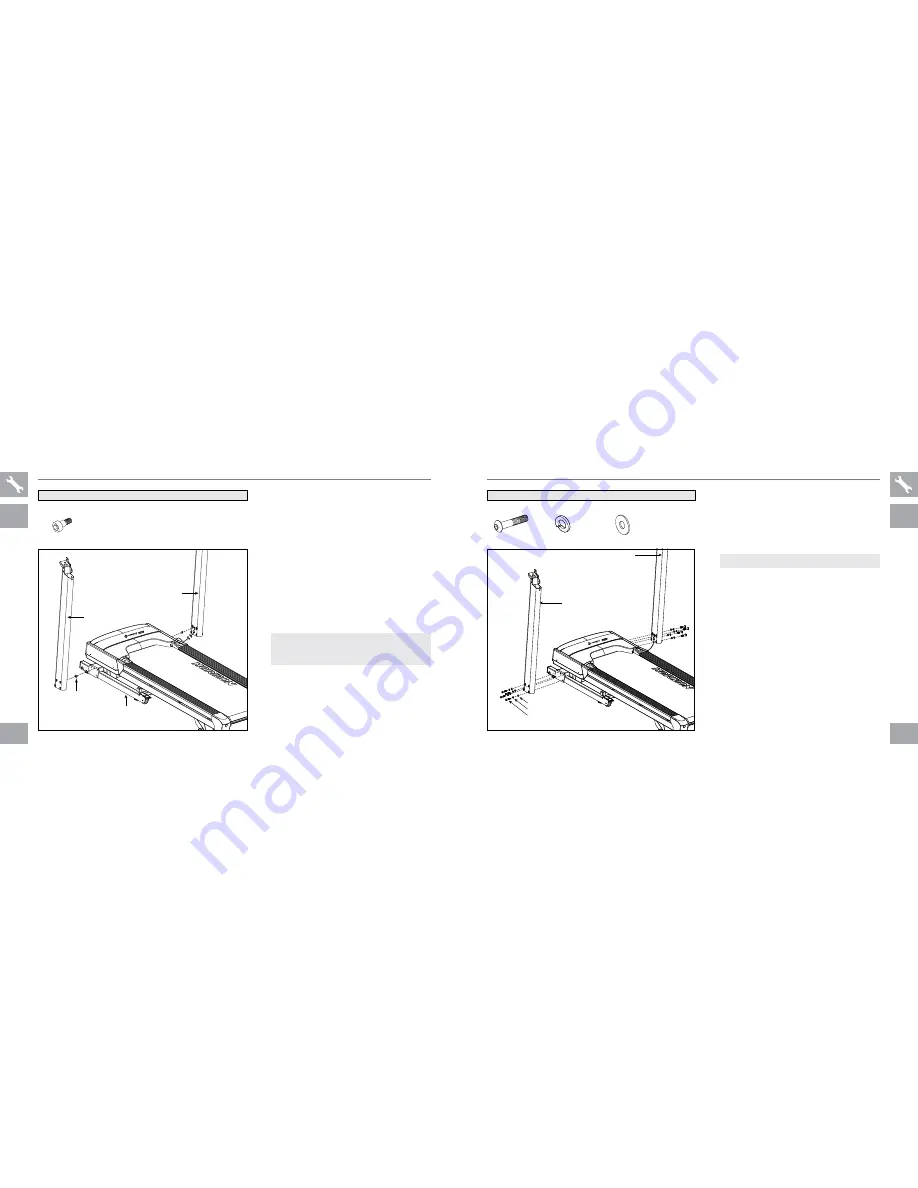
HARDWARE foR STEP 1
:
ASSEMBLY
STEP 1
A Cut the yellow banding straps and lift the running
deck upward to remove all contents from underneath
the running deck.
B Open
HARDWARE BAG 1
C Screw in the 2
Bolt(A)
to the
mAin fRAmE
BRAckEt
.
D Connect the
conSolE cABlES
at
RiGHt
conSolE mASt
an carefully tuck wires to
conSolE mASt
to avoid damage.
E Align and attach right
conSolE mASt
with
mAin
fRAmE BRAckEt
using
Bolt(A)
and repeat on the
other side.
ASSEMBLY
STEP 2
BOLT (A)
M
8 x 10
Qty: 2
BOLT (B)
M8 x 70 mm
Qty: 8
SPRING WASHER (C)
Φ
8.2 mm
Qty: 8
FLAT WASHER (D)
Φ
8.2 mm
Qty: 8
HARDWARE foR STEP 2
:
A Open
HARDWARE BAG 2
B Attach
conSolE mASt
to
mAin fRAmE
BRAckEt
using 4
BoltS (B)
, 4
SpRinG
WASHERS (c)
and
4 flAt WASHERS (D)
.
C Repeat step B on other side.
NOTE: Do not tighten bolts until step 4 is complete.
NOTE: Do not pinch console cable when placing
the mast onto the main frame bracket. You may
need extra help assembling step 1 o 2
Paragon 6
Shown
Paragon 6
Shown
LEFT CONSOLE MAST
RIGHT CONSOLE MAST
FLAT WASHERS (D)
SPRING WASHERS (C)
BOLTS (B)
BOLT(A)
MAIN FRAME BRACKET
RIGHT CONSOLE MAST
LEFT CONSOLE MAST


