background image

EN

6

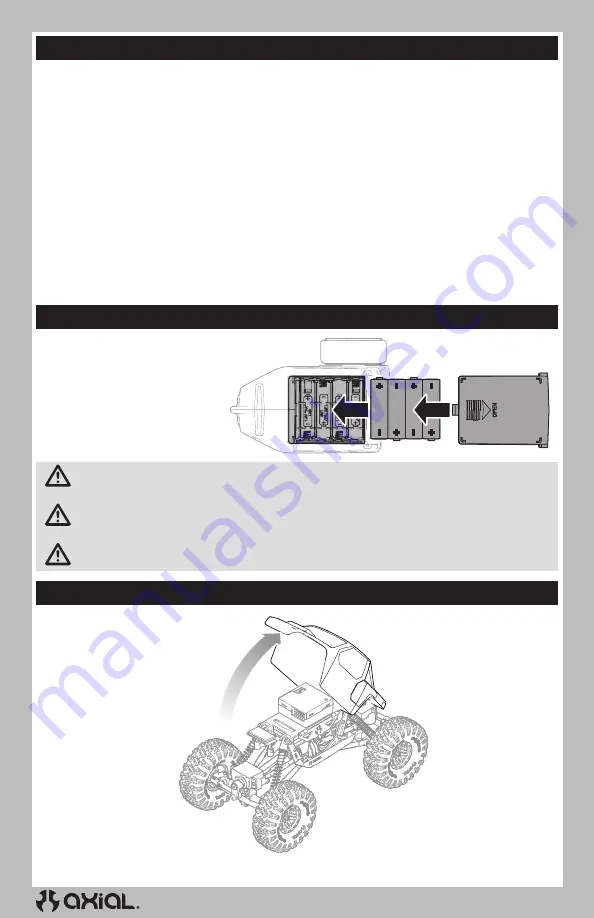
INSTALL THE TRANSMITTER BATTERIES

SERVO TRAVEL

CAUTION:

 NEVER remove the transmitter batteries while the vehicle is powered ON. Loss of vehicle 

control, damage, or injury may occur.

CAUTION:

 If using rechargeable batteries, charge only rechargeable batteries. Charging non-rechargeable 

batteries may cause the batteries to burst, resulting in injury or property damage.

CAUTION:

 Risk of explosion if battery is replaced by an incorrect type. Dispose of used batteries according 

to state and local laws.

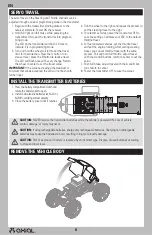
1.  Press the battery compartment latch and 

rotate the batter cover to open.

2.  Install 4 AA alkaline batteries (or Ni-Cd or 

Ni-MH), verifying correct polarity.

3.  Close the battery cover until it latches.

1.  Begin with the transmitter binding process to the 

receiver complete. Power ON the receiver.

2.  Hold full right and full brake while powering the 

transmitter ON to put the transmitter into program-

ming mode. 

The LED on the transmitter will flash 4 times to 

indicate it is in programming mode.

3.  Turn and hold the wheel full left to set the travel 

limit for that direction, Press the A button to in-

crease travel, press the B button to reduce travel. 

The LED will flash once with every change. Return 

the wheel to center to set the travel value.

IMPORTANT: 

If the value has reached the maximum or 

minimum that can be accepted, the LED will not flash with 

further input.

4.  Turn the wheel to the right and repeat the process to 

set the steering travel to the right.

5.  For electric vehicles, power the Transmitter OFF to 

save the settings. Calibrate your ESC to the default 

throttle travel.

6.  For fuel powered vehicles, set the throttle travel 

without the engine running; After setting steering 

travel, you can set throttle travel with the same 

process. Pull and hold full throttle, adjust travel 

with the A and B buttons, return to center to set the 

value. 

7.  Push full brake, adjust travel with the A and B but-

tons, return to center.

8.  Power the transmitter OFF to save the values.

The servo travel on the Steering and Throttle channels can be 

adjusted through a special programming mode in the transmitter.

REMOVE THE VEHICLE BODY

Summary of Contents for axial AX24 XC-1

Page 1: ...roduct page for the most up to date manual information Scannen Sie den QR Code und w hlen Sie auf der Produktseite die Quicklinks Handb cher und Unterst tzung um die aktuellsten Informationen zu Handb...

Page 2: ...hysical property damage AND a possibility of serious injury NOTICE Procedures which if not properly followed create a possibility of physical property damage AND a little or no possibility of injury A...

Page 3: ...rranty 10 Warranty and Service Contact Information 12 FCC Information 12 IC Information 12 Compliance Information for the European Union 13 Exploded Views 50 BOX CONTENTS SPECIFICATIONS Length 8 6 220...

Page 4: ...contact Horizon Hobby if the product malfunctions Charge only rechargeable batteries Charging non rechargeable batteries may cause the batteries to burst resulting in injury to persons and or damage t...

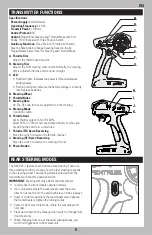
Page 5: ...ering center point Normally the steering trim is adjusted until the vehicle tracks straight C LED Solid red lights Indicates the power is ON and adequate battery power Flashing red lights Indicates th...

Page 6: ...ndicate it is in programming mode 3 Turn and hold the wheel full left to set the travel limit for that direction Press the A button to in crease travel press the B button to reduce travel The LED will...

Page 7: ...EN 7 INSTALL THE VEHICLE BATTERY POWER ON THE TRANSMITTER...

Page 8: ...the front wheels turn in the proper direction with steering input After checking for proper direction of controls start driving slowly If the vehicle does not go straight without steering input adjus...

Page 9: ...trol of your vehicle Prior to starting the binding procedure ensure the servos and motor are connected to the proper ports on the receiver and the transmitter has fresh batteries installed 1 Insert th...

Page 10: ...1 0 Rock Lizards 2 44 62mm 4 AXIC1147 AX31147 Nylon Lock Nut 2mm 10 DYNB0012 Battery 7 4v 350mAh 2s LiPo DYNC1062 USB Charger LiPo DYNS1217 SCX24 Motor w Pinion SPMRSLT310 SLT3 Transmitter SPMXSE2425...

Page 11: ...process found on our website or call Horizon to obtain a Return Merchandise Authorization RMA number Pack the Product securely using a shipping carton Please note that original boxes may be included...

Page 12: ...y Axial AX24 XC 1 1 24 4WD RTR AXI00003T1 T2 This device complies with part 15 of the FCC Rules Operation is subject to the following two conditions 1 This device may not cause harmful interference an...

Page 13: ...covered under the 2006 66 EC European Directive which cannot be disposed of with normal household waste Please follow local regulations Wireless Frequency Range and Wireless Output Power Transmitter...

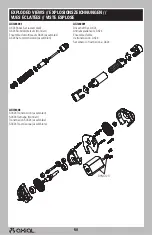
Page 14: ...ontiert Transmission SCX24 assembl e SCX24 Trasmissione assemblata AXI203001 AX24 Shock Set assembled AX24 Sto d mpfersatz montiert Ensemble d amortisseurs AX24 assembl s AX24 Set ammortizzatori assem...

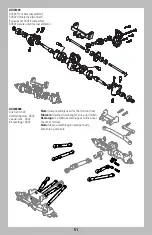
Page 15: ...X24 Assale anteriore assemblato AXI204004 Link Set AX24 Verbindungssatz AX24 Jeu de liens AX24 Kit leveraggi AX24 Note Same assembly used for the front and rear Hinweis Gleiche Anordnung f r vorne und...

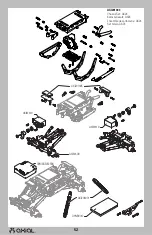
Page 16: ...52 AXI201004 Chassis Set AX24 Karosseriesatz AX24 Ensemble de carrosserie AX24 Set telaio AX24 AXI203001 SPMXSE2425RX AXI31619 AXI31619 AXI201005 AXI31609 DYNB0012...

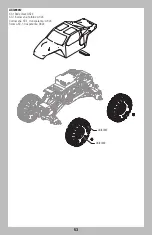
Page 17: ...EN 53 53 AXI40002 AXI40007 AXI200012 XC 1 Body Clear AX24 XC 1 Karosserie farblos AX24 Carrosserie XC 1 transparente AX24 Scocca XC 1 trasparente AX24...

Page 18: ...egistered trademarks of Nitto Tire U S A Inc KMC Wheels name and logo are trademarks or registered trademarks of WheelPros LLC and are used under license All other trademarks service marks and logos a...

Reviews: