EN
11
WARNING:
Do not install the propeller until the aircraft has been
completely assembled, all the systems have been checked thoroughly
and you are located at a suitable flying site.
WARNING:
Never install a cracked, nicked or otherwise damaged
propeller.
NOTICE:
If the propeller is not balanced, the aircraft may vibrate, causing the
stabilization system to not operate correctly and/or decrease the life of the servos.
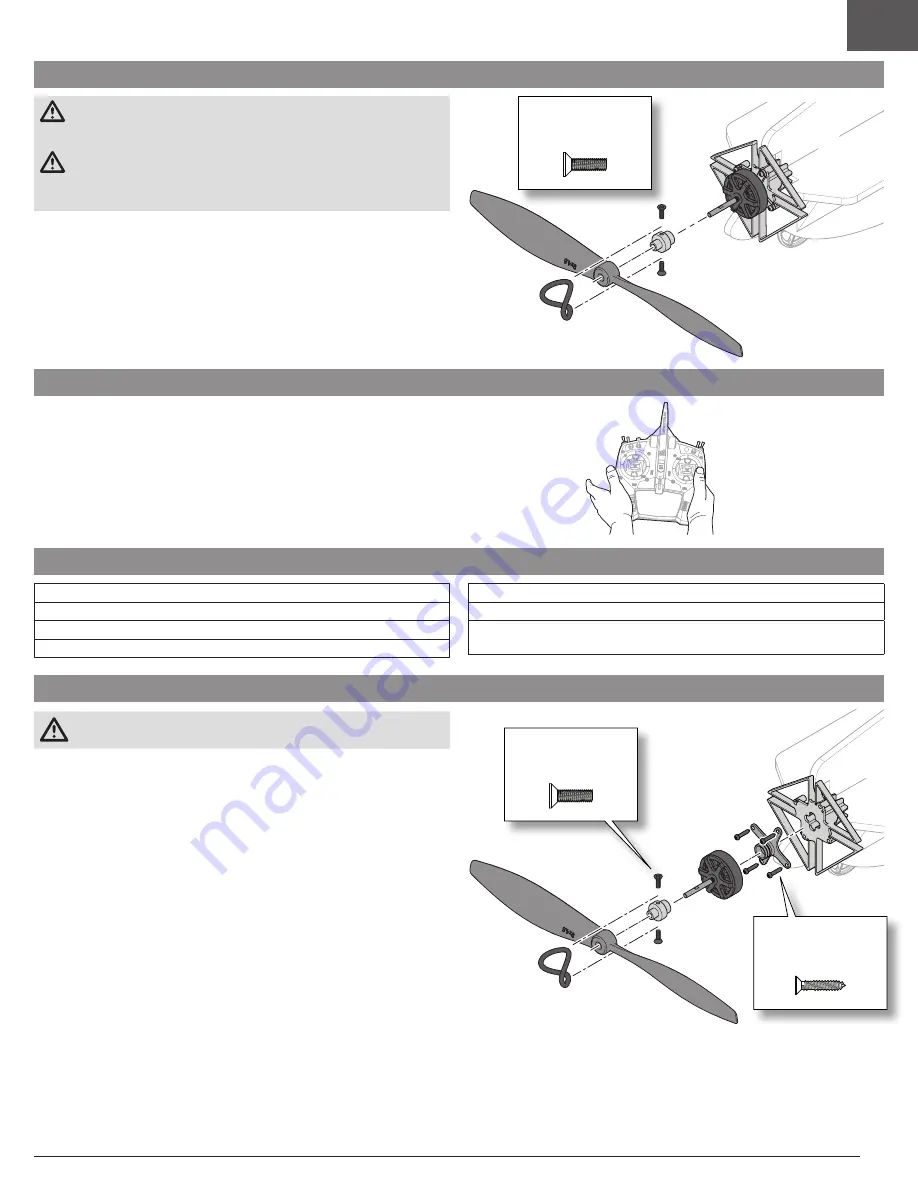
1. Loosely install two M2.5 x 10mm countersunk machine screws into the
propeller adapter.
2. Install the propeller adapter onto the motor shaft with the smaller hub of the
adapter facing forward.
3. Align the screws with the flat spots on the motor shaft, and tighten each screw.
4. Place the propeller on the propeller adapter, and secure it by looping a propeller
O-ring from one screw over the propeller and onto the other screw.
Propeller Installation
During your first flight, trim the aircraft for level flight at 3/4 throttle with flaps up.
Make small trim adjustments with your transmitter’s trim switches to straighten the
aircraft’s flight path.
After adjusting the trim, do not touch the control sticks for 3 seconds. This allows
the receiver to learn the correct settings to optimize AS3X performance.
Failure to do so could affect flight performance.
In Flight Trimming
BNF
3 Seconds
Post Flight
1. Disconnect the flight battery from the ESC (required for safety and battery life).
2. Power OFF the transmitter.
3. Remove the flight battery from the aircraft.
4. Recharge the flight battery.
5. Repair or replace all damaged parts.
6. Store the flight battery apart from the aircraft and monitor the battery charge.
7. Make note of the flight conditions and flight plan results, planning for future
flights.
Motor Service
CAUTION:
Always disconnect the flight battery before performing
motor service.
Disassembly
1. Remove the propeller retaining O-ring.
2. Loosen the two M2.5 x 10mm screws in the propeller adapter,
and remove the propeller adapter.
3. Remove the four M2 x 8mm screws and the motor with X-mount from the
fuselage.
4. Disconnect the motor wires from the ESC wires.
Assembly
• Assemble in reverse order.
• Correctly align and connect the motor wire colors with the ESC wires.
• Install the propeller with the lettering facing out from the motor.
Wiring not shown
2.5mm x 10mm
Countersunk
Machine Screw
2.5mm x 10mm
Countersunk
Machine Screw
M2 x 8mm
Self-Tapping
Countersunk Screw


