background image

Sonicwake

®

 36 V2 Self-Righting Deep-V Brushless RTR

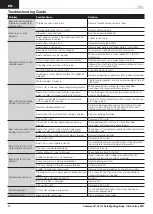
The servo travel on the Steering and Throttle channels can be 

adjusted through a special programming mode in the transmitter.

1. 

Begin with the transmitter binding process to the receiver 

complete. Power ON the receiver.

2. 

Hold full right and full brake while powering the transmitter 

ON to put the transmitter into programming mode. 

The LED on the transmitter will flash 4 times to indicate it is 

in programming mode.

3. 

Turn and hold the wheel full left to set the travel limit for that 

direction, Press the A button to increase travel, press the B 

button to reduce travel. The LED will flash once with every 

change. Return the wheel to center to set the travel value.

IMPORTANT: 

If the value has reached the maximum or 

minimum that can be accepted, the LED will not flash with 

further input.

4. 

Turn the wheel to the right and repeat the process to set the 

steering travel to the right.

5. 

For electric vehicles, power the Transmitter OFF to save the 

settings. Calibrate your ESC to the default throttle travel.

6. 

For fuel powered vehicles, set the throttle travel without 

the engine running; After setting steering travel, you can 

set throttle travel with the same process. Pull and hold full 

throttle, adjust travel with the A and B buttons, return to 

center to set the value. 

7. 

Push full brake, adjust travel with the A and B buttons, 

return to center

8. 

Power the transmitter OFF to save the values.

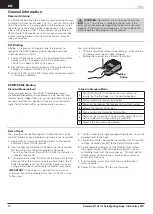
Bind 
Button

Binding is the process of programming the receiver to 

recognize the GUID (Globally Unique Identifier) code of a 

single specific transmitter.

1. 

Power ON the receiver, press the bind button three times 

quickly (within 1.5 seconds of the first button press). 

The LED will begin to flash with a pause.

2. 

Set the trims and control positions at the desired failsafe 

settings, and power ON the SLT3 transmitter.

3. 

When the LED on the SLT3 transmitter and receiver remain 

lit, binding is complete.

You must rebind when:

•  Different failsafe positions are desired e.g., when throttle 

or steering reversing has been changed.

•  Binding the receiver to a different transmitter.

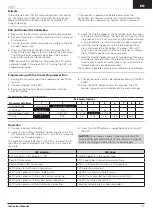
The SR315 receiver features a coaxial antenna design for easy 

installation in almost any model. The last 1 inch (32mm) on the 

tip of the antenna is the active portion of the antenna. Install 

the antenna so the active portion is positioned as high as pos-

sible in the vehicle and not “in the shadow” of any carbon 

fiber or metal. The receiver case can accept an antenna tube 

directly, making optimal antenna placement easy (antenna 

tube not included).

WARNING: 

Do not kink, cut or damage the antenna 

wire. The antenna is made of a coaxial wire; if the 

outer sheath becomes damaged, the receiver will not work 

properly. If the antenna is damaged in any way, replace the 

antenna before attempting to use the receiver. 

SLT Binding

Receiver Antenna

Servo Travel

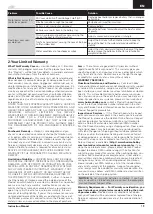
Standard Mode (default)

If loss of signal occurs, SmartSafe™ technology moves 

the 

throttle channel

 to its designated failsafe position (low 

throttle, neutral trigger) that was set during binding. All other 

channels hold their last position. When the receiver detects 

signal from the transmitter, normal operation resumes.

To Bind in Standard Mode:

1

Center the throttle trim knob on the transmitter and 

ensure the throttle trigger is at the neutral position.

2

Push and hold the receiver bind button.

3

Power on the reciever. The receiver LED will flash rapidly.

4

Release the receiver bind button.

5

Push and hold the transmitter bind button.

6

Power on the transmitter. The transmitter power LED will 

flash and glow solid when binding is complete.

7

Release the transmitter bind button.

DSMR/DSM2 Binding

10

EN

General Information

Summary of Contents for PRB08032V2

Page 1: ...n Sie den QR Code und wählen Sie auf der Produktseite die Quicklinks Handbücher und Unterstützung um die aktuellsten Informationen zu Handbücher Scannez le code QR et sélectionnez les liens rapides Manuals and Support sur la page du produit pour obtenir les informations les plus récentes sur le manuel Scannerizzare il codice QR e selezionare i Link veloci Manuali e Supporto dalla pagina del prodot...

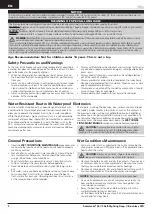
Page 2: ...damage and serious injury OR create a high probability of superficial injury CAUTION Procedures which if not properly followed create the probability of physical property damage AND a possibility of serious injury NOTICE Procedures which if not properly followed create a possibility of physical property damage AND little or no possibility of injury Age Recommendation Not for children under 14 year...

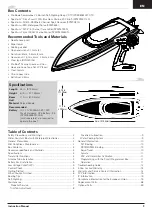
Page 3: ... 15 Compliance Information for the European Union 15 Replacement Parts 58 Optional Parts 59 Table of Contents 3 EN Specifications Length 36 in 914 4mm Height 6 75 in 171 45mm Beam 11 0 in 279 4mm Hull Material Polycarbonate Recommended Battery 2 11 1V 5000mAh 3S 100C Smart Hardcase LiPo Battery IC5 SPMX50003S100H5 sold separately are required to operate the boat 6 75 in 171 45mm 36 in 914 4mm Reco...

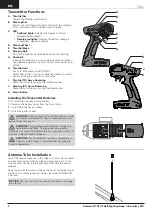
Page 4: ... the power is ON and adequate battery power Flashing red lights Indicates the battery voltage is critically low Replace batteries D Steering Wheel E Throttle Brake F Steering Rate On The Fly knob for travel adjustment on the steering G Channel 3 3 position momentary switch middle position is neutral For programming press up for A button press down for B button H Throttle Limit Limits throttle outp...

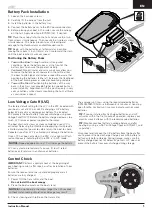
Page 5: ...NT Perform a control check at the beginning of each boating session after repair or after installation of new batteries Ensure the receiver antenna is extended properly and all batteries are fully charged 1 Power ON the transmitter and the boat Do not install the boat canopy 2 Place the boat securely on the boat stand NOTICE Do not operate the motor longer than 20 seconds without water cooling cir...

Page 6: ...or DYNE4201 9 Note the lessons learned from the trimming of your boat including water and wind conditions 10 Replace the rudder cover to protect the rudder s sharp points NOTICE When you are finished boating never leave the boat in direct sunlight or in a hot enclosed area such as a car Doing so can damage the boat NOTICE Using a larger propeller or one with more pitch than the one included on 6S ...

Page 7: ...peller and drive shaft to some stress Frequent stress may damage the propeller and drive shaft In rough water and windy conditions consider mounting the batteries further forward for added stability adjusting the struts downward to prevent the boat from overturning Avoid boating near watercraft people swimming areas fishing areas stationary objects waves and wakes rapidly moving water wildlife flo...

Page 8: ...a ruler to measure and record the tab adjustment Measure the length of the bolt head to the base of alumi num trim tab arm 4 Record the position of the trim tab against the ruler s straight edge after adjusting the trim tab 5 Tighten the adjustment lock nut to prevent further move ment of the adjustment screw 6 Repeat this process on the left trim tab ensuring the trim tab panels are either perpen...

Page 9: ... the stuffing tube and drive strut at the rear of the boat 3 Wipe the old lubricant and material from the drive shaft 4 Apply a liberal amount of lubrication to the flex shaft and spread it around the entire shaft Ensure enough lubrication is on the shaft to prevent any dry areas NOTICE When lubricating the flex shaft do not lubricate the first 20mm of the flex shaft If grease gets into the motor ...

Page 10: ...with a pause 2 Set the trims and control positions at the desired failsafe settings and power ON the SLT3 transmitter 3 When the LED on the SLT3 transmitter and receiver remain lit binding is complete You must rebind when Different failsafe positions are desired e g when throttle or steering reversing has been changed Binding the receiver to a different transmitter The SR315 receiver features a co...

Page 11: ...Hold the throttle trigger at the full brake position then press and release the Set button The green LED will fl ash three times and the motor will make three tones to indicate the full brake position has been accepted The motor will operate normally after calibration is completed 1 Unplug the fan and connect the programming lead to the fan port 2 Connect a battery to the ESC 3 Power on the box an...

Page 12: ...e you are trying to bind Incorrect binding protocol set Verify binding procedure and use SLT binding for stock radio If using a DSMR or DSM2 utilize the standard binding procedure listed in the manual Boat battery Transmitter battery charge is too low Replace recharge batteries ESC switch is off Power on ESC switch Boat will not connect after binding to transmitter Transmitter is too near boat dur...

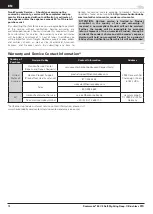
Page 13: ... of the Product on which liability is asserted As Horizon has no control over use setup final assembly modification or misuse no liability shall be assumed nor accepted for any resulting dam age or injury By the act of use setup or assembly the user accepts all resulting liability If you as the purchaser or user are not prepared to accept the liability associated with the use of the Product purcha...

Page 14: ... expense exceeds 50 of the retail purchase cost By submitting the item for service you are agreeing to payment of the service without notification Service estimates are available upon request You must include this request with your item submitted for service Non warranty service estimates will be billed a minimum of hour of labor In addition you will be billed for return freight Horizon accepts mo...

Page 15: ...the equipment and receiver Connect the equipment into an outlet on a circuit different from that to which the receiver is connected Consult the dealer or an experienced radio TV technician for help Horizon Hobby LLC 2904 Research Rd Champaign IL 61822 Email compliance horizonhobby com Web HorizonHobby com FCC Information Compliance Information for the European Union EU Compliance Statement ProBoat...

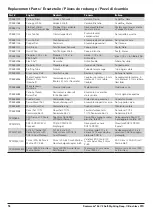
Page 16: ...mm moteur 4 7 mm arbre flexible Accoppiamento motore 5 mm motore 4 7mm albero flessibile PRB286058 Miscellaneous Hardware Diverse Hardware Matériel divers Hardware vario PRB286084 Canopy Thumb Screw Set Daumenschraubensatz für Kabinendach Ensemble vis à oreilles de la verrière Kit viti zigrinate capottina PRB286095 Rudder Cover Ruderabdeckung Protection du gouvernail Coperchio timone PRB286096 Ser...

Page 17: ...Start Up Tool Set Pro Boat PRB282028 Propeller CCW 1 4 x 1 65 3 16 Shaft Propeller CCW 1 4 x 1 65 3 16 Welle Hélice CCW 1 4 x 1 65 Arbre 3 16 Elica rotazione antioraria 1 4 x 1 65 Albero 3 16 PRB282047 Propeller 1 7 x 1 6 3 16 Shaft Propeller 1 7 x 1 6 3 16 Welle Hélice 1 7 x 1 6 Arbre 3 16 Elica 1 7 x 1 6 Albero 3 16 SPMMR4000 MR4000 DSMR 4CH Marine Receiver MR4000 DSMR 4 Kanal Bootsempfänger Réc...

Page 18: ... Sonicwake Dynamite EC5 IC5 DSMR Firma and the Horizon Hobby logo are trademarks or registered trademarks of Horizon Hobby LLC The Spektrum trademark is used with permission of Bachmann Industries Inc US 9 930 567 US 10 419 970 US 10 849 013 Other patents pending PRB08032V2 ...

Reviews: