6
7
Instructions de mise en route de l’électrificateurs
ranger A2000 / A3000
(ranger A3000 = identique à farmer A3000)
en relation avec les conseils de sécurité SECURA ANIMAL ou SECURA SECURITY
(www.horizont.com)
Installation et branchement:
Connecter le piquet de terre avec le fil de terre. Enfoncer profondément le piquet de terre (1m),
ref. 14041, dans un endroit humide, à proximité de l’électrificateur. Une bonne prise de terre
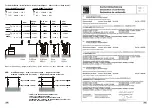
(Fig.1) est une condition préalable et nécessaire pour l’installation dans de bonnes conditions.
Se conformer ici à SECURA.
Les câbles de terre et de ligne doivent être raccordés suivant l’illustration.
La boite de l’électrificateur peut contenir les accus suivants: 12V, dimensions max. pour l’accu
250 x 192 x 225 mm.
Mise en route et contrôle:
Appuyer sur l’interrupteur en le positionnant sur >1<. Après quelques secondes, on entend
un léger tic-tac. L’électrificateur donne du voltage à la ligne. La lampe témoin de la clôture cli-
gnote à la cadence des impulsions électriques. Mettre le régulateur dans la position désirée la
puissance (Fig. 2a): Les 6 lampes de contrôle de la clôture ( a ) Fig. 2 montrent la tension sur la
ligne. La tension est indiquée par tranche de 1000V. Si moins de 3 lampes (3000 Volts) s’allument
il faut contrôler la ligne et l’appareil.
Causes possibles:
Avec clôture: Végétation trop abondante ou court-circuit de la clôture sur un piquet métallique.
Sans clôture: L‘appareil est défectueux, voir service.
Contrôle de l’accumulateur:
Dans la position > test < vous pouvez en même temps contrôler
l’état du déchargement de l’accumulateur. Si la charge de l’accu est encore suffisante vous allez
voir de la lumière permanente ( b ) Fig. 2, si la charge ne suffit plus, la lumière s’arrête.
Après avoir testé l’accu il faut remettre l’interrupteur sur la position >1<.
Standards: l’électrificateur correspond au normes de sécurité.
Changement du type d´alimentation (accumulateur):
Ouvrir l’électrificateur selon Fig. 3 et opérér le changement.
Les câbles de connexion nécessaires sont fournis
Solarisation:
Sur demande, un panneau solaire peut être fourni. Une fois monté, il doit être orienté vers le sud
(Fig. 4). Un panneau solaire 12V / 5W est connecter de l‘accumulateur 12V avec 25Ah minimum
(alternative 10W avec 35Ah ou 15W avec 45Ah et 20W avec 60Ah)
Maintenance:
Seulement du personnel qualifié est autorize d‘effectuer des réparatures.
Il ne faut utiliser que des pièces de rechange ordonnées par le producteur.
fr
Operating instruction
for electric fence controllers ranger A2000 / A3000
(ranger A3000 = identical in construction to farmer A3000)
in connection with SECURA safety and installation hints for electric fence controllers
(www.horizont.com)
Installation and connection:
Install the unit in a rather moisty place of the fence on the ground.
Drive one earth stake (1 metre), ref. 14041, as much as possible into the ground. A good groun-
ding (fig.1) is very important for the trouble free operation and the ideal performance of the fencer,
see also SECURA. Earth and line cables are connected according to the illustration.
The energizer housing can take 12V-batteries with following dimensions:
max. 250mm x 192mm x 225mm.
Operation and control:
(fig.2) Press switch in position >1<.
After a few seconds you will hear a regular tic tac. The energizer is supplying voltage onto the
fence. The control lamp flashes with the pulses.
Press the regulator into desired position (Fig. 2a): The 6 controllamps ( a ) indicate the fence
voltage in 1000V steps. At least 3 lamps should flash (3000V) to ensure sufficient voltage and
fencing.
Possible reasons, when the voltage is too low:
with fence:
heavy vegetation on the fence, insulator flash-over or fence too long.
without fence:
the energizer is faulty, see service.
Battery test:
In position > test < you can check at the same time the state of discharge of the battery. If
the battery charge is still ok you will see a permanent indicator light ( b ) Fig. 2, if the charge is
no longer sufficient the light will stop flashing. After testing the battery the switch has to be put
back in the position >1<.
Requirements:
The energizer corresponds to the safety standards.
Change of battery:
Open the unit according to (fig.3) and change or insert battery.
Solar operation: (Fig. 4)
On request a solar panel is available that can be mounted on top of the energizer and be directed
with this one towards the south.
A solarpanel 12V / 5W must be always connected to a 12V-battery with minimum 25Ah (alterna-
tivly 10W with minimum 35Ah und 15W with minimum 45Ah and 20W with minimum 60Ah).
Service:
Servicing is only to be made by qualified service personell.
Only by the manufacturer commanded replacement parts must be used.
en
Summary of Contents for ranger A3000
Page 7: ...12 ...


