3
2
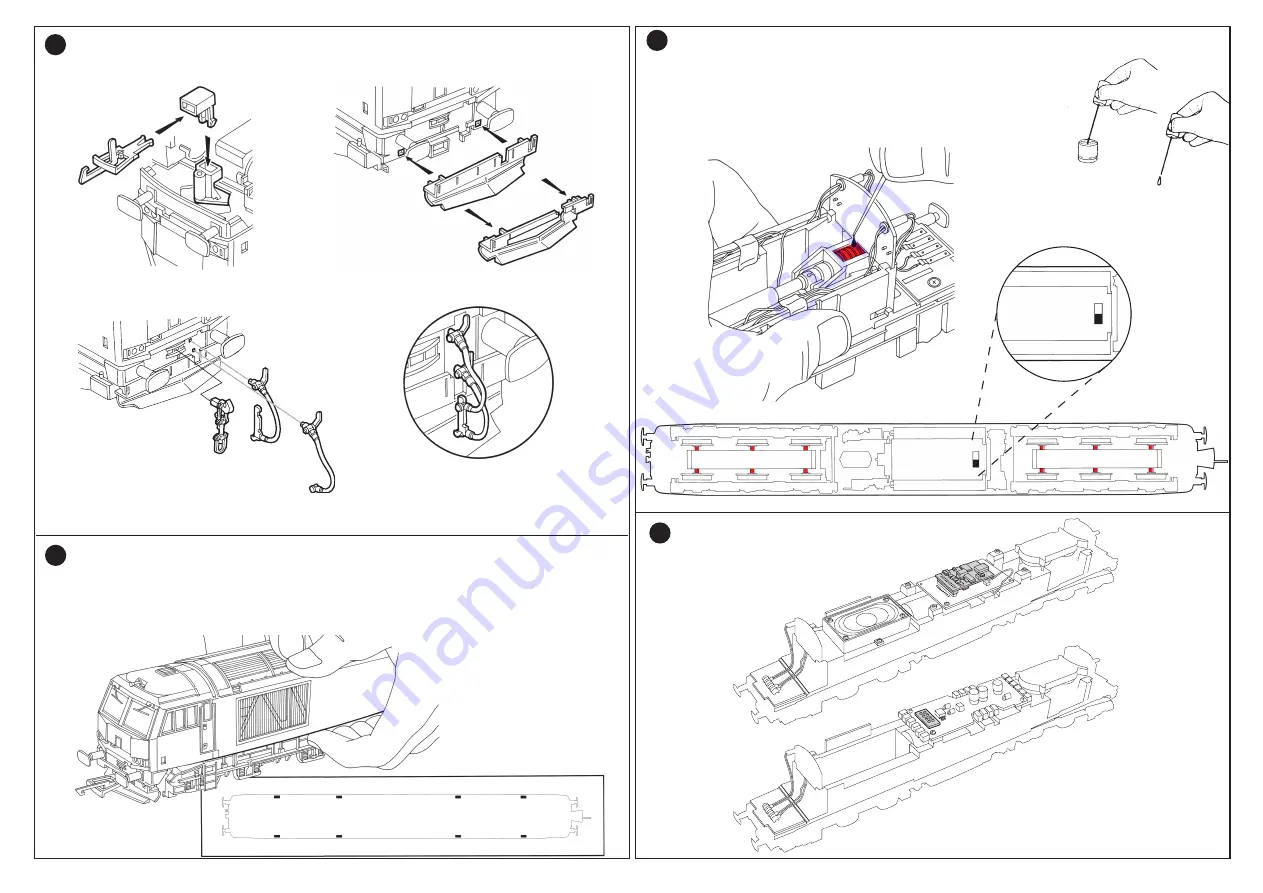
Fig.3a
Fig.6
Lubrication
IMPORTANT – Only apply small single drops of light machine oil to the places
indicated in red in Figs.6 and 7. This is best achieved by making a simple oil
‘dropper’ as illustrated in Fig.5. Insert a straightened paper clip into a cork and
use a bottle cap as a container for the oil. A small drop of oil can then be picked
up by the dropper and applied in exactly the right place. Immediately wipe off
any excess oil, especially from the locomotive body. Only lubricate moving parts.
Fig.5
Fig.7
Accessories
To fit alternative snow plough
Remove coupling pocket, (Fig.1), then remove pre-fitted snow plough and fit alternative as shown, (Fig.2).
To fit vacuum hoses and articulated coupling, locate as shown in Fig.3 and Fig.3a
Fig.1
Fig.2
Fig.4a
Fig.3
Note:
When fitting the alternative snow plough, vacuum hoses and articulated coupling, the coupling pocket, (Fig.1),
must be removed.
N
D
N
D
Switch for day-time and
night-time lighting.
Sound / DCC Ready
Location of Sound/DCC Decoder (Fig.4) and
DCC Ready socket (Fig.5)
4
Fig.4
Fig.5
1
3
Body Removal
Due to the weight of the chassis, this should only be carried out on a flat, stable surface.
Position hands centrally either side of the body as shown in Fig.4. Unclip the sides from the chassis by easing the
sides outwards, (the body clip positions are shown in Fig.4a), and carefully lift the body clear. Ensure that both
ends of the body are kept equally level when lifting, as pulling the body up from one end only may cause damage.
Fig.4
2


