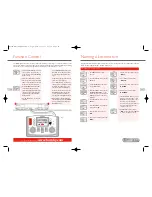
Set Clock in Scale Time
1.
Press
Menu
. Screen shows “
Loco
”.
Rotate
Control 1
until “
Unit
” is
displayed.
2.
Press
Control 1
and, if necessary,
rotate until screen shows “
Train 0
”.
3.
Rotate
Control 1
until screen
shows “
Clock X
”.
4.
Press
Control 1
. Screen shows
“
Clock X 00
”.
5.
Rotate
Control 1
until the speed
level required is shown on the
screen and press to confirm. Screen
shows “
Clock X
”.
6.
Press
Menu
to return to main
screen.
For more information visit:
www.hornby.com
26
Clock Setting
27
The Clock has the ability to be set at the actual time level or up to 10 times faster, 10 being the fastest. Having
set the time you may now wish to increase the speed of the clock.
Please note that the clock will immediately start functioning as soon as the Elite is powered up, therefore some
of the clock times that you see on the main screen may not correspond with the graphic interpretations of the
main screen shown throughout these instructions.
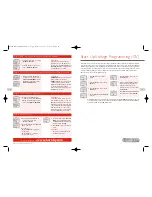
Set Clock in Real Time
1.
Press
Menu
. Screen shows “
Loco
”.
Rotate
Control 1
until “
Unit
” is
displayed.
2.
Press
Control 1
and, if necessary,
rotate until screen shows “
Train 0
”.
3.
Rotate
Control 1
until “
Set Clk
”
is displayed.
4.
Press
Control 1
. “
Set Clk 00:00
”
is displayed.
5.
To set the hours rotate
Control 1
clockwise until the desired hour
has been reached.
6.
To set the hours rotate
Control 2
clockwise. The hour is now set and
the minutes will flash.
7.
Rotate
Control 1
to the minutes
required and press to confirm.
Screen shows “
Set Clk
”.
8.
If the hour setting is incorrect,
rotate
Control 2
anti-clockwise
until the hours flash and reset.
9.
Press
Menu
to return to the main
screen.
RailCom
®
is a registered trade mark of Lenz Systems.
Loco Log or Search Function
When there are numerous stationary locomotives on the same track at the same time it is quite easy to become
confused as to the numbers of the locomotives on the track.The following Loco Search or Log Function is a very
useful application should this happen.The following is the procedure to allow you to do this using Locomotive
1 as an example.
1.
Press
Menu
. Screen shows
“
Loco
”.
2.
Rotate
Control 1
. Screen shows
“
Unit
”.
3.
Press
Control 1
to confirm.
Rotate, if necessary, until screen
shows “
Train 0
”.
4.
Rotate
Control 1
until screen
shows “
Loco Log
”. Press
Control 1
to confirm.
Please Note:
Should you have named the locomotive
then use the procedure above to locate
the locomotive only typing in the name
rather than the locomotive’s address.
5.
Screen shows “
Loco Log Address
”
or “
Loco Log Name
”. Rotate
Control 1
to show “
Loco Log
Address
”.
6.
Press
Control 1
and type in the
locomotive number you are looking
for and press
Control 1
to confirm.
7.
Watch for movement on your
layout.The locomotive that you are
searching for will move slightly
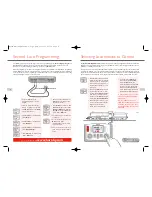
forwards and/or backwards. See
Fig 1.
8.
Once you have located the
locomotive press
Menu
to return
to the main screen.
Fig 1
Elite HBook updated 6.3.07_Q6.qxd 13/3/07 13:09 Page 24


