RailCom
®
is a registered trade mark of Lenz Systems.
1.
Press
Menu
. Screen shows
“
Loco
”.
2.
Rotate
Control 1
until screen
shows “
Acc
”.
3.
Press
Control 1
. Screen shows
“
Direct
”.
4.
Press
Control 1
to confirm. Screen
shows “
Address
”.
5.
Rotate
Control 1
until screen
shows “
CV
”. Press
Control 1
.
Screen shows “
CV Write
”.
6.
Press
Control 1
to confirm. Screen
shows “
CV 0001 W
”. 0001 is the
default setting.
7.
Press
Control 1
. Screen shows
“
CV 0001 W 000
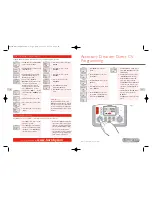
”. See Fig 1.
8.
Rotate
Control 1
until the CV
you wish to change is shown.
9.
Press
Control 1
. Rotate
Control 1
to enter the new value for your
chosen CV. Press
Control 1
to
confirm.
10.
Press
Control 1
. Red LED flashes
five times and screen shows
“
Address
”.
11.
Press
Menu
to return to the main
screen.
Accessory Decoder Direct CV
Programming
Fig 1
41
For more information visit:
www.hornby.com
40
Step 2: Naming of the Accessory
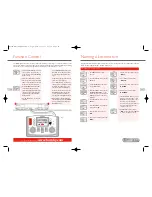
Controlling Accessories
1.
Press
Acc
. Screen shows the last
accessory operated.
2.
Press
Acc
again if an alternative
accessory is required. Screen shows
“
Contr. :1
” or “
2
” “
Adr:0003
” or
the last accessory operated.
3.
Rotate either
Control 1
or
2
until
the number of the accessory/point
you wish to operate is shown. Press
the appropriate
Control
to confirm.
4.
Press and release the selected
control knob. Accessory / point will
change direction together with the
arrow symbol on the screen.
Using the Elite it is possible to name all accessories / points that are digitally operated.
The Elite Control unit is capable of controlling 252 accessory/turnout addresses.
1.
Press
Menu
and rotate
Control 1
until screen shows “
Acc
”.
2.
Press
Control 1
to confirm. Screen
shows “
Direct
”.
3.
Rotate
Control 1
until screen
shows “
Features
” and press
Control 1
to confirm.
4.
Screen shows “
Features
Adr:0000
” and the number of the
last accessory used. Rotate
Control 1
to the accessory
number you wish to name and
press
Control 1
to confirm.
5.
Screen shows “
Name _
”. For this
example the name “
POINT 5
” will
be used.
6.
Press
7
twice. Screen shows “
P
”.
7.
Press
6
four times. Screen shows
“
PO
”.
8.
Press
4
four times. Screen shows
“
POI
”.
9.
Press
6
three times. Screen shows
“
POIN
”.
10.
Press
8
twice. Screen shows
“
POINT
”.
11.
Press
0
twice. Screen shows
“
POINT
”.
12.
Press
5
once. Screen shows
“
POINT 5
”.
13.
Press
Control 1
to confirm.
Screen shows “
Direct
”.
14.
Press
Menu
to return to the main
screen.
Please Note:
Should a mistake be made rotate
Control 1
anti-clockwise so that the
cursor moves back one position below
the incorrect letter. Press
0
twice and
the letter will disappear then continue
as above.
Elite HBook updated 6.3.07_Q6.qxd 13/3/07 13:09 Page 38


