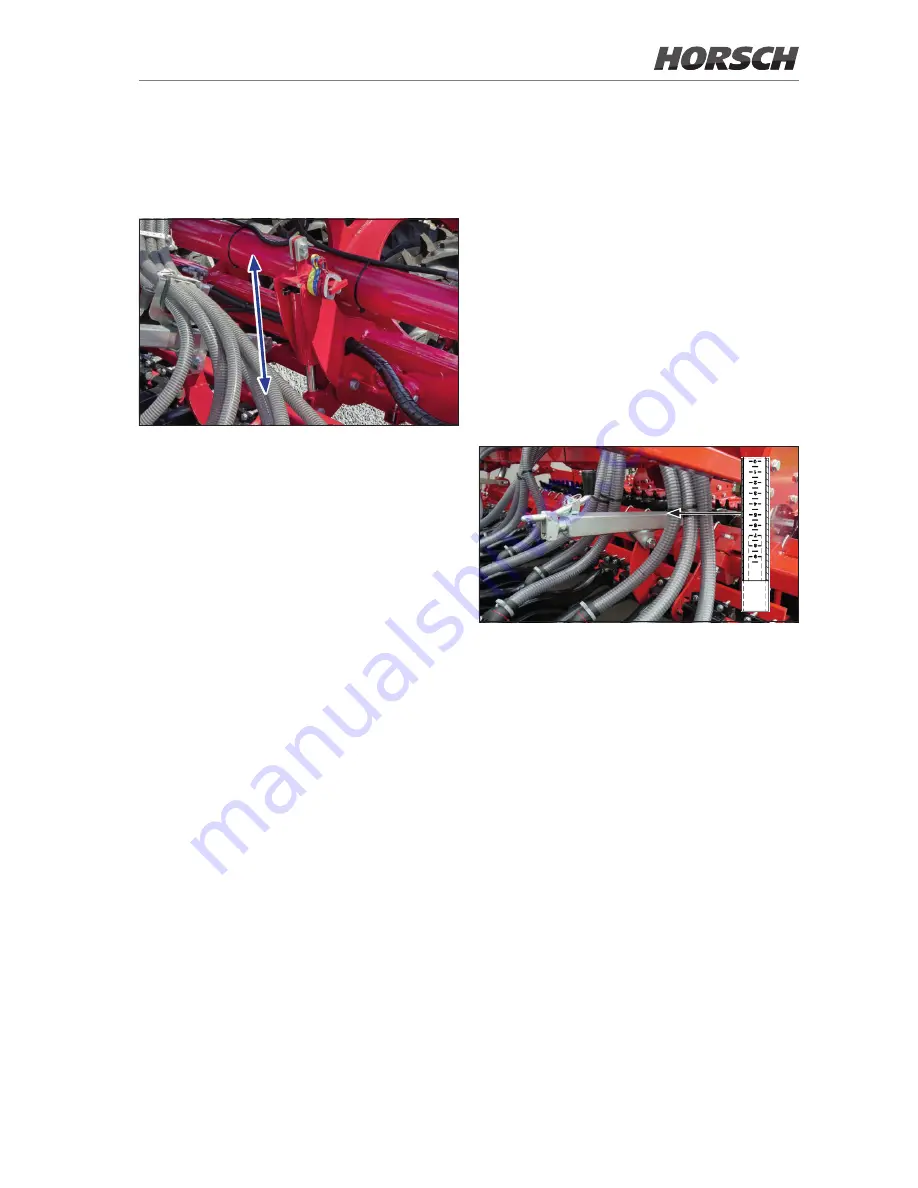
Drilling depth
The seed bar is guided in the depth via the hy-
draulic cylinders. The drilling depth is adjusted
by adding or removing aluminium clips.
Setting the drilling depth
The drilling depth is the larger the more clips
are placed.
¾
Turn the coulter pressure adjustment back to
a low pressure.
¾
Lift the seed bar.
¾
Place or remove the clips on/from the hy-
draulic cylinders. Place the same number
and colour of clips on all hydraulic cylinders.
¾
Plug unnecessary clips on the brackets pro-
vided for this purpose.
¾
In working position lower the machine onto
he aluminium clips with the control unit. The
cylinders must always be fully extended - the
pressure gauge should indicate min. 100 bar.
Thereafter, switch the control unit to the float
-
ing position.
¾
Check the coulter submersion depth and the
consolidation by the press rollers.
¾
If necessary, increase the coulter pressure
and check for changes after driving a few
meters in the field, see
Coulter pressure
.
¾
Check the drilling depth. If the desired setting
is not found in the adjustment range of the
coulter pressure adjustment, the drilling depth
must be adjusted again.
During drilling the coulter arm should be in hori-
zontal position.
Coulter pressure
The harder the soil and the deeper the seed is
to be placed, the higher the required pressure.
If the coulter pressure is too high, the frame is
lifted up slightly via the press rollers or the press
rollers sink into the soil. Exact depth guidance
is therefore no longer ensured.
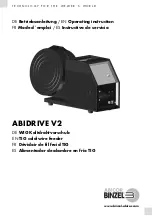
The coulter pressure can be increased by back-
ing out the screw adjustment.
¾
For adjustment loosen the handle, fold it into
the guide and secure it with a cotter pin.
¾
Pay attention to the engraved adjusting scale.
¾
Set all screw adjustment uniformly.
Screw adjustment for coulter pressure with adjusting
scale
Correlation
Changes to the hydraulic cylinder mainly effect
the drilling depth, but also the coulter pressure
and the press rollers.
Changes to the coulter pressure adjustment
mainly effect coulters and press rollers, but also
have an influence on the drilling depth.
¾
Check the coulter pressure after changing the
drilling depth.
¾
Check the drilling depth after changing the
coulter pressure.
46
47
Summary of Contents for Pronto 8 SW
Page 2: ......
Page 5: ......
Page 22: ...Position of safety stickers 2 2 18...
Page 52: ...Tightening torques on the coulter 20 Nm 55 Nm 38 Nm 20 5 Nm 100 Nm 5 Nm 48...
Page 75: ......


