background image


67 


28.


ALLUMAGE  


Avant d'allumer l'appareil, il est nécessaire de vérifier les parties suivantes:


-


Contrôler que le réservoir à granulés ait été rempli. 

-


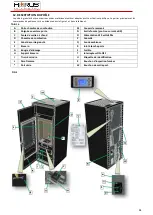
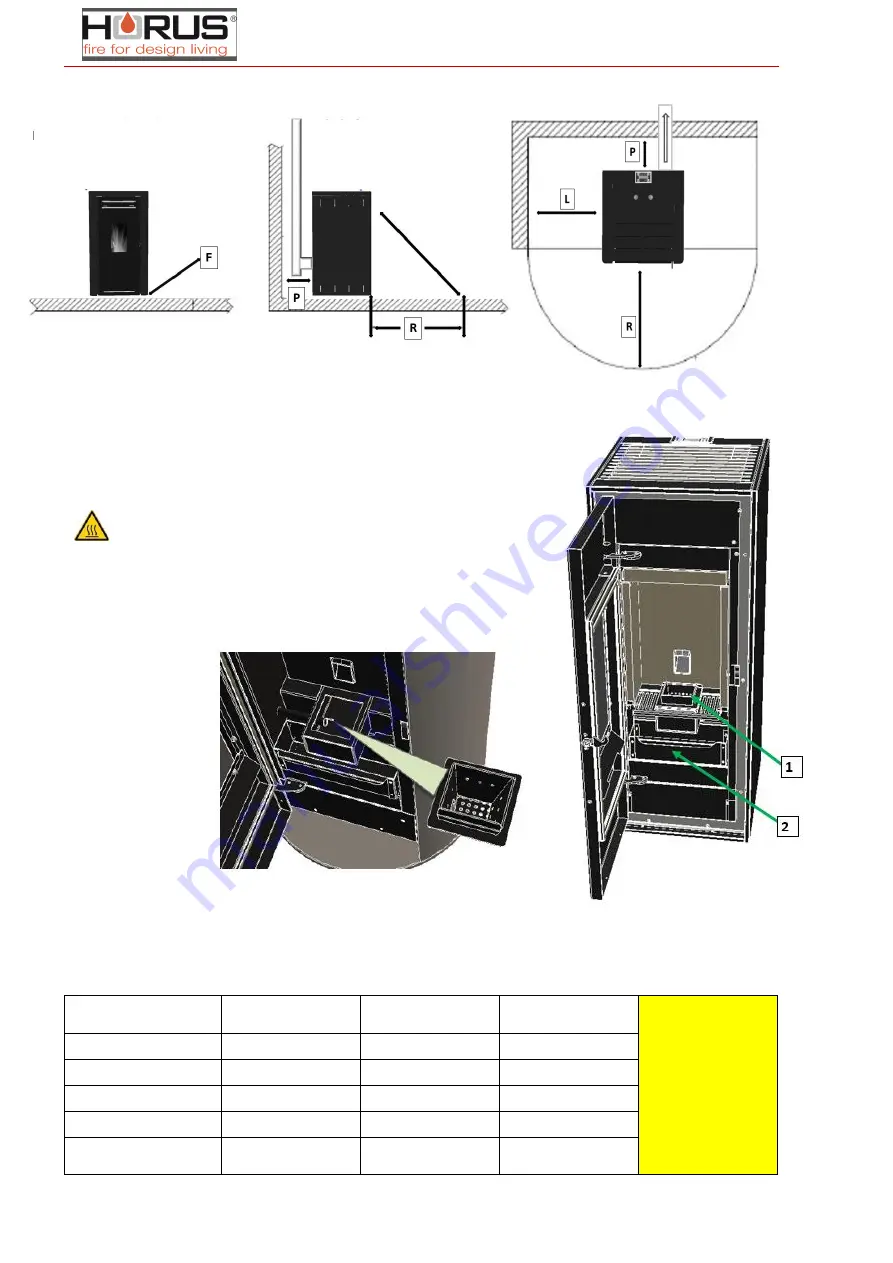
Extraire, nettoyer et contrôler le déflecteur, le creuset (fig. 1), le tiroir cendres 
(fig. 2), en faisant attention à replacer les parties dans les positions correctes. 


ATTENTION 

Faites attention à la présence éventuelle de résidus encore chauds 

-


Repositionner le déflecteur feu et le tiroir cendres 

-


Repositionner le creuset en vérifiant que le trou sur le flanc droit de 
dimensions  majeures  coïncide  avec  le  tuyau  de  la  résistance 
d'allumage  

-


Fermez 

la 

porte 

du 

foyer. 

-


Vérifiez  que 
l'appareil soit 
branché  à  la 
prise 

de 

courant. 

-


Vérifiez que 
l'interrupteur 
postérieur 
soit en 
position "I".


29.


ENTRETIEN ORDINAIRE 

IMPORTANT : 

avant chaque allumage il est nécessaire de nettoyer le creuset

 (F

), tous les 2-3 jours nettoyez le tiroir cendres 

(

I

) et le porte-creuset (

H).

 Il est conseillé de démonter le pare flamme aussi une fois par mois (

L

) et le bouchon d'inspection 

des fumées (

Z

) et de nettoyer avec un aspirateur adéquat 

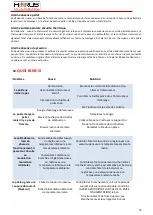
PARTIES/FRÉQUENCE 

Type de nettoyage:


1 JOUR Nettoyage ordinaire 

2-3 JOURS Nettoyage 
ordinaire 

1 MOIS Nettoyage ordinaire 

1 AN Nettoyage 
Extraordinaire * * 
Attention pour 
l'Entretien 
ordinaire consulter 
le paragraphe 
 

Creuset (F)


Tiroir cendres (I) 


Porte creuset (H)


 Déflecteur


(L)


Bouchon insp. 
Fumées (Z) 


Summary of Contents for DOMUS

Page 1: ...33 Non è stata trovata alcuna voce d indice STUFA A PELLET DOMUS MANUALE DI INSTALLAZIONE USO E MANUTENZIONE MOD DOMUS IT ...

Page 2: ...FA 7 16 INSTALLAZIONE 8 17 CHE COSA E RICHIESTO PER L INSTALLAZIONE DELLA STUFA 8 18 POSIZIONAMENTO DELLA STUFA 8 19 AVVERTENZE DI SICUREZZA PER L ALLACCIAMENTO ATTIVAZIONE DELLA STUFA 9 20 PRESA D ARIA ESTERNA E COLLEGAMENTO ALLA CANNA FUMARIA 9 21 COLLEGAMENTO AD UN CONDOTTO CON TUBO ISOLATO O DOPPIA PARETE 10 22 RACCORDO A CANNA FUMARIA 10 23 COLLEGAMENTO A CANNA FUMARIA 11 24 NOZIONI UTILI PER...

Page 3: ...AMBIENTE 20 52 IMPIEGO DEL TERMOSTATO CRONOTERMOSTATO ESTERNO 20 53 LA TEMPERATURA AMBIENTE RAGGIUNGE LA TEMPERATURA IMPOSTATA 20 54 RIAVVIO DOPO LO SPEGNIMENTO PER RAGGIUNTO SET TEMPERATURA AMBIENTE 20 55 PULIZIA BRACIERE 21 56 SPEGNIMENTO DELLA STUFA 21 57 STUFA SPENTA 21 58 RIACCENSIONE DELLA STUFA 21 59 CHE COSA SUCCEDE SE 21 60 IL PELLET NON SI ACCENDE 21 61 MANCA L ENERGIA ELETTRICA 21 62 AL...

Page 4: ...cordo con le indicazioni fornite 5 GENERALITA Tutti i dati necessari per identificare in maniera chiara ed univoca il costruttore la serie e la marcatura CE si possono rilevare dalla targhetta posta come esempio figura 1 e nel retro della stufa stessa Tutte le operazione di manutenzione straordinaria dovranno essere obbligatoriamente effettuate da personale abilitato specializzato ed autorizzato d...

Page 5: ...ere un tiraggio minimo di 12 PA Non sono previste serrande e valvole di chiusura 11 AVVISO PER L UTILIZZATORE Predisporre il luogo d installazione della stufe secondo i regolamenti locali nazionali ed europei Non toccare e non avvicinarsi al vetro della porta Non toccare lo scarico dei fumi Non eseguire pulizie di qualunque tipo con stufa in funzionamento Non scaricare le ceneri Non aprire la port...

Page 6: ...6 FIG 1 ...

Page 7: ... Peso Max 5 3 Kw Kg Consigliamo vivamente di impiegare per le nostre stufe combustibile certificato ENPlus DINplus O NORM M7135 L utilizzo di pellet non conforme può compromettere il funzionamento della stufa e portare al decadimento della garanzia 15 VERIFICA VISIVA DELLA STUFA Il tecnico deve accertarsi visivamente e funzionalmente delle parti indicate nella figura 2 e nella tabella 2 verificand...

Page 8: ...one nel Paese di riferimento L aria deve entrare attraverso aperture permanenti praticate sulle pareti che danno all esterno In caso di presenza di oggetti quali mobili tendaggi e divani aumentare considerevolmente la distanza della stufa dagli stessi In presenza di un pavimento in legno predisporre il piano salva pavimento e comunque in conformità alle norme vigenti nel Paese È indispensabile che...

Page 9: ...NA FUMARIA Tutte le tipologie di installazione e configurazione dei collegamenti tra la stufa e la canna fumaria devono prevedere delle sicurezze che tutelano la presenza dei bambini È importante per la sicurezza e la vivibilità nei locali dove è installata la stufa prevedere una presa d aria per consentire il ricambio della stessa UNI10683 Al fine di ottenere un corretto funzionamento della stufa...

Page 10: ...aio inox lisci all interno non ammessi tubi inox flessibili fissati a muro Prevedere alla base del condotto verticale un ispezione per i controlli periodici e la pulizia annuale Eseguire il raccordo alla canna fumaria a tenuta con raccordi e tubi normati e adeguati al tipo di utilizzo Controllare tassativamente che sia installato un comignolo antivento secondo le normative vigenti Vietato installa...

Page 11: ... vernice di finitura della stufa si raggiunge dopo alcuni processi di riscaldamento Durante i primi periodi di funzionamento l apparecchio potrebbe emanare odori sgradevoli Aerare il locale per consentire l eliminazione di tali odori Togliere dall interno del serbatoio tutti gli attrezzi che sono stati inseriti nel momento dell imballo e assicurarsi che il serbatoio sia libero da eventuali corpi e...

Page 12: ...care le seguenti parti Controllare che il serbatoio pellet sia pieno Estrarre ripulire e controllare il batti fiamma il braciere 1 il cassetto cenere 2 risistemando le parti avendo cura di inserirle nelle dovute posizioni ATTENZIONE Prestare attenzione all eventuale presenza di residui ancora caldi Riposizionare il braciere verificando che il foro sul lato destro di dimensione maggiore coincida co...

Page 13: ...rafiamma L e il tappo ispezione fumi situato dietro il cassetto cenere Z ripulendo con aspirapolvere adeguato PARTI FREQUENZA TIPO DI PULIZIA 1 GIORNO Pulizia ordinaria 2 3 GIORNI Pulizia ordinaria 1 MESE Pulizia ordinaria 1 ANNO Pulizia Straordinaria Attenzione per la Manutenzione ordinaria consultare il paragrafo Braciere F Cassetto cenere i Battifiamma L Sup braciere H Battifiamma L Tappo isp F...

Page 14: ...ufa spenta o accesa La console è del tipo touch screen basterà quindi sfiorare i tasti per modificare lo stato della stufa La figura seguente descrive il significato dei segnalatori di stato sulla parte sinistra del display L attivazione nel display di uno dei segmenti nell area STATO segnala l attivazione del dispositivo corrispondente secondo l elenco sottostante ATTENZIONE la prima accensione d...

Page 15: ...obalmente tutte le funzioni di cronotermostato Il prospetto per la programmazione è quello riportato nel diagramma l operazione non cancella le programmazioni memorizzate Prog Giornaliero Settimanale Week end Inizio Premere P3 1 volta Premere P1 P2 sceglie il giorno Premere P3 1 volta Premere P1 P2 sceglire l ora Premere P3 1 volta Premer e P1 P2 sceglire i minuti Premere P3 1 volta Premere P1 P2 ...

Page 16: ...ivato come rappresentato nel grafico Inoltre impostando OFF nel campo orari l orologio ignora il comando corrispondente Attenzione effettuare con cura la programmazione evitando in generale di far sovrapporre le ore di attivazione nella stessa giornata in differenti programmi Inizio Premere P3 1 volta Premere P5 1 volta Premere P3 1 volta Premere P5 1 volta Prog Giornaliero Premere P3 1 volta poi ...

Page 17: ...tart Prog 2 Ora di attivazione Ora OFF Stop prog 2 Ora di disattivazione Ora OFF Lunedì prog 2 Giorni di riferimento On off Martedì prog 2 On off Mercoledì prog 2 On off Giovedì prog 2 On off Venerdì prog 2 On off Sabato prog 2 On off Domenica prog 2 On off Programma 3 Selezione Significato Valori possibili Start Prog 3 Ora di attivazione Ora OFF Stop prog 3 Ora di disattivazione Ora OFF Lunedì pr...

Page 18: ... SUGGERIMENTO allo scopo di evitare confusione e operazioni di avvio e spegnimento non voluti attivare un solo programma per volta Disattivare il programma giornaliero se si desidera impiegare quello settimanale Disattivare il programma week end se si utilizza quello settimanale Attivare la programmazione week end solamente dopo aver disattivato la programmazione settimanale Inizio Premere P3 1 vo...

Page 19: ... 05 MODO CICALINO Quando OFF disabilita la segnalazione acustica 43 MENU 06 CARICO INIZIALE Consente di effettuare a stufa spenta e fredda un precarico pellet per un tempo pari a 90 Avviare con il tasto P1 e interrompere con il tasto P4 Inizio Premere P3 1 volta Premere P2 2 volte Premere P3 1 volta P1 P2 per scegliere la lingua Premere P4 per uscire Inizio Premere P3 1 volta Premere P2 3 volte Pr...

Page 20: ... funzionamento Con l aumentare della temperatura all interno della camera di combustione sono abilitati gli scambiatori 51 MODIFICA DELL IMPOSTAZIONE DELLA TEMPERATURA AMBIENTE Per modificare la temperatura ambiente è sufficiente selezionare la modalità MODIFICA SET AMBIENTE con pressione sul tasto P2 Agire quindi sui tasti P1 e P2 per impostare la temperatura desiderata Dopo alcuni secondi dall i...

Page 21: ...n valore inferiore al parametro interno 62 ALLARMI Nell eventualità che si verifichi un anomalia di funzionamento la scheda interviene e segnala l avvenuta irregolarità operando in diverse modalità a seconda della tipologia di allarme Sono previsti i seguenti allarmi Origine dell allarme Visualizzazione display Sonda temperatura fumi 01 ALARM SONDA FUMI Sovratemperatura fumi 02 ALARM HOT TEMP Manc...

Page 22: ... essere di una non adeguata manutenzione della stufa diventa necessario contattare il centro assistenza prima di riutilizzare la stufa 63 COSA FARE SE Problema Causa Soluzione La stufa non si accende Alimentazione scollegata interruttore spento Intervento del fusibile di protezione Collegare il cavo di alimentazione e o accendere l interruttore Controllare il fusibile posto nell interruttore di ac...

Page 23: ...accensione Mancanza pelle all interno del serbatoio Troppo residuo di cenere nel braciere Candeletta di accensione malfunzionante Riempire il serbatoio del combustibile Svuotare e ripulire il braciere ripulire gli eventuali fori passaggio aria otturati controllare le buone condizioni del braciere Controllare il serraggio dei morsetti controllare il funzionamento elettrico sostituire se non funzion...

Page 24: ...ollegare il cavo di alimentazione dalla rete elettrica Indossare dispositivi di sicurezza es guanti appropriati quando si effettuano operazioni di manutenzione Effettuare questa operazione a stufa spenta e completamente raffreddata 66 OPERAZIONI DA ESEGUIRE OGNI STAGIONE PRIMA DELL ACCENSIONE A CURA DEL CAT Centro Assistenza Tecnica Pulizia generale interna ed esterna Pulizia accurata dei tubi di ...

Page 25: ...chi di rottura sono generati solamente da impatti fisici ed i materiali di normale consumo guarnizioni di vetri e sportelli che periodicamente devono essere sostituiti per il buon funzionamento della macchina pareti interne d vermiculite bracieri resistenze di accensione Non sono in garanzia guasti accidentali causati da cadute o danni dovuti al trasporto a noi imputabili Accertare l integrità del...

Page 26: ... della garanzia compilare la presente cartolina e spedirla alla FONTANA FORNI SRL entro 8 giorni dalla data di acquisto N B La cartolina viene registrata o non rispedita all acquirente il quale deve conservare il certificato di garanzia e la ricevuta fiscale con data di acquisto INFORMAZIONI SULLA PRIVACY dichiaro di prestare il consenso al trattamento dei dati personali ai sensi della legge n 196...

Page 27: ...apparecchiature elettriche ed elettroniche nonché allo smaltimento dei rifiuti Il simbolo del cassonetto barrato riportato sull apparecchiatura o sulla confezione indica che il prodotto alla fine della propria vita utile deve essere smaltito in modo idoneo L utente pertanto dovrà conferire l apparecchiatura agli idonei centri di raccolta differenziata dei rifiuti elettronici ed elettrotecnici ...

Page 28: ..._____________________________________________________________ _____________________________________________________________________________________ _____________________________________________________________________________________ _____________________________________________________________________________________ ________________________________________________________________________________...

Page 29: ...29 FONTANA FORNI SRL Via G Di Vittorio 6 61047 San Lorenzo in Campo PU Italy Tel 39 0721 776697 Fax 39 0721 735370 ...

Page 30: ...30 PELLET STOVE DOMUS INSTALLATION AND MAINTENANCE MANUAL MOD DOMUS EN ...

Page 31: ... THE STOVE 36 17 SAFELY CONNECT OPERATE THE STOVE 37 18 EXTERNAL AIR INTAKE AND CONNECTION TO THE FLUE 38 19 CONNECTION TO AN INSULATED OR DOUBLE WALL FLUE 38 20 CONNECTION TO THE FLUE Figura 8 39 21 CONNECTION TO THE FLUE Figura 9 39 22 USEFUL INFORMATION ABOUT CHIMNEYS 39 23 COMMISSIONING 39 24 FUEL CHARGE 39 25 IGNITION 40 26 ROUTINE MAINTENANCE 41 27 CONTROL PANEL 42 28 MENU 43 29 ALARMS 49 30...

Page 32: ...described intended use of the stove and the relative configurations are the only ones permitted by the manufacturer never use the stove in ways not described in the provided instructions 5 GENERAL INFORMATION The identification label on the back of the stove figure 1 contains all the relevant information to clearly and univocally identify the manufacturer the serial number and the EC marking Extra...

Page 33: ...ified and authorized technicians Laws regulations and directives relating to chimney configuration ventilation exhaustion power supply and other systems must be respected The stove must be installed and used in settings that are deemed suitable in compliance with current regulations The manufacturer declines any responsibility for accidents due to improper installation parts removal bad maintenanc...

Page 34: ...nk lid B Combustion chamber door handle N Fume exhaustion outelt C Air louvers O Inlet for power supply 220 volts 50hz D Combustione chamber fire box P Control panel E Pellet outlet channel Q Environment probe F Brazier Crucible R Door gasket G Spark plug S Fuse H Support brazier T Circuit breaker ON OFF I Ash pan U Identification label on the back of the stove L Flame trap Z Inspection cap smoke ...

Page 35: ...es are recommended Type of pellet VIRGIN WOOD Diameter 6 8 mm Average length 15 20 mm Moisture 10 Heating power Max 4 500 Kcal Kg Power Weight Max 5 3 Kw Kg We strongly recommend to use for our stoves certified fuel Enplus DINplus O NORM M7135 The use of improper pellet may compromise the functioning of the stove and bring to the invalidity of the guarantee ...

Page 36: ...FORNI SRL declines any responsibility for damages caused by improper connections and systems 16 POSITIONING OF THE STOVE Position the stove so that the plug is easily accessible In order to ensure a good functioning and an even distribution of temperature leave adequate clearance and air for the pellets to burn in compliance with installation instructions and national regulations Air will flow thr...

Page 37: ... the Technical Informations table There is an earthed wall socket just behind the stove compliant with current regulations prepare a mains socket according to law and a grounding behind the stove The stove cable is not dragging on the floor causing potential hazards to users The cable is not folded or pressed Once the stove has been installed make the power cable and socket easy to reach by adults...

Page 38: ...lly or horizontally near the thermolabile wall Figure 6 Position 2 Alternatively we suggest you use industrial insulated pipes These can be used on the outside without causing condensation problems WARNING Always use pipes and connections with appropriate close fitting gaskets All the sections of a flue must be easily controlled and removed for periodic internal cleaning WARNING Each 90 bend in th...

Page 39: ...ely sure to install an anti draught chimney in compliance with current regulations 22 USEFUL INFORMATION ABOUT CHIMNEYS The flue must be compliant with current building regulations The picture below shows how to connect the fume exhaustion pipe to a pre existing flue 23 COMMISSIONING The stove commissioning can only be carried out after installation and assembling The device must then be connected...

Page 40: ...Before switching the stove on perform the following checks Check that the pellet tank is full Remove clean and thoroughly check the vermiculite flame retardant plate the brazier 1 and the ash pan then reposition them correctly WARNING Be careful there may be burning residues Reposition the ash pan making sure that the bigger hole on its right side its with the ignition resistance pipe Close the fi...

Page 41: ...ssemble the flame trap Position M and the inspection plug once a month Position M1 cleaning up the area by using an appropriate vacuum cleaner PARTS FREQUENCY TYPE OF CLEANING 1 DAY Routine cleaning 2 3 DAYS Routine cleaning 1 MONTH Routine cleaning 1 YEAR Extraordinary cleaning Warning for ordinary maintenance please refer to section Brazier F Ash pan i Brazier support H Flame trap L Inspection p...

Page 42: ...the display If an icon shows up in the STATE area of the display the corresponding device is activated on the basis of the list appearing right below the icon The following figure describes the meaning of the status indicators on the left side of the display The activation in the display of one of the segments in the STATUS area signals the activation of the corresponding device according to the l...

Page 43: ... P3 1 volta MENU 02 SET CHRONO SUB MENU 02 01 ENABLE CHRONO It allows you to globally enable and disable all chrono thermostat functions To set the chrono follow the instructions in the graphic the operation doesn t delete previous settings Daily weekly weekend programming Start Press P3 once Press P1 P2 choose day Press P3 once Press P1 P2 choose hour Press P3 once Press P1 P2 choose minute s Pre...

Page 44: ...MENU 02 03 WEEKLY PROGRAMMING Allows you to enable disable and set weekly chrono thermostat functions The weekly programming has 4 independent programs whose final result is the combination of the 4 single programming options The weekly programming can be enabled and disabled as shown in the graphic Moreover by selecting OFF in the hour filed the clock ignores the corresponding command Attention C...

Page 45: ...45 ...

Page 46: ...in order to avoid confusion and unwanted start and stop operations activate only one program at a time Deactivate the daily program if you want to use the weekly program Deactivate the weekend program if you use the weekly one Activate the weekend programming only after deactivating the weekly programming MENU 03 CHOOSE LANGUAGE Allows you to choose the language you prefer among the available ones...

Page 47: ...CIAN CALIBRATIONS This page is dedicated to the installer technician and is password protected Only authorized person are allowed to modify the parameters contained Non coherent modifications can compromise the good functioning of the stove with possible serious damages to things and people OPERATING MODE The standard operating mode of a controller installed on an air stove is described below The ...

Page 48: ...ivated the stove starts to working again until Pr13 value is reached Restart is possible when the above conditions are fulfilled RESTART AFTER SWITCHING OFF WHEN TEMPERATURE REACHES SET ROOM TEMPERATURE After the switching off has been completed the stove is in a cooling condition the fume exhaustion smoke is brought to maximun level into the final cleaning phase Restart is possible as soon as the...

Page 49: ...pressing the P4 key FUME PROBE ALARM The alarm will go off if the fume probe is broken or disconnected During the alarm the stove shuts down automatically HOT TEMPERATURE ALARM It occurs when the fume probe detects a temperature over 270 C During the alarm the stove shuts down automatically The cause of the shutdown can be pellets exhausted inside the tank auger motor blocked FAILED IGNITION ALARM...

Page 50: ...heck the thermostat operation if the outdoor thermostat is the battery powered type check the batteries or set with a value greater than the actual room temperature The stove shows a blackout No power Plug improperly connected Check the connections on both the mains and the stove check AFTER UNPLUGGING THE POWER CORD proper operation of the switch hookups and terminals The stove shows Smoke temper...

Page 51: ...al overheating The bimetallic safety thermostat trips the alarm Contact technical assistance The stove shows No vacuum Improper installation of the flue or clogged flue Pressure switch not working Make sure there are no chimneypots on top of the flue that are unsuitable for pellet stoves or clean the flue Contact technical assistance 31 GENERAL INSTRUCTIONS WARNING Switch the stove off and let it ...

Page 52: ...receipt invoice or documents proving that the stove was actually purchased on that specific day One of these documents is compulsory for warranty claims It must be shown to your technician before the warranty claim or it could void the manufacturer s warranty The warranty is valid if all due payments have been settled and the purchaser is not in default of payments The warranty is valid if it is p...

Page 53: ... showing the purchase date I hereby authorise the use of my personal data in compliance with Legislative Decree no 196 2003 Signature INFORMATION TO USERS According to Legislative Decree 49 2014 Implementation of Directives 2002 95 EC 2002 96 EC e 2003 108 EC concerning the reduction of the use of hazardous substances in electrical and electronic equipment as well as the disposal of waste The symb...

Page 54: ...____________________________ __________________________________________________ __________________________________________________ __________________________________________________ __________________________________________________ __________________________________________________ __________________________________________________ __________________________________________________ ______________...

Page 55: ...55 ...

Page 56: ...56 POÊLE À GRANULÉS DOMUS GUIDE D INSTALLATION D UTILISATION ET D ENTRETIEN MOD DOMUS FR ...

Page 57: ...POUR LE BRANCHEMENT MISE EN SERVICE DU POÊLE 64 20 PRISE D AIR EXTÉRIEURE ET BRANCHEMENT AU CONDUIT DE FUMÉE 64 21 JONCTION À UN CONDUIT AVEC TUYAU ISOLÉ OU DOUBLE PAROI 65 22 RACCORDEMENT AU CONDUIT DE FUMÉE 65 23 JONCTION AU CONDUIT DE FUMÉE 66 24 INFORMATIONS UTILES POUR LE CONDUIT DE FUMÉE 66 25 CHARGEMENT DU COMBUSTIBLE 66 26 CHARGEMENT DU COMBUSTIBLE 66 27 DISTANCE MINIMALE DE MATÉRIAUX INFL...

Page 58: ...NE 72 52 LA TEMPÉRATURE AMBIANTE ATTEINT LA TEMPÉRATURE INTRODUITE 72 53 REDÉMARRAGE APRÈS EXTINCTION POUR AVOIR ATTEINT LA TEMPÉRATURE AMBIANTE PRÉVUE 72 54 NETTOYAGE CREUSET 73 55 EXTINCTION DU POÊLE 73 56 RALLUMAGE DU POÊLE 73 57 QU EST CE QUI SE PASSE SI LE PELLET NE S ALLUME PAS 73 58 IL N Y A PAS D ÉLECTRICITÉ 73 59 QUE FAIRE SI Errore Il segnalibro non è definito 60 INSTRUCTIONS FONDAMENTAL...

Page 59: ...nsorielles ou mentales sont réduites ou qui n aient pas d expérience ou de compétence L appareil ne doit pas être utilisé par des enfants Les enfants ne doivent pas s approcher du poêle lors que l appareil est en fonctionnement Les utilisations ci dessus et les relatives configurations sont les seuls admises par le constructeur ne pas utiliser le poêle dans des conditions différente de celles indi...

Page 60: ...remarques qui suivent L installation de l appareil doit être effectuée par le personnel technique qualifié et agréé On demande la conformité à toutes les lois normes directives relatives à la configuration de conduits de fumée ventilation extraction de fumée projets d installation et électricité L installation et l utilisation de l appareil doit avoir lieu dans des lieux qui sont jugés adéquats et...

Page 61: ... combustion M Couvercle reservoir B Poignée ouverture porte N Sortie fumée pre trou sur cotée DX C Fente de sortie air chaud O Alimentation 220 volts 50hz D Chambre de combustion P Consolle E Canal de sortie granulé Q Sonde ambiance F Brasero R Joint étanche porte G Bougie d allumage S Fusible H Support brasero T Interrupteur ON OFF I Tiroir à ceindre U Etiquette de identification L Pare flamme Z ...

Page 62: ...u granulés ayant les caractéristiques suivantes Type de granulé BOIS VIERGE Diamètre 6 8 mm Longueur moyenne 15 20 mm Humidité 10 Pouvoir calorifique Max 4 500 Kcal Kg Puissance Poids Max 5 3 Kw Kg Nous vous recommandons vivement d utiliser pour nos poêles carburant certifié ENplus DINplus O NORM M7135 L utilisation de pellets non conforme peut compromettre le fonctionnement du poêle et conduire à...

Page 63: ...installation de chauffage Tous les branchements doivent être effectués selon les réglementations en vigueur FONTANA FORNI SRL ne s assume aucune responsabilité en cas de dommages causés par des installations inadéquates ATTENTION La ligne electrique doit etre equipée de décharge au sol 18 EMPLACEMENT DU POÊLE Le poêle doit être placé de façon à ce que la prise électrique soit aisément accessible P...

Page 64: ...si cela était indispensable contactez immédiatement le SAV de FONTANA FORNI SRL Contrôlez périodiquement que le câble ne subisse pas d altérations Ne branchez jamais le câble à la ligne électrique moyennant des adaptateurs ou des prises multiples Ne manipulez jamais le câble avec les mains humides ou mouillées Évitez l accessibilité aux enfants La FONTANA FORNI SRL décline toute responsabilité dan...

Page 65: ...nstruments adéquats qu il y ait un tirage de 12 Pa N utilisez que des tuyaux isolés double paroi en acier inox lisses à l intérieur les tuyaux flexibles ne sont pas admis fixés au mur Prévoir à la base du conduit verticale une inspection pour les contrôles périodiques et le nettoyage qui doit être fait une fois par an Effectuez le raccordement au conduit de fumée étanche avec des raccords et des t...

Page 66: ...Il est conseillé de contrôler et maintenir constant le niveau de granulé dans le réservoir d alimentation dans le but d éviter que le feu s éteigne faute de combustible Il est important que la trappe du réservoir reste fermée sauf lors du chargement du combustible Faites attention à ne pas introduire volontairement ou accidentellement des corps étrangers différant du combustible recommandé à l int...

Page 67: ...nce d allumage Fermez la porte du foyer Vérifiez que l appareil soit branché à la prise de courant Vérifiez que l interrupteur postérieur soit en position I 29 ENTRETIEN ORDINAIRE IMPORTANT avant chaque allumage il est nécessaire de nettoyer le creuset F tous les 2 3 jours nettoyez le tiroir cendres I et le porte creuset H Il est conseillé de démonter le pare flamme aussi une fois par mois L et le...

Page 68: ...ignifications différentes dépendant de leur position sur l écran La figure décrit la signification des voyants d état sur la partie gauche de l écran L activation dans l écran d un des segments dans la zone ÉTAT indique l activation du dispositif correspondant selon la liste ci dessous ATTENTION le premier allumage doit être effectué par un technicien certifié lors de la première utilisation il fa...

Page 69: ...Menu Programmation menu d accès l accès des sous menus entre dans le menu suivant 4 On off Réinitialiser les alarmes Allumage Arrêter des poêle Enconcé pendant 2 secondes allume ou énteint le poele Déverrouille le poêle par une alarme 5 abaisse la puissance Menu Programmation Avances au menu suivant Permet de selectionner les parametres du programme 6 augmente la puissance Menu Programmation Redui...

Page 70: ...s programmation quotidienne hebdomadaire week end 36 SOUS MENU 02 02 PROGRAMMATION QUOTIDIENNE Cela permet d activer désactiver et introduire les fonctions de chrono thermostat quotidien Il est possible d introduire deux périodes de fonctionnement réglées par 2 allumages et 2 extinctions La fonction quotidienne peut être activée et désactivée en gardant en mémoire la programmation insérée Veuillez...

Page 71: ...ur OFF dans le champ des horaires l horloge ignore la commande correspondante Attention effectuer attentivement l introduction en évitant en général de superposer dans le même jour les horaires de désactivation en des programmes différents 38 SOUS MENU 02 04 PROGRAMMATION WEEK END Cela permet d activer désactiver et introduire les fonctions de chrono thermostat au week end jours 6 et 7 c est à dir...

Page 72: ...i la température des fumées est majeure de Pr15 les échangeurs entrent en fonction 50 MODIFICATION DE LA TEMPÉRATURE AMBIANTE ET DU RÉGLAGE PUISSANCE Pour modifier la température ambiante il suffit de sélectionner le mode MODIFICATION RÉGLAGE TEMPÉRATURE AMBIANTE en appuyant sur la touche P2 Appuyez ensuite sur les touches P1 et P2 L écran affiche l état courant du RÉGLAGE SET de température Pour ...

Page 73: ...aspirateur fumées défectueux AL 4 ALAR AL 4 ASPIRAT DEFECTUEUX Allumage manqué AL 5 ALAR AL 5 ALLUM MANQUE Epuisement pellet AL 6 ALAR AL 6 ABSENCE PELLET Intervention sécurité thermique AL 7 ALAR AL 7 SECUR THERMIQUE Intervention pressostat AL 8 ALAR AL 8 ABSENCE DEPRESS TOUTE SITUATION D ALERTE CAUSE L IMMÉDIATE EXTINCTION DU POÊLE L état d alerte est atteint après le temps Pr11 et il peut être ...

Page 74: ...tection Branchez le cordon d alimentation et ou allumer l interrupteur Contrôler le fusible placé dans l interrupteur d allumage Et à l intérieur de la carte de contrôle Le poêle charge le pellet mais il n y a pas de flamme Bougie d allumage défectueuse Brasier bouché par des résidus de combustion Brasier inséré de manière anormale Remplacez la bougie Videz le brasier et nettoyez le support du bra...

Page 75: ...actez le service technique Le poêle signale Demarrage manqué Manque de pellets à l intérieur du réservoir Trop de résidus dans le brasier Dysfonctionnement de la bougie d allumage Remplissez le réservoir de pellets Videz et nettoyer le brasier nettoyez tous les trous de passage d air obstrués vérifier le bon état du brasier Vérifiez le serrage des bornes vérifier le fonctionnement électrique rempa...

Page 76: ...AUTORISÉ ATTENTION L entretien extraordinaire doit être effectuée en se servant du service d un technicien spécialisé et agréé SAV ATTENTION Avant tout type d intervention d entretien substitution réparation nettoyage etc il est impératif d isoler le poêle des sources d électricité débrancher le câble d alimentation du réseau électrique Utiliser des dispositifs de sécurité convenables ex gants lor...

Page 77: ...gueur ou aux caractéristiques de l appareil La garantie déchoit si dans la localité d utilisation de l appareil il y a des facteurs environnementaux et ou il y a des dommages causés par des agents atmosphériques climatiques chimiques électrochimiques La garantie déchoit si il y a un mauvais fonctionnement causé par une installation erronée une manipulation impropre de l appareil un usage non appro...

Page 78: ...strée mais elle ne sera pas renvoyée à l acheteur qui doit garder le certificat de garantie et le ticket de caisse avec la date de l achat INFORMATIONS SUR LA CONFIDENTIALITÉ je déclare de donner mon consensus au traitement des données personnelles aux termes de la loi n 196 2003 Signature MODÈLE MATRICULE DONNÉES D ACHAT ACHETEUR Nom Rue Ville CP Nation E mail TEL Mobile DONNÉES DU REVENDEUR Cach...

Page 79: ..._____________________________________________________________ _____________________________________________________________________________________ _____________________________________________________________________________________ _____________________________________________________________________________________ ________________________________________________________________________________...

Page 80: ...80 ...

Page 81: ...81 PELLETKACHEL DOMUS INSTALLATIE GEBRUIKS EN ONDERHOUDSHANDLEIDING MOD DOMUS NL ...

Page 82: ...LING VAN DE KACHEL 91 20 EXTERNE LUCHTINLAAT EN AANSLUITING OP DE ROOKGASAFVOER 91 21 AANSLUITING OP EEN LEIDING MET GEISOLEERDE BUIS OF DUBBELE WAND 92 22 AANSLUITING AAN ROOKGASAFVOER 93 23 VERBINDING AAN ROOKGASAFVOER 93 24 NUTTIGE OPMERKINGEN VOOR DE ROOKGASAFVOER 93 25 INBEDRIJFSTELLING 94 26 LADEN VAN BRANDSTOF 94 27 MINIMALE AFSTAND VAN BRANDBARE MATERIAAL 94 28 INWERKINGSTELLING 95 29 ROUT...

Page 83: ...4 OPNIEUW INSCHAKELEN VAN DE KACHEL 103 55 WAT GEBEURT ER ALS DE PELLET NIET AANGAAT 104 56 GEBREK ELECTRICITEIT 104 57 ALARM SENSOR ROOKGASTEMPERATUUR 104 58 ALARM OVERVERHITTING ROOKGASSEN 104 59 ALARM VOOR MISLUKTE INSCHAKELING 104 60 ALARM UITSCHAKELING TIJDENS DE WERKFASE 104 61 ALARM DRUKBEVEILIGING 104 62 ALARM ALGEMENE THERMOSTAAT 104 63 ALARM VENTILATOR AFZUIGING ROOKGASSEN DEFECT 105 64 ...

Page 84: ...g voor de juiste installatie onderhoud en gebruik van het product Met de aflevering van deze handleiding wijzen we elke aansprakelijkheid af zowel civiel als strafrechtelijk voor ongevallen die voortvloeien uit het geheel of gedeeltelijk niet inachtnemen van de daarin opgenomen aanwijzingen 4 BEDOELD GEBRUIK Dit product model LESS TONDA is een kachel waarbij men stookt met houtpellets brandstof vo...

Page 85: ...orziene is niet gedekt door de garantie 8 VERANTWOORDELIJKHEID VAN DE FABRIKANT Met de aflevering van deze handleiding wijst FONTANA FORNI SRL alle aansprakelijkheid af zowel civiel als strafrechtelijk direct of indirect als gevolg van het niet naleven van de volgende voorschriften 1 Niet conforme installatie 2 Gedeeltelijk of totaal niet naleven van de instructies in deze handleiding 3 Installati...

Page 86: ... buitengewone onderhoudswerkzaamheden op De kachel niet uitschakelen door het loskoppelen van de netaansluiting De kachel niet schoonmaken vooraleer de structuur en de as volledig afgekoeld zijn De deur enkel aanraken als de kachel koud is 12 BESCHRIJVING VAN DE KACHEL De pelletkachel werd vervaardigd uit materialen die werden ontworpen voor het specifieke gebruik en met speciale afmetingen De bel...

Page 87: ...87 FIG 1 ...

Page 88: ...88 13 TECHNISCHE GEGEVENS ...

Page 89: ...reservoir 16 INSTALLATIE Alleen een gekwalificeerd en erkend technicus mag in volledige overeenstemming met de geldende voorschriften en montage instructies de installatie en de aansluiting uitvoeren en de goede werking van de kachel controleren FONTANA FORNI SRL wijst elke aansprakelijkheid voor schade aan voorwerpen en of personen af in geval de installatie niet is uitgevoerd in overeenstemming ...

Page 90: ...imte Voor de veiligheid en leefbaarheid in de ruimte waar de kachel wordt geïnstalleerd is het voor de veiligheid en leefbaarheid belangrijk een opening te voorzien voor het verversen van de lucht UNI10683 Het is niet toegestaan de kachel te installeren in slaapkamers en badkamers Het is niet toegestaan de kachel te installeren waar al een ander verwarmingstoestel is geïnstalleerd zonder een onafh...

Page 91: ...acht worden genomen 20 EXTERNE LUCHTINLAAT EN AANSLUITING OP DE ROOKGASAFVOER Alle soorten installaties en configuraties van de verbindingen tussen de kachel en de rookgasafvoer moeten zorgen voor beveiligingen die de aanwezigheid van kinderen beschermen Voor de veiligheid en leefbaarheid in de ruimten waar de kachel wordt geïnstalleerd is het belangrijk een luchtinlaat te voorzien voor verversing...

Page 92: ...en van de kachel 21 AANSLUITING OP EEN LEIDING MET GEISOLEERDE BUIS OF DUBBELE WAND De externe buis moet minimale binnenafmetingen hebben van 10 x 10 cm of 10 cm diameter en maximale van 20 x 20 cm of 20 cm diameter Controleer met geschikte instrumenten dat er een minimum trek van 12 PA is Alleen geïsoleerde buizen gebruiken dubbelwandig in roestvrij staal glad aan de binnenkant niet toegelaten fl...

Page 93: ...nstalleerd volgens de geldende voorschriften 23 VERBINDING AAN ROOKGASAFVOER Het rookkanaal moet inwendige afmetingen hebben die niet meer dan 20 x 20 cm bedragen of een diameter van niet meer dan 20 cm in geval van grotere afmetingen of een slechte staat van de rookgasafvoer bijv barsten slechte isolatie enz wordt aanbevolen om in de rookgasafvoer een roestvrij stalen buis van de juiste diameter ...

Page 94: ...t bovenste gedeelte van het apparaat waar zich het reservoir bevindt Dit wordt gedaan door het openen van het deksel van het reservoir men zorgt er hierbij voor dat geschikte handschoenen worden gedragen die de handen beschermen tegen warmtebronnen veroorzaakt door het apparaat in werking Het is raadzaam om het niveau te controleren en een constant niveau te handhaven in het reservoir van de brand...

Page 95: ...voor dat het apparaat is aangesloten op het stopcontact Zorg ervoor dat de achterste schakelaar op I geplaatst is 29 ROUTINE ONDERHOUD Belangrijk de vuurpot schoonmaken bij elk opnieuw inschakelen Pos F de aslade reinigen om de 2 3 dagen Pos I de vlammenafdekking vermiculiet panelen Pos L en de bovenste vuurpot Pos H Het is aangeraden een keer per maand het vlamscherm te demonteren Pos L en het in...

Page 96: ...van het toegangsniveau Afhankelijk van de operationele modi kunnen de weergaven verschillende betekenissen aannemen afhankelijk van de positie op het display De figuur beschrijft de betekenis van de statussignalen aan de linkerkant van het scherm De inwerkingstelling van een van de segmenten in het display in de STATUS zone signaleert de inschakeling van het bijbehorende apparaat volgens de onders...

Page 97: ... progr dag 01 chrono dag ON OFF 02 02 start 1 dag Uur 03 stop 1 dag Uur 04 start 2 dag Uur 05 stop 2 dag Uur 03 progr wekelijks 01 chrono week ON OFF 02 start prog 1 Uur 03 stop prog 1 Uur 04 maandag prog 1 ON OFF 05 dinsdag prog 1 ON OFF 06 woensdag prog 1 ON OFF 06 donderdag prog 1 ON OFF 08 vrijdag prog 1 ON OFF 09 zaterdag prog 1 ON OFF 10 zondag prog ON OFF 11 start prog 2 Uur 12 stop prog 2 ...

Page 98: ...elen de voortgang van de programmering is deze weergegeven in het diagram de handeling wist de opgeslagen programmeringen niet uit dagelijkse programmering wekelijkse weekend 34 SUBMENU 02 02 DAGPROGRAMMERING Maakt mogelijk de functies van de dagelijkse chronothermostaat in te schakelen uit te schakelen en in te stellen Het is mogelijk twee werkzones in te stellen geleverd door 2 inschakelingen en...

Page 99: ...mma s waarvan de eindimpact een combinatie is van de 4 individuele programmeringen De weekprogrammering kan in of uitgeschakeld worden zoals aangegeven in de grafiek Bovendien negeert de klok het overeenkomstige bevel door het veld uur in te stellen op OFF Let op maak de instelling zorgvuldig en vermijd in het algemeen gedurende dezelfde dag overlappingen van inschakelingsuren in verschillende pro...

Page 100: ...100 ...

Page 101: ...n het weekend in te schakelen uit te schakelen en in te stellen dagen 6 en 7 of zaterdag en zondag De weekend programmeur kan in of uitgeschakeld worden zoals aangegeven in de grafiek SUGGESTIE teneinde verrichtingen van ongewild in en uitschakelen te voorkomen één enkel programma per keer activeren ...

Page 102: ...s ter beschikking die opeenvolgend worden weergegeven 42 MENU 08 TECHNISCHE AANPASSING 43 BEDRIJFSMODUS Is de normale werking van het controlesysteem dat regelmatig geïnstalleerd is in een kachel De aanwijzingen hieronder verwijzen naar het bovengenoemde systeem uitgerust met chronothermostaat optie 44 INSCHAKELEN VAN DE KACHEL Om te kachel in te schakelen een paar seconden op P4 drukken De inscha...

Page 103: ...rd wordt zal de kachel zijn activiteit hernemen tot het realiseren van de waarde Pr13 Het heropstarten gebeurt nadat de bovengenoemde voorwaarden gecontroleerd werden 51 HEROPSTARTEN NA HET UITSCHAKELEN OMDAT DE INGESTELDE KAMER TEMPERATUUR BEREIKT IS Na de STAND BY uitschakeling gaat de kachel in de koeling voorwaarde waarbij de afzuigsnelheid van rookgassen op maximum wordt gebracht Na het uitsc...

Page 104: ... losgekoppeld Tijdens de alarmtoestand voert de kachel de uitschakelingprocedure uit 58 ALARM OVERVERHITTING ROOKGASSEN Treedt op in geval de rookgassonde een temperatuur detecteert hoger dan 280 C Tijdens de alarmtoestand voert de kachel een uitschakelingprocedure uit 59 ALARM VOOR MISLUKTE INSCHAKELING Treedt op als de fase van inschakeling mislukt Tijdens de alarmtoestand voert de kachel de uit...

Page 105: ...it het stopcontact halen geen enkel compartiment van het apparaat openen en maatregelen nemen om de brandweer te contacteren ONDERHOUD DOOR DE TECHNISCHE BIJSTANDSDIENST LET OP Het buitengewoon onderhoud moet worden uitgevoerd met behulp van een gespecialiseerd en erkend technicus Technische bijstandsdienst LET OP Vóór elke vorm van onderhoud vervanging herstel schoonmaak etc is het essentieel om ...

Page 106: ...ten is aan een fabricagefout en niet aan verkeerd gebruik misbruik gebrekkig of onvoldoende onderhoud van het toestel De garantie vervalt indien er storingen zijn gegenereerd door niet conforme rookkanalen die niet voldoen aan de eisen opgelegd door de geldende wetgeving of die niet overeenstemmen met de eisen van het toestel De garantie vervalt indien in het gebied van gebruik van het apparaat ab...

Page 107: ...uurd naar de koper die het certificaat van garantie en het fiscaal ontvangstbewijs met aankoopdatum moet bewaren INFORMATIE BETREFFENDE PRIVACY hierbij geef ik toestemming voor de verwerking van persoonsgegevens in overeenstemming met de wet n 196 2003 Handtekening MODEL SERIENUMMER GEGEVENS VAN AANKOOP KOPER Naam Straat Stad Postnummer Land E mail Tel GSM GEGEVENS DETAILHANDELAAR Stempel E mail H...

Page 108: ..._____________ ____________________________________________________________ ____________________________________________________________ ____________________________________________________________ ____________________________________________________________ ____________________________________________________________ ____________________________________________________________ ____________________...

Page 109: ...109 ...
Reviews: