background image


2 . 3 

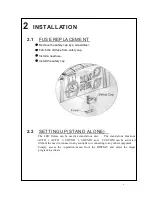
LED PCB PEPLACEMEMENT 


Take off the head cover. 


Remove the fan cover, fan, fan supports, heat sink step by step. 


Replace the new LED PCB. 


Install all parts on the original position. 


2 . 4 

SETTING UP(MASTER/SLAVE) 


When  units  are  connected  in  series  using  DMX512  signal  cable  connect  the  units  as  shown  in  the 

diagram below. 

Connect    the (male) 3 pin connector side of the DMX cable to the output (female) 3 pin connector 

of the first(MASTER) fixture. 

Connect  the  end  of  the  cable  coming  from  the  MASTER  fixture  which  will  have  a  (female)  3pin 

connector to the input connector of the next fixture consisting    of    a    (male) 3 pin connector. 

Then  proceed  to  connect  from  the  output  as  stated  above  to  the  input  of  the  following  fixture  and 

soon. 

Set the first unit in the series to one of the STAND ALONE modes as    described in section2.2   

All other units in the series should be set to <SLAVE>from the <operation>menu.   


Summary of Contents for HS-LMS30

Page 1: ...1 Mini Spot Moving Head USER MANUAL HS LMS30...

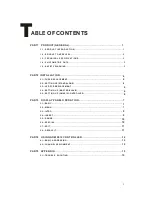
Page 2: ...USE REPLACEMENT 4 2 2 SETTING UP STANDALONE 4 2 3 LED PCB REPLACEMENT 5 2 4 SETTING UP MASTER SLAVE 6 2 5 SETTING UP DMX512 CONTROLLER 6 PART3 DISPLAY PANEL OPERATION 7 3 1 BASIC 7 3 2 MENU 7 3 3 INTR...

Page 3: ...nput of DMX512 signal allows the fixtures to be controlled from any DMX512 controller The fixture is fully programmable with one custom program available and is supplied with two automatic programs al...

Page 4: ...Prism FOCUS Operation Control mode DMX512 Master Slave Auto Custom Sound LED display DMX512 CHS 11 CHS 12CHS Pan Tilt Pan 630 Tilt270 Pan Tilt speed User selectable Pan Tilt ranges Reverse Pan Tilt m...

Page 5: ...of the products The earth wire must always be connected to the ground Do not touch the power cables if your hands are wet ATTENTION This product left the place of manufacture in perfect condition In...

Page 6: ...safety cap 2 2 SETTING UP STAND ALONE The LED fixture can be used as stand alone unit The stand alone functions AUTO 1 AUTO 2 SOUND 1 SOUND2 and CUSTOM can be activated without the need to connect to...

Page 7: ...ector side of the DMX cable to the output female 3 pin connector of the first MASTER fixture Connect the end of the cable coming from the MASTER fixture which will have a female 3pin connector to the...

Page 8: ...fixture consisting of a male 3 pin connector Then proceed to connect from the output as stated above to the input of the following fixture and so on If over 32pcs fixtures connected the amplifier is...

Page 9: ...9 3 2 MENU...

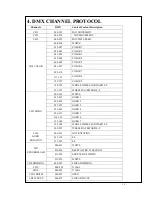
Page 10: ...WARD F S CH4 COLOR 193 255 WHEEL BACKWARD S F 000 018 WHITE 019 037 GOBO 1 038 056 GOBO 2 057 075 GOBO 3 076 093 GOBO 4 094 113 GOBO 5 114 132 GOBO 6 133 144 GOBO 7 145 208 WHOLE WHEEL FORWARD F S CH5...

Page 11: ...size 410x330x280mm Net weight 6kgs Gross weight 7 3kgs POWER Powersettings 220V50Hz 60Hz Fuse 2A220V Consumption 80W LIGHT SOURCE 1 X 30W WHITE COLOR LAMP LIFE 50 000Hrs CONTROL PROGRAMMING Data outp...

Reviews: