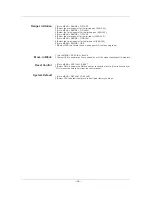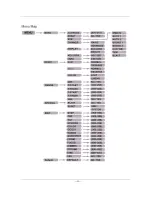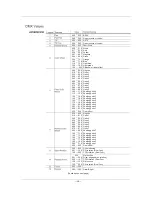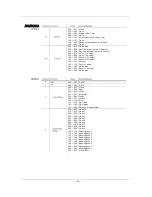
Keylock
Movement Inversion
Color Wheel
Movement
Edit Custom
1) Go to MENU > INTRO > KEYLOCK
2) Select YES or NO
When i n t he " YES" set ting, the u ser will h ave to en ter t he password after 30
seconds of control panel inactivity or each time he/she turns the fixture on.
The default (non-modifiable) password is < UP>, <DOWN>, < UP>, < DOWN> and
<ENTER>.
1) Go to MENU > INVERT > PAN
2) Select a movement mode (NORMAL or REVERSE)
3) Go to MENU > INVERT > TILT
4) Select a movement mode (NORMAL or REVERSE)
5) Go to MENU > INVERT > USE
6) Select YES to activate the new settings or NO to stop using them.
1) Go to MENU > INVERT > COLOR
2) Select a movement mode (STEP or LINEAR)
3) Go to MENU > INVERT > USE
4) Select YES to activate the new setting or NO to stop using it.
1)Go to MENU > EDIT > STEP
2) Select a programming step (000~255)
3) Go to MENU > EDIT > PAN
4) Select a pan value (000~255)
5) Go to MENU > EDIT > TILT
6) Select a tilt value (000~255)
7) Go to MENU > EDIT > XY SPEED
8) Select a tilt/pan movement speed (000~255)
9) Go to MENU > EDIT > COLOR
10) Select a color wheel position (000~255) as per the DMX Values table
11) Go to MENU > EDIT > GOBO 1
12) Select a fixed gobo (000~255) as per the DMX Values table
13) Go to MENU > EDIT > GOBO 2
14) Select a rotating gobo (000~255) as per the DMX Values table
15) Go to MENU > EDIT > GOBO 2 ROT
16) Select a rotating gobo mode (000~255) as per the DMX Values table
15) Go to MENU > EDIT > PRISM
16) Select a rotating prism mode (000~255) as per the DMX Values table
17) Go to MENU > EDIT > FOCUS
18) Select a focus position (000~255)
19) Go to MENU > EDIT > DIMMER
20) Select a dimmer setting (000~255)
21) Go to MENU > EDIT > STROBE
22) Select a strobe setting (000~255) as per the DMX Values table
23) Go to MENU > EDIT > TIME
24) Select the duration of this step (000~255)
25) Go to MENU > EDIT > USE
26) Select YES to save the settings for this step or NO to delete them.
27) Repeat steps "3" to "26" for the other steps
To r epeat the Custom s teps in a n e ndless loop mode, c onfigure the " TIME"
setting of the last step as "0".
--9--
Summary of Contents for MH LED 60D
Page 14: ...11...
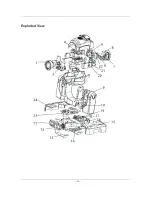
Page 20: ...Exploded View 17...


