background image


1. BEFORE YOU BEGIN 

What is included 


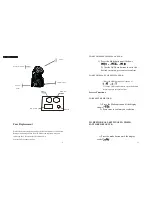
1w or 3w x18 pcs    Min wash   

User Manual   

Unpacking Instructions


Immediately upon receiving a fixture, carefully 

unpack the carton, check the contents to ensure 

that all parts are present, and have been received 

in good condition. Notify the shipper 

immediately and retain packing material for 

inspection if any parts appear damaged from 

shipping or the carton itself shows signs of 

mishandling. Save the carton and all packing 

materials. In the event that a fixture must be 

returned to the factory, it is important that the 

fixture be returned in the original factory box 

and packing.   

AC Power


To determine the power requirements for a 

particular fixture, see the label affixed to the back 


19 


THERMAL


Maximum ambient 

temperature.......................................................... .....104°F

40°C


CONTROL & PROGRAMMING 


Data  input  ..................................................................  locking  3-pin 

XLR male socke

Data  output  ..............................................................  locking  3-pin 

XLR female socke

Data  pin  configuration  ...................................................pin  1  shield, 

pin 2 (-), pin 3 (+

Protocols...................................................................DMX-512USIT

DMX 

Channels ....................................................................................12


WARRANTY INFORMATION 


Warranty ..................................................................

1-year limited warranty 
Remark: LED bead no including.


Summary of Contents for MINI WASH MOVING HEAD

Page 1: ...1 MINI WASH MOVING HEAD USER MANUAL Suitable for 1w or 3w mode...

Page 2: ...ling Save the carton and all packing materials In the event that a fixture must be returned to the factory it is important that the fixture be returned in the original factory box and packing AC Power...

Page 3: ...ll fixtures must be powered directly off a switched circuit and cannot be run off a rheostat variable resistor or dimmer circuit even if the rheostat or dimmer channel is used solely for a 0 to 100 sw...

Page 4: ...1 Use standard DMX cables to daisy chain your units together via the DMX connector on the rear of the units Proper performance it may be necessary to use a terminator at the last fixture For more info...

Page 5: ...display reads slow Master Slave Mode Master Sound This mode will allow you to link up to 32 units together without a controller 5 Compact and lightweight LED display menu with invert Reset to factory...

Page 6: ...MUM PAN ANGLE 1 Press the Mode button until it shows or or 2 Use the Up Down buttons to set to the desired inversion press enter to confirm TO SET THE MA X I MUM TILT ANGLE 1 Press the Mode button unt...

Page 7: ...nversion press enter to confirm 7 Fixture Linking You will need a serial data link to run light shows of one or more fixtures using a DMX 512 controller or to run synchronized shows on two or more fix...

Page 8: ...he cable will have the following characteristics 2 conductor twisted pair plus a shield Maximum capacitance between conductors 30 pF ft Maximum capacitance between conductor and shield 55 pF ft Maximu...

Page 9: ...that follow may also require a slave setting Please consult the Operating Instructions section in this manual for complete instructions for this type of setup and configuration 9 DMX connector configu...

Page 10: ...er 2 Connect the end of the cable coming from the controller which will have a female 3 pin connector to the input connector of the next fixture consisting of a male 3 pin connector 3 Then proceed to...

Reviews: