background image


18 

DMX Mode 


This mode allows the unit to be controlled by any 

universal DMX controller. If you are unfamiliar with 

DMX, please read the DMX Primer on page #19. 

1)


The default mode for the fixture is DMX, 
which appears as

on the LED 

Readout. 


  4   

5. APPENDIX 


Technical Specifications


POWER


Switch-selectable power settings ................................120V 

60Hz AC or 230V 50H

Fuse............................................................................... 2A 250

LIGHT SOURCE


LED.............................................................. 
1/3w*18pcs (RGB, Edison Brand)


  RANGE


Pan ...................................................................................... 54


Tilt........................................................................................18


plate of the fixture or refer to the fixture s 

specifications chart. A fixture s listed current 

rating is its average current draw under normal 

conditions. All fixtures must be powered directly 

off a switched circuit and cannot be run off a 

rheostat (variable resistor) or dimmer circuit, even 

if the rheostat or dimmer channel is used solely 

for a 0% to 100% switch. Before applying power 

to a fixture, check that the source voltage matches 

the fixture s requirement. Check the fixture or 

device carefully to make sure that if a voltage 

selection switch exists that it                          is set 

to the correct line voltage you will use. 


Warning!   

Verify that the voltage select 

switch on your unit matches the   

line voltage applied. Damage to 

your fixture may result if the line 

voltage applied does not match 

the voltage indicated on    the 

voltage selector switch. All 

fixtures must be connected to   

circuits with a suitable Earth 

Ground.     


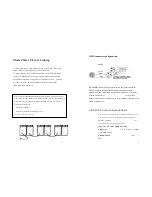
Figure 1 - AC Voltage Switches


Summary of Contents for MINI WASH MOVING HEAD

Page 1: ...1 MINI WASH MOVING HEAD USER MANUAL Suitable for 1w or 3w mode...

Page 2: ...ling Save the carton and all packing materials In the event that a fixture must be returned to the factory it is important that the fixture be returned in the original factory box and packing AC Power...

Page 3: ...ll fixtures must be powered directly off a switched circuit and cannot be run off a rheostat variable resistor or dimmer circuit even if the rheostat or dimmer channel is used solely for a 0 to 100 sw...

Page 4: ...1 Use standard DMX cables to daisy chain your units together via the DMX connector on the rear of the units Proper performance it may be necessary to use a terminator at the last fixture For more info...

Page 5: ...display reads slow Master Slave Mode Master Sound This mode will allow you to link up to 32 units together without a controller 5 Compact and lightweight LED display menu with invert Reset to factory...

Page 6: ...MUM PAN ANGLE 1 Press the Mode button until it shows or or 2 Use the Up Down buttons to set to the desired inversion press enter to confirm TO SET THE MA X I MUM TILT ANGLE 1 Press the Mode button unt...

Page 7: ...nversion press enter to confirm 7 Fixture Linking You will need a serial data link to run light shows of one or more fixtures using a DMX 512 controller or to run synchronized shows on two or more fix...

Page 8: ...he cable will have the following characteristics 2 conductor twisted pair plus a shield Maximum capacitance between conductors 30 pF ft Maximum capacitance between conductor and shield 55 pF ft Maximu...

Page 9: ...that follow may also require a slave setting Please consult the Operating Instructions section in this manual for complete instructions for this type of setup and configuration 9 DMX connector configu...

Page 10: ...er 2 Connect the end of the cable coming from the controller which will have a female 3 pin connector to the input connector of the next fixture consisting of a male 3 pin connector 3 Then proceed to...

Reviews: