background image

DISHWASHER                                 

FOR END USER

INSTRUCTION MANUAL 

L1J030103 (060421)

No. 15 Qingqiu Street, Suzhou Industrial Park, Suzhou 215126 China 

HW-600A

HW-600A-1

Summary of Contents for HW-600A

Page 1: ...DISHWASHER FOR END USER INSTRUCTION MANUAL L1J030103 060421 No 15 Qingqiu Street Suzhou Industrial Park Suzhou 215126 China HW 600A HW 600A 1...

Page 2: ...d service technicians should install service and maintain the product Read the warnings contained in this booklet carefully as they give important information regarding safety Please retain this bookl...

Page 3: ...TENANCE 15 16 SELF CLEANING 17 17 WEEKLY MAINTENANCE 18 a HEATER 18 b EXTERIOR 18 c WASH COMPARTMENT 18 18 MONTHLY INSPECTION 18 a WATER SUPPLY LINE 18 b DRAIN HOSE WASH TANK 19 c POWER SUPPLY CORD 19...

Page 4: ...ns including the following Electrical connection must be hard wired and must meet national and local electrical code requirements Failure to meet these code requirements could result in death electric...

Page 5: ...d sprays rinse water onto dishes to rinse off detergent 2 Upper Wash Spray Arm Lower Wash Spray Arm Rotates and sprays wash water onto dishes to remove stains 3 Heater Keeps wash water at a proper tem...

Page 6: ...lter Prevents scraps from being drawn into the pump b OPERATION PANEL 1 READY Lamp Lights up when the auto fill cycle completes and the dishwasher is ready to wash 2 AUTO FILL Lamp Flashes during the...

Page 7: ...er temperature in wash cycle rinse water temperature in rinse cycle and error codes in case of trouble See 19 TROUBLESHOOTING 7 MODE Button Press to change the selected operation mode See 6 WASH AND R...

Page 8: ...fective and efficient use of this equipment will also vary depending on the local water conditions Ask your municipal water supplier for details about local water specifics prior to installation Recom...

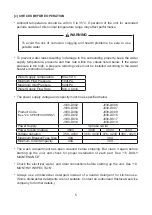
Page 9: ...4 L min The power supply voltage and capacity must be as specified below Product Code See 22 SPECIFICATIONS J030 D002 J030 D003 J030 D004 J030 D012 J030 D013 J030 D014 J030 D006 J030 D007 J030 D009 J0...

Page 10: ...ttached to the detergent tank and rinse aid tank 4 PREPARING THE WASH COMPARTMENT Check that the wash compartment has been cleaned with all the parts in place If not clean the wash compartment accordi...

Page 11: ...starts and stops about 12 times Then the dishwasher is ready for washing The auto fill cycle starts when the water temperature in the internal booster tank reaches 60 C 1 Close the door The AUTO FILL...

Page 12: ...le rack for dishes b LOADING DISHES 1 Place the rack on the dishtable 2 Keep the dishes within the rack otherwise they may be damaged 3 Do not stack the dishes otherwise they cannot be washed properly...

Page 13: ...oor resulting in damaging the wash and rinse spray arms and dishes NOTICE Do not stack racks Otherwise this will cause reduction in wash performance or failure 6 WASH AND RINSE a OPERATING TEMPERATURE...

Page 14: ...and start a rinse cycle after completion of water supply In the rinse mode the unit will wait for the water supply cycle to complete and start a rinse cycle 3 In case washing operation is interrupted...

Page 15: ...Wash water is not clean Press the ON OFF button check that the display goes off and pull out the drain pipe to drain the wash water Reinsert the drain pipe then press the ON OFF button to supply fresh...

Page 16: ...ion panel The display and lamps go off 2 Turn off the main power supply 3 Close the water supply line shut off valve 4 Open the door and remove the rack support frame 5 Turn and loosen the lower spray...

Page 17: ...s and hold the ON OFF button for 3 seconds after pulling out the drain pipe The drain pump starts to fully drain the wash tank The display shows as follows during the full drain flush cycle The operat...

Page 18: ...ng operation Press it while the READY lamp is on 12 INTERNAL BOOSTER TANK ENERGY SAVING CONTROL When the dishwasher is left idle for a while the internal booster tank water temperature can be temporar...

Page 19: ...ipe on the sink to drop scraps or to empty these parts 2 Turn and loosen the upper spray arm nut in the direction of the arrow Support the upper rinse spray arm and remove it together with the upper w...

Page 20: ...spray arm shaft and use the other hand to tighten the upper spray arm nut in the direction of the arrow 9 Place the lower wash spray arm on the lower header and tighten the lower spray arm nut in the...

Page 21: ...supply line shut off valve and turn on the main power supply 2 Pull out the drain pipe 3 Install the upper and lower rinse spray arms only 4 With the door open press and hold the STANDBY CLEANING but...

Page 22: ...ush 18 MONTHLY INSPECTION a WATER SUPPLY LINE Check the water supply line for damage deformation or water leak marks stains If any of these conditions are found contact an authorized Hoshizaki service...

Page 23: ...to the following instructions If the problem still exists immediately contact an authorized Hoshizaki service company When contacting a service company let them know the model name serial number date...

Page 24: ...p light up the unit is ready If the auto fill cycle is not complete the unit will start water supply and then enter the ready mode In the ready mode operation can be started by opening and closing the...

Page 25: ...CATION DISPOSAL TRANSFER When preparing the unit for long storage shut down and clean the unit according to sections 9 and 15 17 Turn off the main power supply If something seems wrong when restarting...

Page 26: ...airs should be completed by an approved Hoshizaki dealer or service agency using genuine Hoshizaki components To obtain full details of your warranty and approved service agency please contact your de...

Page 27: ...rinse 6 sec dwell 1 sec 64 seconds Wash 48 sec dwell 5 sec rinse 10 sec dwell 1 sec Tank Capacity Wash tank 24L Booster tank 7 6L Effective capacity 4 4L Rinse Water Volume 2L cycle Adjustable up to...

Page 28: ...485mm H 1955mm H with door open Weight 105kg Standard Cycle Time 60 seconds Wash 48 sec dwell 5 sec rinse 6 sec dwell 1 sec Tank Capacity Wash tank 24L Booster tank 7 6L Effective capacity 4 4L Rinse...

Page 29: ...se 6 sec dwell 1 sec 64 seconds Wash 48 sec dwell 5 sec rinse 10 sec dwell 1 sec Tank Capacity Wash tank 24L Booster tank 7 6L Effective capacity 4 4L Rinse Water Volume 2L cycle Adjustable up to 4L c...

Page 30: ...1485mm H 1955mm H with door open Weight 105kg Standard Cycle Time 60 seconds Wash 48 sec dwell 5 sec rinse 6 sec dwell 1 sec Tank Capacity Wash tank 24L Booster tank 7 6L Effective capacity 4 4L Rinse...

Reviews: