

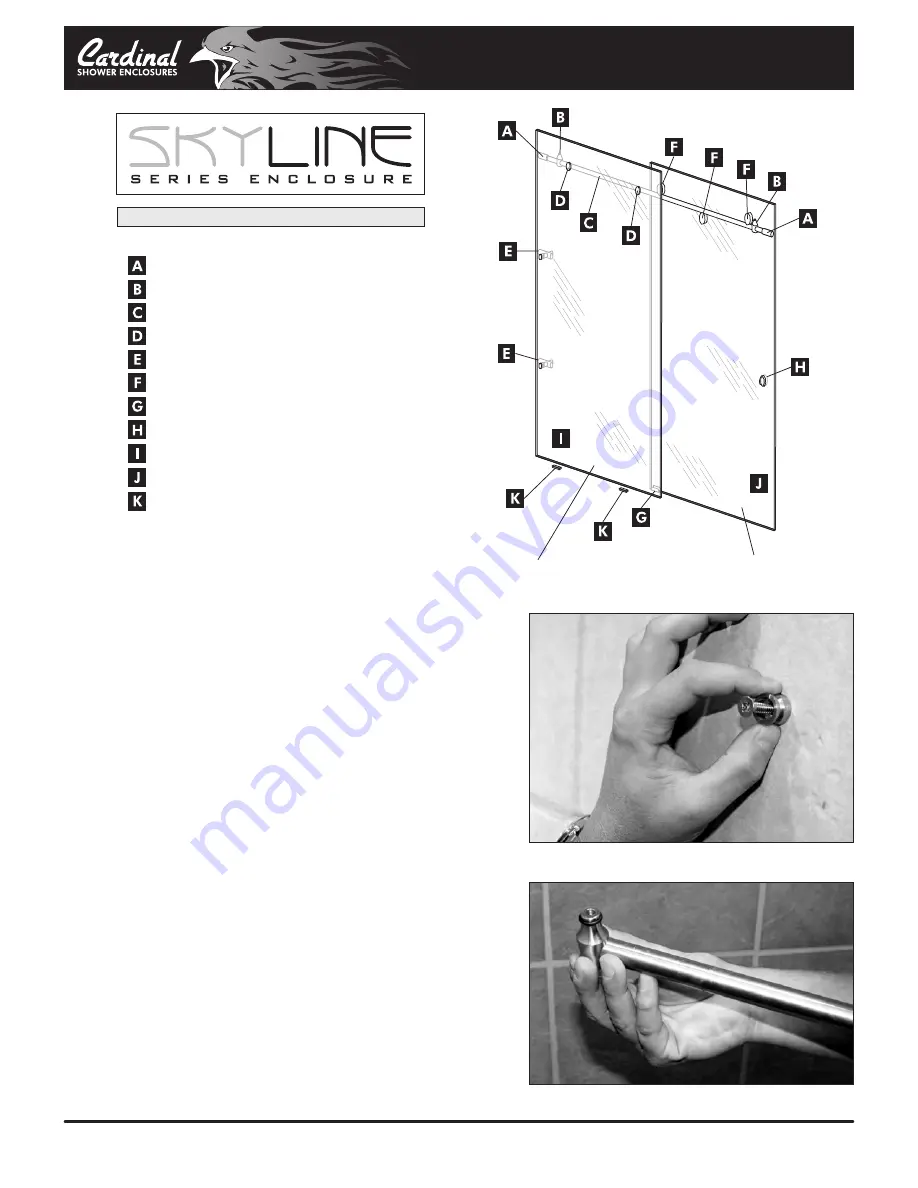
73-11A
503F
19MM
502G1
512A
501E1
505S
50H
Connector Bracket
Door Stops
Support Bar
Panel Glass Bracket
Wall Mount Bracket
Rollers
Center Guide
Recessed Finger Pull
Fixed Panel (3/8” Clear Glass)
Rolling Panel (3/8”Clear Glass)
Glass Block
2
2
1
2
2
3
1
1
1
1
2
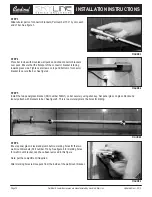
STEP 1
Using the centerline of tub/shower base as a starting point, come down
3” from overall height of shower and drill holes on both walls for bar
attachment. If you’re drilling into wood, use a 3/16” drill bit. If using the
anchors, use a 1/4” drill bit. If your tub has outages, and you’re
measuring up from the tub or shower base, make sure to allow for your
outages so the bar will be completely level when installed.
Place anchor in hole (if needed) and silicone in hole. The connector
bracket (Part number 73-11A) consists of two parts, a tubular sleeve and
a wall-mount puck. Using your allen key remove your wall mount puck
located inside the tubular sleeve. Attach wall mount pucks using 1-1/2”
screws provided. See figure 1. Tighten screw down inside puck. Make
sure the slot in the puck is vertical to allow for some leveling adjustment.
STEP 2
Slide door stops (Part number 503F) a few inches down onto each end
of the bar and use a small amount of tape to hold it in place so it won’t
slide off during installation of the rod. See figure 2.
Page 69
Cardinal Shower Enclosures are manufactured by Hoskin & Muir, Inc.
Updated Dec 1, 2012
INSTALLATION INSTRUCTIONS
PARTS LIST
ITEM PART
DESCRIPTION
QTY
FIXED PANEL
SLIDING PANEL (GOES ON SHOWER HEAD SIDE)
FIGURE 1
FIGURE 2


