A. REPLACING ROTOR BLADES
In the event that a rotor blade requires installation, ensure the drone is
switched off
.
Remove the rotor blade by gently pulling off and replace
with the new rotor blade. Drone may not perform correctly if the spare
rotor blades are not installed correctly. Refer to page 3 for correct
position.
B. BATTERY INSTALLATION
1.
Remove the screw from the battery cover at the back of the handset.
2.
Place 4x AA batteries in the battery compartment, as per the polarity
shown inside.
3.
Replace the battery cover and tighten the screw. Batteries
to be replaced by an adult. New non-rechargeable alkaline batteries are
recommended for optimum use and maximum performance. Drone LED
lights will flash when low battery.
C. CHARGING FROM USB
The drone is supplied with an initial charge allowing you to start using
straight away. To prevent overcharging the battery please ensure the
battery is fully discharged before recharging.
1.
Ensure the drone is
switched off.
2.
Plug the USB into a computer/USB port.
3. DO NOT
plug the USB charger into an AC Adapter.
4.
Insert the drone
battery connector, located on the back of the drone, into the USB charger
connector. Be careful not to force the connectors as it may cause damage.
The RED LED on the USB will turn on, indicating that the drone is charging.
5.
The drone is charged after approximately 60 minutes. The RED LED on
the USB will go out, indicating that the drone battery is fully charged.
6.
Remove the USB cable pin connector from the drone battery port once
the charging is complete. DO NOT OVERCHARGE. Flight time 5 minutes.
D. SYNCHRONISE - IMPORTANT!
1.
Insert the drone battery connector in to the drone power socket on
the back of the drone.
2.
Switch on the drone. The RED & GREEN LED
lights on the drone will flash. The drone is now ON.
3.
Place the drone
on a FLAT SURFACE with the GREEN LED light towards you. If the drone
is not positioned on a flat surface, this may prevent the rotor blades from
spinning correctly.
4.
Turn the handset ON. The handset will beep.
5 &
6.
Push ‘Control Stick A’ up and then down to pair the handset with the
drone. The LED lights will stop flashing
7.
The handset and drone are now
synchronised and active.
8.
Slowly push ‘Control Stick A’ up.
9.
Your drone
will start to take off.
E. FLYING
Take Off and Land:
Slowly push the ‘Control Stick A’ up to control take
off and increase the height. Slowly push down to reduce height and land.
‘Control Stick A’ is extremely sensitive so please move gently. Move down
‘Control Stick A’ to bring the drone to a landing.
Turn Left and Right:
Whilst holding the drone in a controlled hover,
push ‘Control Stick A’ right to turn clockwise and left to turn anti-clockwise.
ENGLISH
GB
Please ensure that you maintain the hover with ‘Control Stick A’.
Fly Forward and Back:
Whilst holding the drone in a controlled hover, push the ‘Control Stick
B’ slowly forward to fly forwards and back to fly backwards. Whilst
flying forwards/backwards continue to control ‘Control Stick A’ to
adjust left/right turn and maintain height.
Sideways Left and Right:
Whilst holding the drone in a controlled
hover, push ‘Control Stick B’ slowly to the right to fly the drone
sideways to the right, or to the left to fly the drone sideways to the left.
Ensure there is a minimum of 3 metres space surrounding the drone.
F. DRIVING
1.
Press the Drive/Fly mode button to activate drive mode.
2.
Driving
forward - Slowly push ‘Control Stick A’ up
3.
Turning left - When the
Drone Racer is driving forward move ‘Control Stick B’ to the left position.
4.
Turning right - When the Drone Racer is driving forward move ‘Control
Stick B’ to the right position.
G. TRIM CONTROL
1. If the drone leans undesirably either forwards or backwards (T3/
T4).
Push the trim button the opposite direction to the undesired
movement. For example, if the drone is leaning forwards while
hovering, push the backward trim (T4) button to correct.
2. If the drone leans undesirably either left or right (T5/T6).
Push the trim button the opposite direction to the undesired
movement. For example, if the drone is leaning left while hovering,
push the right lean trim button (T6) to correct.
3. If the drone spins undesirably clockwise/anti-clockwise (T1/T2).
Push the trim button the opposite direction to the undesired
movement. For example, if the drone is spinning right while hovering,
push the T1 button (left spin trim) to correct.
H. HEADLESS FUNCTION
The Headless Mode feature allows the user to operate the drone without
worrying about the orientation of the drone. This feature is great for
beginners as it reduces the steepness of learning curve.
1.
Place the
drone on a FLAT SURFACE with the GREEN LED light towards you.
2.
Press
and hold the Headless Mode button. The drone will beep intermittently
when in headless mode.
I. STUNT 360
1.
Fly the drone in a controlled hover at a minimum of 3 metres from
the ground. Ensure there is enough clear space with no objects nearby.
2.
Press the ‘Stunt 360’ button (top right shoulder) and move the
control stick in the direction you want to flip 360˚ (forward/backward)
and the drone will flip in that direction. Repeat steps 1 - 2 to perform
another flip.
J. SPEED SETTING
Press the speed button to adjust the speed level of your drone.
1.
Press
once for normal speed (1 ‘Beep’)
2.
Press again for expert speed (2 ‘Beeps’).
7
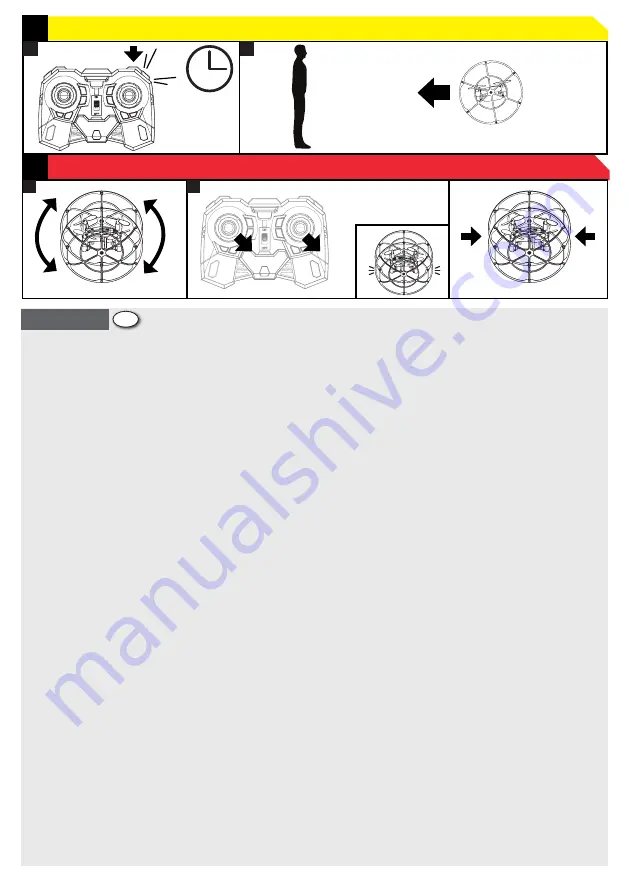
REMOVING DRONE FROM CHASSIS
1
2
STABILITY RESET / RÉTABLISSEMENT DE LA STABILITÉ / WIEDERHERSTELLEN DER STABILITÄT / RIPRISTINO
STABILITÀ / RESTABLECIMIENTO DE ESTABILIDAD / STABILITEIT RESETTEN / OPRAVA STABILITY
1
2
SEND HOME FUNCTION / FONCTION POSITION D’ORIGINE / FUNKTION HOME / FUNZIONE RITORNO A CASA /
FUNCIÓN HOME / HOME-FUNCTIE / FUNKCE NÁVRATU
2 secs
BEEP!
L
M


