


10
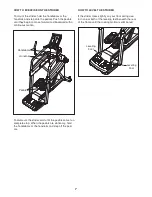
HOW TO ACTIVATE THE CONSOLE
The included AC power adapter must be used to oper-
ate the strider. See HOW TO PLUG IN THE AC
POWER ADAPTER on page 6. When the AC power
adapter is plugged in, the displays will light and the
console will be ready for use.
IMPORTANT: If the console has been exposed to
cold temperatures, allow it to warm to room tem-
perature before activating the console. Otherwise,
you may damage the console displays or other
electronic components.
HOW TO TURN OFF THE CONSOLE
If the pedals are not moved for a short period of time,
the console will enter an idle mode and a screen
saver will appear in the center display. Unplug the AC
power adapter when the strider is not in use.
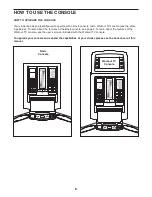
HOW TO USE THE QUICK START MODE
The quick start mode allows you to start exercising,
adjust the resistance of the pedals manually, and set a
target stride length manually.
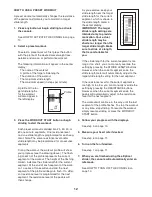
1. Press the QUICK START button or begin strid-
ing to activate the console.
See HOW TO ACTIVATE THE CONSOLE above.
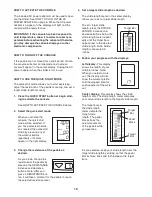
2. Select the quick start mode.
When you activate the
console, the quick start
mode will be selected. If
you have selected a work-
out, reselect the quick start
mode by pressing any of
the workout buttons
repeatedly until zeros
appear in the right display.
3. Change the resistance of the pedals as
desired.
As you stride, change the
resistance of the pedals by
pressing the RESISTANCE
increase and decrease
buttons. Note: After you
press a RESISTANCE but-
ton, it will take a moment for the pedals to reach
the selected resistance level.
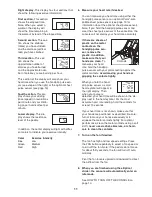
4. Set a target stride length as desired.
The stride length meter in the center display
allows you to set a target stride length.
To set a target stride
length, press the STRIDE
LENGTH increase and
decrease buttons below the
stride length meter repeat-
edly until the target bars
appear next to the desired
stride length. Note: Stride
length is measured in
inches.
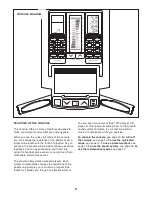
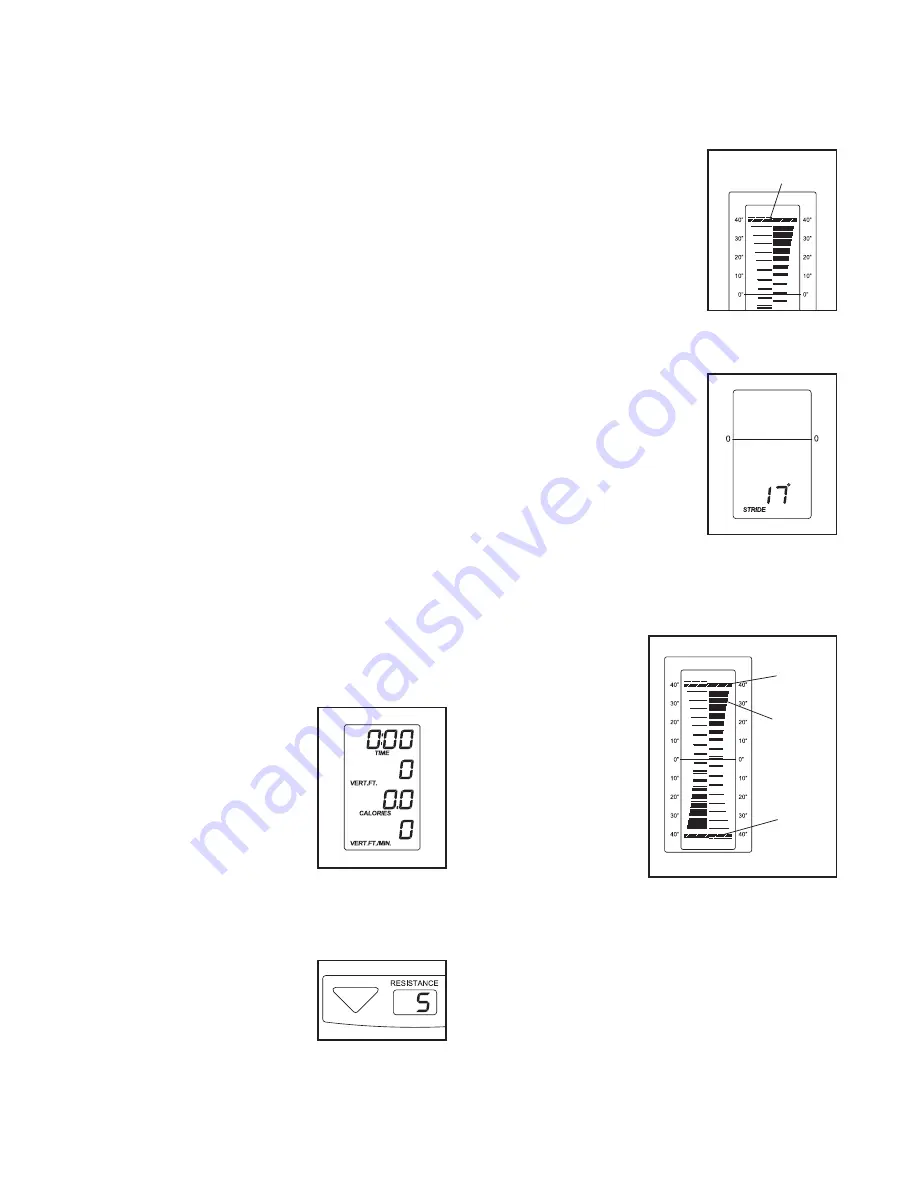
5. Follow your progress with the displays.
Left display
–This display
shows the length of your
stride in inches. Note:
When you select a work-
out, this display will also
show the workout profile
and the elapsed time for
each segment of the work-
out.
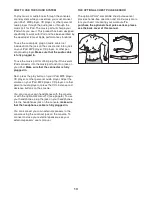
Center display
–This display shows the stride
length meter. The stride length meter compares
your actual stride length to the target stride length.
The target bars in
the stride length
meter indicate the
target stride
length. The pedal
blocks track the
actual movement
of the pedals while
you exercise.
As you exercise, keep your stride length near the
target stride length by striding so that the pedal
blocks move back and forth between the target
bars.
Target Bar
Target
Bar
Target
Bar
Pedal
Block
Summary of Contents for HF-XS9800-E.1
Page 18: ...18 NOTES...


