background image

22 of 33

Indesit


Company

Service Manual UK

English

3.

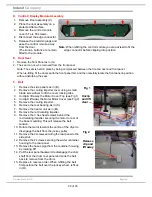
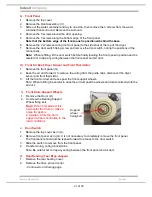
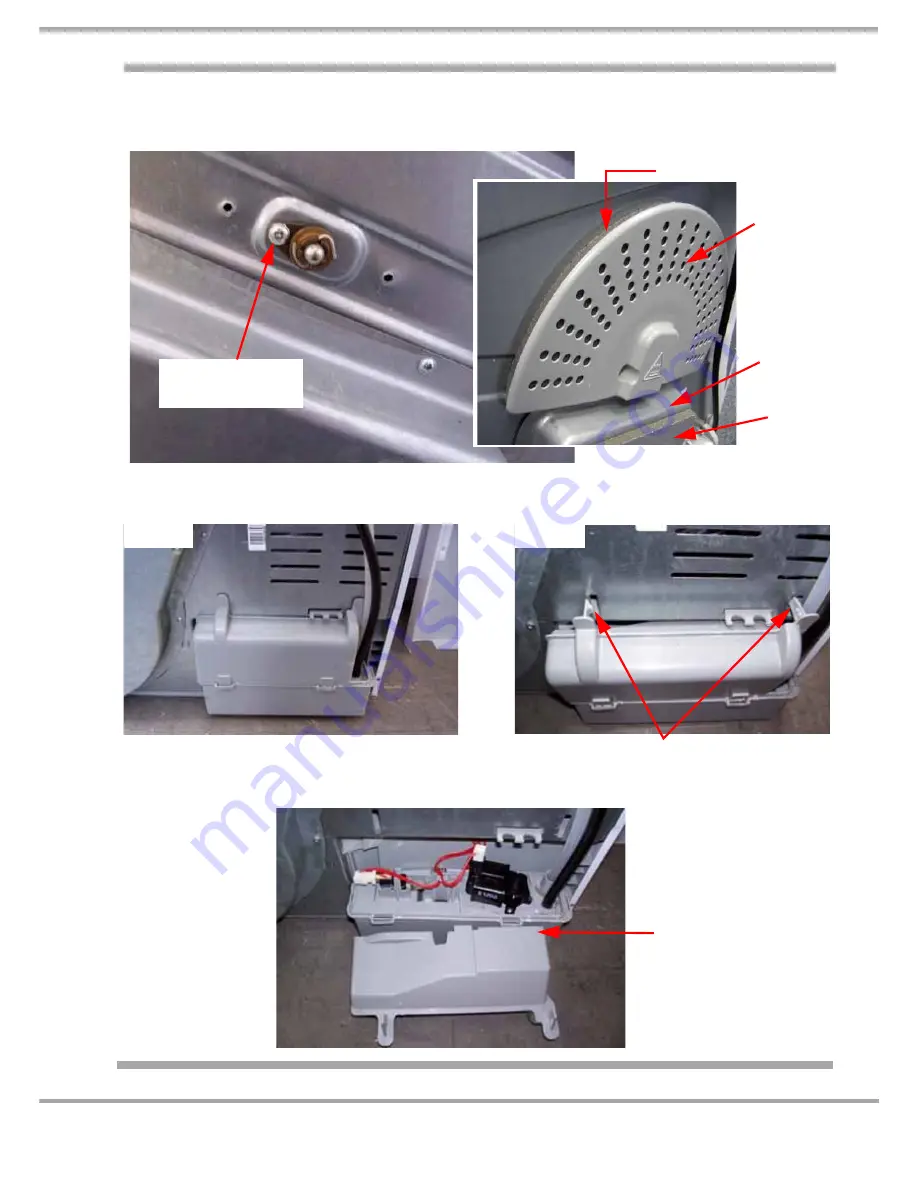
Remove the tear drop bearing fixing screw.

4.

Slide the bearing off the drum shaft. 

Note:

 Place the insulation pad before refitting the rear bearing cover.

L.

Pump & Float Switch

1.

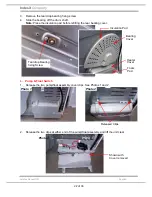
Release the two pump/float assembly cover clips. See Photos 1 and 2.

2.

Release the two clips at either end of the pump/float assembly and lift the unit clear.

Teardrop Bearing
fixing Screw

Bearing

Cover

Insulation Pad

Heater
Cover

Foam 

Pad

Photo 1

Photo 2

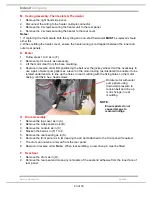
Released Clips

Photo 3

Shown with 
Cover removed

Summary of Contents for Aqualtis AQCF851BUEU

Page 1: ... 9JB Registered in London 106725 Service Information Aqualtis 8 Kg B Energy CONDENSER ELECTRONIC TUMBLE DRYER Models Covered AQCF851BUEU 61513 AQCF851BUFR 61408 AQCF851BUIT 61375 AQCF852BIEU 61523 AQCF852BUEU 61526 AQCF852BUSK 61527 5407471 Issue 1 Nov 2008 ...

Page 2: ...ater supply i e Washing Machines Dishwashers Food Centres etc checks must be made for leaks from seals gaskets and pipe work and rectification carried out where necessary 7 It can be dangerous to attempt DIY repairs maintenance on complex equipment and the Company recommends that any problem with the appliance is referred to its own Service Organisation 8 Whilst the Company has endeavoured to ensu...

Page 3: ...n Dimensions Height 850 mm Width 595 mm Depth 584 mm Weight 41 kg Packed Energy Class B Noise Level 65 dBA approximately Drum Volume 112 litres Drying Load Dry weight maximum 8 kg Programmes 16 Drying Sensing Levels Up to 5 depending on programme selected Door Operation Lever operated door catch Heater 2050W 230V Electronic Platform EVO2 Heater Controls Variable using electronic control and thermi...

Page 4: ...s through the drum it collects lint as well as moisture To prevent the lint from blocking the heat exchanger condenser the air is passed through a filter located in the front air duct The filter unit is positioned so as to be easily removable for cleaning by the user After passing through the filter the circulating air is ducted through passageways in a heat exchanger condenser located in a housin...

Page 5: ...ot at the required dryness level the display will hold at 10 minutes depending on the programme in progress and the material being dried the dryer will either wait until the correct dryness level is reached and move to the cool down period or wait until the machines sensors are able to recalculate the dryness time and the display will update accordingly If after the maximum programme time of 240 m...

Page 6: ...CATOR Used to select the required programme option 16 timed auto and special programmes are available Consult the programme chart on pages 14 and 15 to see Programme descriptions Display Indicates Current Dryness Level Sensor cycles only See Sensing Levels Active Auto Cycles only Indicates Time Set Active Manual Time Cycles Only Countdown Timer Gives Estimated time to end of delay or cycle Display...

Page 7: ...is not available the display will flash and the buzzer beeps three times The selected time remains displayed after the programmestarts and cannot be changed after the after the Start Pause Button is Pressed Delay Timer After selecting a Programme that has a Delay Timer Option a delay start time can be selected Each press of the Delay button advances the delay setting in 1 hour Increments from to t...

Page 8: ...been selected the clothes are tumbled occasionally during the Delay period to help prevent creases developing 3 secs Clockwise 30 min Pause 3 secs Anti Clockwise 30 Pause continuously until programme starts 4 Post Crease Care Can be selected if the clothes will not be removed as soon as the cycle is finished This option occasionally tumbles the clothes to prevent creases developing while the cloth...

Page 9: ...ool Tumble Is illuminated when the dryer is on a cycle and the heater element is off this would be the cool down period at the end of the cycle End Is illuminated when the programme has finished its cycle Empty Water Clean Filter Is illuminated permanently on at the end of every cycle as a reminder to the customer to empty the water container and to clean the filter after every use If the Empty Wa...

Page 10: ...c coated front and rear body and two removable plastic lifters The rear of the drum is perforated to allow the passage of air Fixed to the rear pressing is a support shaft which runs in a bearing located in the rear panel of the dryer A drive pin and collar on the drum shaft prevents forward thrust during use The front lock seam of the drum rotates on bearing pads Note Galvanised and Stainless ste...

Page 11: ...e to maintain the correct temperature for the programme selected Pump Float Switch Mounted on the bottom right hand side of the rear panel condensate water from the condenser chamber is pumped via an external hose to the water container situated behind the console The pump runs continually throughout the programme Motor A two pole P S C running at 2800 rpm with the impeller fitted to the rear end ...

Page 12: ...ualtis B Energy Condenser Dryers have additional components to improve airflow efficiency continued on following page A Base Cover B Motor Top Cover C Motor Cover Inner D Motor Cover Outer E Base Duct Lower These covers are used to retain the heat within the Drying System to increase the Condenser efficiency E B C D A ...

Page 13: ...OVER ASSEMBLY A hole in the bottom of the Heater Cover diverts condensate onto the wick sponge Any condensate will be absorbed into the wick and evaporated away by the heat of the cover Back Panel Wick sponge Inside view of Drain Wick Absorbent rear cover Hole ...

Page 14: ...Dry Iron Dry Hanger Dry Cupboard Dry Extra Dry Cottons Low Heat Dries your Cotton clothes on Low heat 1 Position the PROGRAMME knob on 2 Select a drying time see Timed next page See Timed next page Shirts Programme What it does How to set it Notes Options available Shirts High Heat Dries your Cotton Shirts on High heat 1 Position the PROGRAMME knob on 2 Choose Timed or Automatic option If Timed Dr...

Page 15: ... the PROGRAMME knob on 2 Select any Options if required 3 Press the Start Button Alarm Delay Timer Pre care Post care An Automatic Programme BabyCycle Dries your Baby clothes on Low Heat 1 Position the PROGRAMME knob on 2 Select any Options if required 3 Press the Start Button Alarm Delay Timer Pre care Post care An Automatic Programme Lingerie Dries your Lingerie on Low Heat 1 Position the PROGRA...

Page 16: ...g approx 3 sweaters For Tumble dryer safe garments with symbol It is recommended garments re turned inside out before drying Jeans 85 minutes High Heat 3 kg approx 4 pairs For garments made of Denim Cotton turn front pockets inside out Garments with embroidery or elasticated waistbands should not be dried Shirts High Heat 80 minutes High Heat 3 kg approx 10 shirts For Shirts made from cotton Shirt...

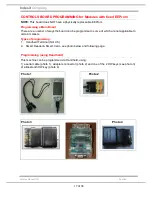
Page 17: ...ays the board can be programmed some of which are not applicable to certain markets Types of programming 1 Handheld Terminal Not UK 2 Smart Reader Smart Card see photo below and following page Programming using Handheld This machine can be programmed via Handheld using 1 a serial cable photo 1 adapters connector photo 2 and one of the 2 HW keys see photo 3 2 a Bluetooth HW key photo 4 Photo 1 Phot...

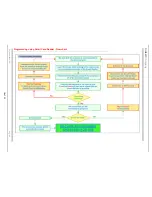
Page 18: ...Indesit Company 18 of 33 Service Manual UK English Programming using Smart Card Reader Flowchart ...

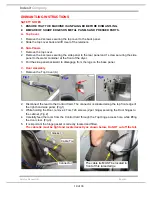
Page 19: ...3 Pull the side panel backward to disengage from the lugs on the base panel C Door Assembly 1 Remove the Top Cover A 2 Disconnect the lead to the Control Card The connector is situated along the top front edge of the right hand side panel Fig 1 3 While holding the Door remove 4 Torx T20 screws 2 per hinge securing the Door hinges to the cabinet Fig 2 4 Carefully feed the loom from the Control Card...

Page 20: ...ing impeller cover using a small blade screwdriver to lift the cover locking tabs 3 Unclip lift away the Motor Cover Top see Fig 1 4 Unclip lift away the Outer Motor Cover see Fig 2 5 Remove the cooling impeller 6 Remove the rear bearing as in K 7 Remove the heater unit as in M 8 Remove the recirculating impeller 9 Remove the 3 hex head screws behind the recirculating impeller securing the motor t...

Page 21: ...t panel G 2 Ease the air duct forward to remove the wiring from the guide clips disconnect the dryer sensor and front thermistor 3 Lift the front air duct and ease past the front support wheels Note When refitting be careful to ease the air duct past the wheels and locate correctly into the air duct J Door Switch 1 Remove the top cover as in A 2 Remove front panel as in G It is not necessary to co...

Page 22: ...d before refitting the rear bearing cover L Pump Float Switch 1 Release the two pump float assembly cover clips See Photos 1 and 2 2 Release the two clips at either end of the pump float assembly and lift the unit clear Teardrop Bearing fixing Screw Bearing Cover Insulation Pad Heater Cover Foam Pad Photo 1 Photo 2 Released Clips Photo 3 Shown with Cover removed ...

Page 23: ...ry to use a pair of water pump pliers as a lever on the motor casing as illustrated to enable it to be rotated under tension to line up the holes in rear moulding with the fixing holes on the motor casing refit the 4 hex head screws O Drum Assembly 1 Remove the top cover as in A 2 Remove the side panels as in B 3 Remove the console as in C 4 Slacken the belt as in F 1 to 8 5 Remove the rear bearin...

Page 24: ... Action F01 The motor is running when it should be off Check if module connector J3 has shorted due to moisture Replace module F02 Open circuit between module motor Common Check security of module connector J3 Test motor Common TOC Check wiring between J3 and motor F03 Front thermistor open or short circuit Check security of module connector J12 Test from connector pins approximately 500 Kohms If ...

Page 25: ...ater elements Note Frequent cycling stat operation can cause F10 check filter and condenser for blockages The module checks and waits 3 times before displaying F10 F11 Open circuit pump circuit Test continuity of pump Check connector J5 Check wiring between pump and module J5 Note F11 is usually caused by a fault in the pump circuit not the module Auto cycle being used fault displays within 1 minu...

Page 26: ...supply F15 Upper element is on when it should be off Check security of module connector J4 Check connector for signs of shorting due to moisture Check heater elements and wiring Replace module F15 would normally be caused by a faulty module F16 Not used F17 Master Relay contacts welded closed Replace module Operation of the float switch After continuing to tumble and dry for a further one minute t...

Page 27: ...s anti clockwise No Heat approx 1 amp 4c Press the Post Crease care Button The Display shows Start Led Extra Dry bar 2 50 and Post Care Led The Drum Stops The Drum restarts rotating clockwise Half heat approx 5 or 6 amps 4d Press the Alarm Button The Display shows Start Led Extra Dry bar 2 50 Post Care and Alarm Led s Drum continues to revolve clockwise Full Heat approx 10 to 11amps 5 Conductivity...

Page 28: ...TOR J3 1 2 3 BLACK RED WHITE WHITE WHITE J9 USER INTERFACE PCB PUMP FLOAT SWITCH 2 1 NTC HEATER COVER ASSEMBLY DOOR SWITCH 1 MAINS CONNECTION WITH SUPPRESSION L N E J10 4 3 WHITE J11 1 4 8 2 SENSING STRIP DRUM ASSY BLACK F FLAG RECEPTACLE PB PIGGY BACK M MALE TAB INSULATOR LOCKING RECEPTACLE CYCLING THERMOSTAT BROWN M M BLUE BLUE BLUE 1 2 DOOR SWITCH 2 RED RED RED RED WHITE BLUE BLUE BLUE BLUE BLU...

Page 29: ...29 of 33 Service Manual UK Indesit Company English ...

Page 30: ...30 of 33 Service Manual UK Indesit Company English ...

Reviews: