1
6
G
B
Is eas
y
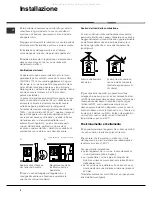
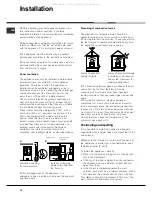
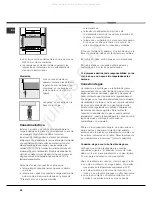
to inspect along its whole length so that
its condition ma
y
be checked.
Is shorter than 1500 mm.
Fits firml
y
into place at both ends, where it will be
fi
x
ed using clamps that compl
y
with current
regulations.
If one or more of these conditions is not fulfilled or if
the cooker must be installed according to the conditions
listed for class 2 - subclass 1 appliances (installed
between two cupboards), the fle
x
ible steel hose must
be used instead (
see below
).
C
onne
c
ting
a
f
lexi
b
le
j
ointless
stainless
steel
p
i
p
e
to
a
th
r
eaded
atta
c
hment
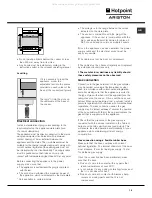
Make sure that the hose and gaskets compl
y
with
current national legislation.
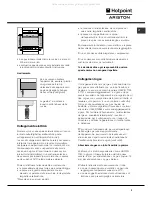
To begin using the hose, remove the hose holder on
the appliance (the gas suppl
y
inlet on the appliance
is a c
y
lindrical threaded 1/2 gas male attachment).
Perform the connection in such a wa
y
that the hose
length does not e
x
ceed a ma
x
imum of 2 metres,
making sure that the hose is not compressed and
does not come into contact with moving parts.
C
he
c
k
ing
the
tightness
o
f
the
c
onne
c
tion
When the installation process is complete, check the
hose fittings for leaks using a soap
y
solution. Never
use a flame.
A
d
a
p
t
in
g
t
o
d
i
ff
ere
n
t
t
y
pes
o
f
g
a
s
It is possible to adapt the appliance to a t
y
pe of gas
other than the default t
y
pe (this is indicated on the
rating label on the cover).
A
da
p
ting
the
ho
b
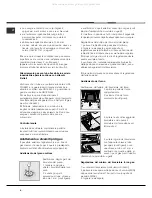
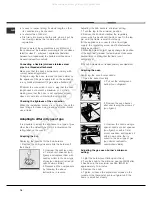
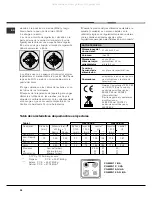
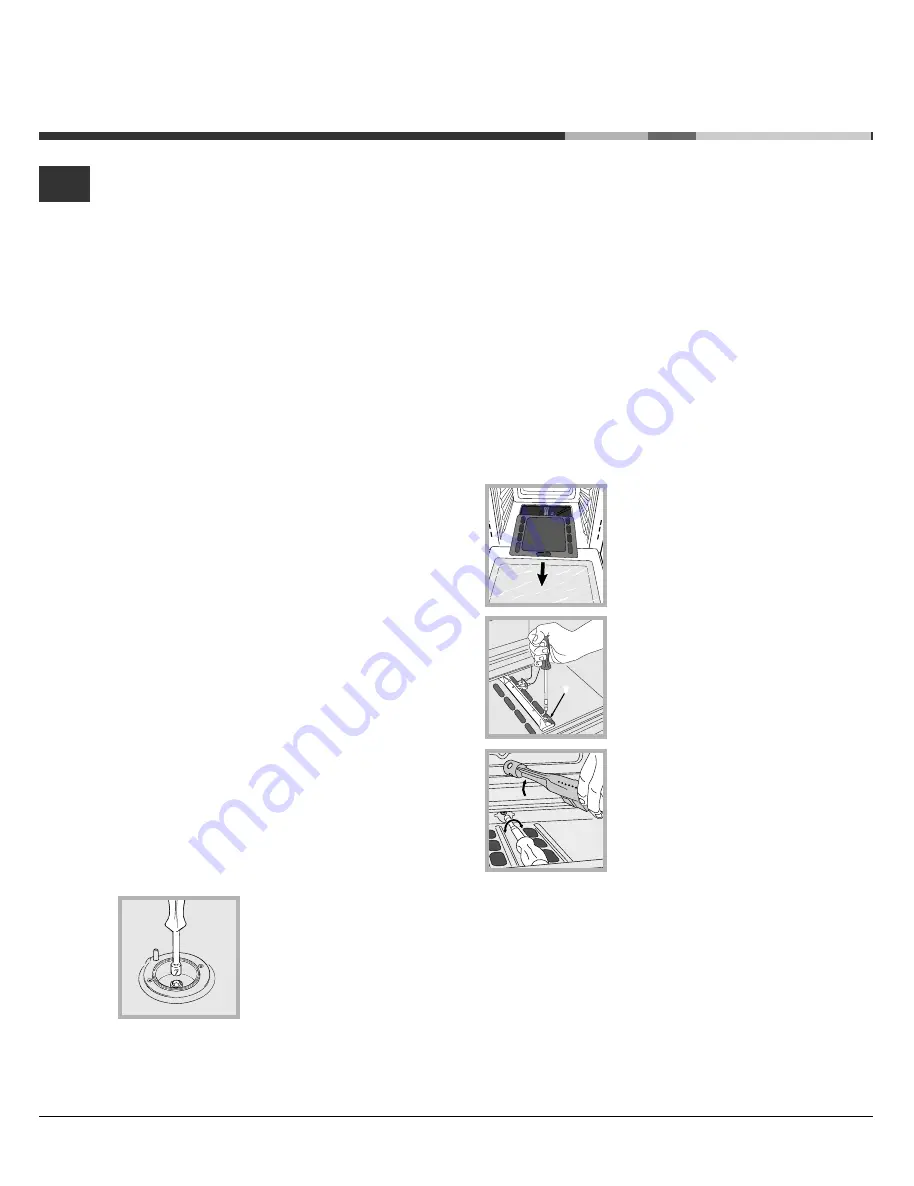
Replacing the nozzles for the hob burners:
1. Remove the hob grids and slide the burners off
their seats.
2. Unscrew the nozzles using
a 7 mm socket spanner (
see
figure
), and replace them with
nozzles suited to the new t
y
pe
of gas (
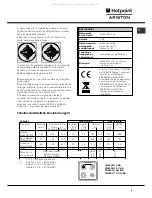
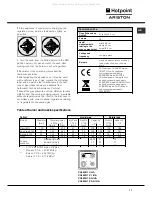
see Burner and nozzle
specifications table
).
3. Replace all the components
b
y
following the above
instructions in reverse.
Adjusting the hob burners minimum setting:
1. Turn the tap to the minimum position.
2. Remove the knob and adjust the regulator
y
screw, which is positioned inside or ne
x
t to the tap
pin, until the flame is small but stead
y
.
If the appliance is connected to a liquid gas
suppl
y
, the regulator
y
screw must be fastened as
tightl
y
as possible.
3. While the burner is alight, quickl
y
change the position
of the knob from minimum to ma
x
imum and vice versa
several times, checking that the flame is not
e
x
tinguished.
The hob burners do not require primar
y
air adjustment.
A
da
p
ting
the
oven
Replacing the oven burner nozzle:
1. Open the oven door full
y
2. Pull out the sliding oven
bottom (
see diagram
).
3. Remove the oven burner
after unscrewing the screws V
(
see figure
).
4. Unscrew the nozzle using a
special nozzle socket spanner
(
see figure
) or with a 7 mm
socket spanner, and replace it
with a new nozzle that is
suited to the new t
y
pe of gas
(
see Burner and nozzle
specifications table
).
A
d
j
u
sting
the
gas
oven
b
ur
ne
r
s
minim
u
m
setting
:
1. Light the burner (
see Start-up and Use
).
2. Turn the knob to the minimum position (MIN) after
it has been in the ma
x
imum position (MAX) for
appro
x
imatel
y
10 minutes.
3. Remove the knob.
4. Tighten or loosen the adjustment screws on the
outside of the thermostat pin (
see figure
) until the
flame is small but stead
y
.
V
All manuals and user guides at all-guides.com
all-guides.com

