background image

GB

15

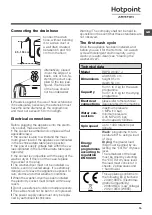
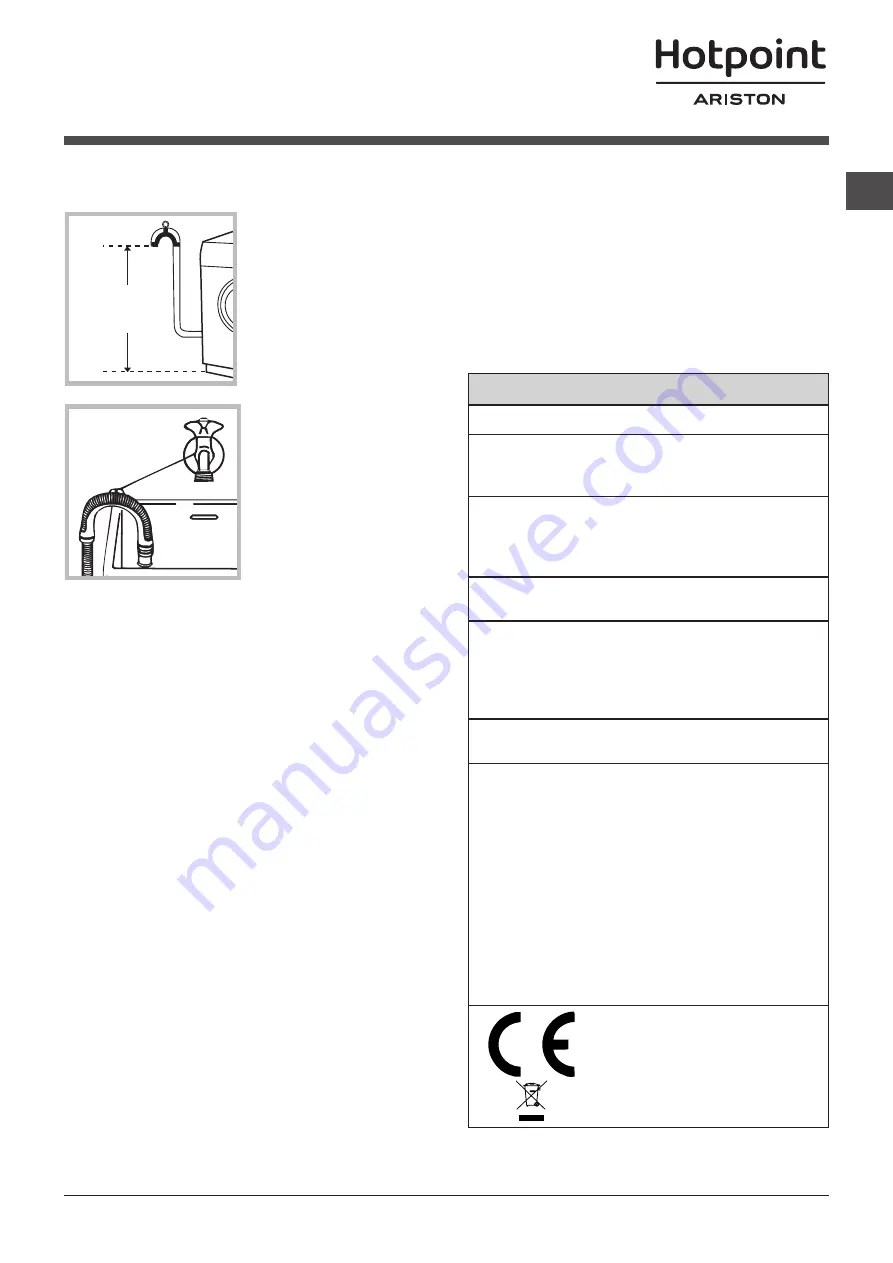
Connecting the drain hose

Connect the drain 

hose, without bending 

it, to a drain duct or 

a wall drain situated 

between 65 and 100 

cm from the floor;

alternatively, placed 

it over the edge of a 

basin, sink or tub, fa-

stening the duct sup-

plied to the tap (

see 

figure

). The free end 

of the hose should 

not be underwater.

!

 We advise against the use of hose extensions; 

if it is absolutely necessary, the extension must 

have the same diameter as the original hose 

and must not exceed 150 cm in length.

Electrical connections

Before plugging the appliance into the electri-

city socket, make sure that: 

•  the socket is earthed and complies with all 

applicable laws;

•  the socket is able to withstand the maxi

-

mum power load of the appliance as indicated 

in the Technical data table

 (see opposite);

•  the power supply voltage falls within the va

-

lues indicated in the Technical data table (

see 

opposite

);

•  the socket is compatible with the plug of the 

washer-dryer. If this is not the case, replace 

the socket or the plug.

!

 The washer-dryer must not be installed ou-

tdoors, even in covered areas. It is extremely 

dangerous to leave the appliance exposed to 

rain, storms and other weather conditions.

!

 When the washer-dryer has been installed, 

the electricity socket must remain within easy 

reach. 

!

 Do not use extension cords or multiple sockets.

!

 The cable should not be bent or compressed.

!

 The power supply cable must only be repla-

ced by authorised technicians.

65 - 100 cm

Warning! The company shall not be held re-

sponsible in the event that these standards are 

not observed.

The first wash cycle

Once the appliance has been installed, and 

before you use it for the first time, run a wash 

cycle with detergent and no laundry, using 

wash cycle auto clean 

(see “Cleaning the 

washer-dryer”).

Technical data

Model

RDPD 96407 J

Dimensions

width 59.5 cm

height 85 cm

depth 54 cm

Capacity

from 1 to 9 kg for the wash 

programme

from 1 to 6 kg for the drying 

programme

Electrical 

connections

please refer to the technical 

data plate fixed to the machine

Water con-

nections

maximum pressure  

1 MPa (10 bar)

minimum pressure  

0.05 MPa (0.5 bar)

drum capacity 58 litres

Spin speed

up to 1400 rotations per 

minute

Energy  

rated 

programmes 

according to 

regulation  

EN 50229

Wash

: programme 8; tem-

perature 60°C; using a load 

of 9 kg.

Drying

: the greater load 

(6kg) must be dried by se-

lecting the “EXTRA” dryness 

level. 

The remainder of the load 

must be dried by selecting 

the “EXTRA” dryness level: 

the load must consist of 3 

sheets, 2 pillowcases and  

1 hand towel.
This appliance conforms to 

the following EC Directives:

- 2004/108/EC (Electroma-

gnetic Compatibility)

- 2006/95/EC (Low Voltage)

- 2012/19/EU (WEEE)

Summary of Contents for RDPD 96407 J

Page 1: ...alimentazione dell acqua Precauzioni e consigli 5 Sicurezza generale Smaltimento Apertura manuale della porta obl Descrizione della lavasciuga 6 7 Pannello di controllo Display Come effettuare un cicl...

Page 2: ...fosse perfettamente orizzontale compen sare le irregolarit svitando o avvitando i piedini anteriori vedi figura l angolo di inclinazione misurato sul piano di lavoro non deve superare i 2 Un accurato...

Page 3: ...e multiple Il cavo non deve subire piegature o com pressioni Il cavo di alimentazione deve essere sostitu ito solo da tecnici autorizzati Attenzione L azienda declina ogni responsabi lit qualora quest...

Page 4: ...ei detersivi Sfilare il cassetto sol levandolo e tirandolo verso l esterno vedi figura Lavarlo sotto l acqua corrente questa pulizia va effettuata frequentemente Curare obl e cestello Lasciare sempre...

Page 5: ...ente Sicurezza generale Questo apparecchio stato concepito esclusiva mente per un uso di tipo domestico Questo apparecchio pu essere usato da bambini da 8 anni in su e da persone con ca pacit fisiche...

Page 6: ...play appare la scritta BLOCCO TASTI ATTIVO il pannello di controllo bloccato ad eccezione del tasto ON OFF In questo modo si impediscono modifiche accidentali dei programmi soprattutto se in casa ci s...

Page 7: ...ccato per impedire aperture accidentali Per evitare danni necessario attendere che il simbolo si spenga prima di aprire l obl N B se attiva la funzione PARTENZA RITARDATA AVVIO RITARDATO l oblo non si...

Page 8: ...ificare ed impostare il livello o la durata dell asciugatura premendo il tasto asciugatura Non compatibile con i programmi 1 2 3 4 14 Impostare il tipo di risciacquo L opzione consente di selezionare...

Page 9: ...tare il programma 8 con una temperaura di 60 C 2 Programma cotone lungo impostare il programma 8 con una temperatura di 40 C e premere il tasto DIRECT INJECTION con modalit Power 3 Programma sintetico...

Page 10: ...endo odori sgradevoli e rilassando le fibre producendo vapore all in terno della vasca Al termine del ciclo i capi risulteranno umidi Antimacchia Turbo 45 questo ciclo garantisce un eccellente capacit...

Page 11: ...ico immersa nell acqua vedi Installazione Lo scarico a muro non ha lo sfiato d aria Se dopo queste verifiche il problema non si risolve chiudere il rubinetto dell ac qua spegnere la lavasciuga e chiam...

Page 12: ...199 Un operatore sar a completa disposizione per fissare un appuntamento con il Centro Assistenza Tecnico Autorizzato pi vicino al luogo da cui si chiama attivo 7 giorni su 7 sabato e domenica compre...

Page 13: ...the door and drum of your appliance Cleaning the pump Checking the water inlet hose Precautions and tips 17 General safety Disposal Opening the porthole door manually Description of the washer dryer 1...

Page 14: ...ing it up against walls furniture cabinets or anything else 2 If the floor is not perfectly level com pensate for any une venness by tightening or loosening the adju stable front feet see figure the a...

Page 15: ...electricity socket must remain within easy reach Do not use extension cords or multiple sockets The cable should not be bent or compressed The power supply cable must only be repla ced by authorised t...

Page 16: ...i city supplies Turn off the water tap after every wash cycle This will limit wear on the hydraulic system inside the washer dryer and help to prevent leaks Unplug the washer dryer when cleaning it an...

Page 17: ...air it yourself Always keep children well away from the appliance while it is operating The door can become quite hot during the wash cycle If the appliance has to be moved work in a group of two or t...

Page 18: ...specially where there are children in the home To deactivate the control panel lock press and hold the button for approximately 2 seconds DELAY TIMER button press to set a delayed start time for the s...

Page 19: ...nt any damage from occurring wait for the symbol to switch itself off before opening the appliance door N B if the DELAY TIMER function has been activated the door cannot be opened pauses the machine...

Page 20: ...maximum level for the selected cycle The drying level or time may be set and changed by pressing the drying button Not compati ble with cycles 1 2 3 4 and 14 Set the rinse type Option makes it possibl...

Page 21: ...n only The length of cycle shown on the display or in this booklet is an estimation only and is calculated assuming standard working conditions The actual duration can vary accor ding to factors such...

Page 22: ...n gar ments making them easier to iron Steam Refresh for refreshing garments neutralised unple asant odours and relaxing the fibres by delivering steam into the drum The garments will be damp at the e...

Page 23: ...system is not fitted with a breather pipe If the problem persists even after these checks turn off the water tap switch the appliance off and contact the Assistance Service If the dwelling is on one o...

Page 24: ...ovided on the guarantee certificate Always request the assistance of authorised technicians Have the following information to hand the type of problem the appliance model Mod the serial number S N Thi...

Reviews: