22
it
en
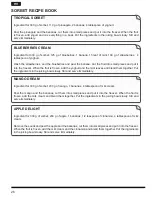
MAKING SORBET
This juicer is able to produce sorbet from frozen fruits
or vegetables.
Remove the feeding chute and pull out from the juicing
bowl the screw/filter assembly. Dismount the filter with
holes (13) and mount the filter without holes (14) as
shown in PICTURE A. Assembly again the juicer as
described in dedicated section.
Place the containers on both sides of the main juicer
body close to the pulp and juice chute.
Remove hard seeds from the ingredients and peel
the skins from the ingredients before juicing, besides,
the fruit need to cut into small pieces. Introduce frozen
fruit slowly and carefully with liquids (milk, cream,
yogurt or similar).
Never introduce frozen fruit without liquids. Take
out from freezer the frozen fruit at least 15
minutes before juicing.
The sorbet come out from the pulp chute, but some
liquid can come out also from juice chute.
When juicing is complete, ensure that the screw is
stopped by pressing the stop button and the juicer is
unplugged. Now the unit can be disassembled safely
in the following order:
1. Remove the food pusher.
2. Remove the lid.
3.
Remove the juice screw/filter assembly
4. Remove the juicing bowl
Regular maintenance and cleaning of your appliance
will keep it safe and in proper operational order. Refer
to “Cleaning and Maintenance” section.
TIPS FOR JUICING
Before juicing:
•
The Slow Juicer is suitable for celery, spinach,
carrots, apples, bananas, tomatoes, cucumbers,
pear and all the fruits and vegetables which
contain juice, but not for those containing starch.
•
Clean the fruit and vegetables thoroughly,
making them ready for juicing. If the pieces of
fruit or vegetables are very large, chop them to
a size that will fit down the juicer’s food chute.
Cut food items into small pieces for optimal
extraction.
•
Pit fruit with stones or hard seeds (i.e. mangoes,
nectarines, apricots and cherries) before juicing.
Always peel fruits with hard or inedible skins.
Examples include mangoes, citrus fruits, melons,
and pineapples.
•
When selecting fruit and vegetables for juicing,
always select fresh and properly ripe specimens.
Fresh fruit and vegetables carry more flavor and
juice than those that are not properly ripe. Juice
is best consumed when freshly made, as this
is when its vitamin and mineral content is the
highest.
While juicing:
•
For optimum results, insert one ingredient at a
time.
•
Insert food at regular speed, allowing all the pulp
to be extracted with maximum efficiency.
•
When juicing celery with other fruits/ vegetables,
it is recommended to interchange the celery with
other items to prevent pulp build-up inside the
juice bowl.
•
When juicing leafy greens like spinach and kale,
it is recommended to juice with a combination of
watery or fibrous fruits and vegetables to help
with juice flow and yield and achieve optimal
results.
•
Insert nuts to be juiced only with other foods
such as soaked soybeans or liquids.
•
Do not operate with an empty bowl.
•
A small amount of lemon can be added to apple
juice to prevent the juice form browning.
•
Bananas can be difficult to juice. When you
use bananas, add them as the first or second
ingredient: the nectar of the bananas will follow
through into the juice form the other fruits.
•
When juicing fruits and vegetables having
different consistencies, it may help to juice
different combinations. For example, juice soft
fruit first (i.e .oranges), then follow with hard fruit
(i.e. apples). This will help you achieve maximum
juice extraction.
•
For better tasting citrus juice, also remove the
inner white peel from fruit.
•
If juicing herbs or leafy vegetables, wrap them
together to form a bundle before placing them in
the juicer or combine them with other ingredients
at low speed.
After juicing:
•
Leftover juice should be refrigerated or frozen.
•
Saved pulp can be used for other recipes, as
compost for your garden, or can be discarded.
•
As you juice, clean parts to avoid dried-on juice
and pulp.
•
After each use, immediately rinse removable
parts in hot water to remove pulp and juice. It
may be necessary to use the cleaning brush to
remove.
Summary of Contents for SJ 15XL UP0
Page 2: ...220 240V 150W SJ 15 EU 1 6 2 3 4 13 14 5 12 7 8 9 10 11 7 ...
Page 3: ...A B C ...
Page 113: ...113 it bg ...
Page 114: ...114 it bg ...
Page 115: ...115 it bg ...


